Monday, April 30, 2012

Rhubarb Tart with Orange Glaze

It is rhubarb season! There are so many things you can do with rhubarb and I adore the tartness of it in deserts or savory dishes. This tart is simple, easy and elegant. It looks like you put a lot of work into it but didn't, making it perfect for guests.


The hardest part of this dish is cutting the stalks on a large enough angle to make them big beautiful slices. It could have been that my stalks of rhubarb were on the smaller size in the thickness department or I just don't get how to cut diagonally. The diagonal cutting is for appearance more than anything. If you decided to throw appearance out the window, just spread the rhubarb evenly over the tart. Taste is what really matters anyways and this is a perfect dish for people who may be skeptical about rhubarb. The rhubarb is not overwhelming and the orange juice mellows it out at the same time. Serve it up with some vanilla ice cream and enjoy!!

xo

April

Adapted from Gourmet
Ingredients:
1 cup fresh orange juice (about 2-3 large oranges)
1 tablespoon fresh lime juice (about half a lime)
1/2 cup sugar
1 pound rhubarb stalks (6-8 medium stalks), thinly sliced diagonally (1/8 inch)
1 sheet frozen puff pastry, thawed

Instructions:

  1. Preheat oven to 400F.
  2. Stir together orange juice, lime juice, and sugar in a medium bowl. Add rhubarb and let stand, stirring occasionally, 10 minutes, while rolling out the puff pastry.
  3. Cut the pastry in half lengthwise, then roll out each piece into a 11-by 7-inch rectangle, on a lightly floured surface. Arrange the pastry rectangles side by side on a large ungreased baking sheet. Score a 1/2-inch border around each pastry rectangle (do not cut all the way through). Prick the pastry inside the border all over with a fork.
  4. Strain rhubarb mixture, reserving the liquid. Top 1 pastry rectangle (inside the border) with half the rhubarb, overlapping slices slightly. Repeat with the other pastry rectangle.
  5. Bake until the pastry is puffed and golden on the top and underside, about 25-30 minutes.  Meanwhile, boil the reserved rhubarb liquid in a small saucepan, skimming foam off the top, until it has reduced to about a 1/4 cup, 15-20 minutes. 
  6. Transfer tarts to a rack, brushing the rhubarb and pastry with the glaze.


Friday, April 27, 2012

Daring Bakers: Armenian Nazook

The Daring Bakers' April 2012 challenge, hosted by Jason at Daily Candor, were two Armenian standards: nazook and nutmeg cake. Nazook is a layered yeasted dough pastry with a sweet filling, and nutmeg cake is a fragrant, nutty coffee-style cake.


I was planning on being ambitious and making both of these, but then my procrastination for doing school work caught up to me. I was pretty excited to make something that had "pastry dough" in it. It was actually pretty easy to make, despite the word "pastry" being in it. For some reason I think something like that would be very tricky to make. These little guys were flaky and delicious. They were not as sweet or flavor packed as I was expecting though. I made half with no nuts and half with. The ones with pecans had a lot more flavor. The great thing is you can really add anything to the filling of these. I think jam would be delicious because I have been smothering them with it anyways. If you added cheese, they would make a great appetizer. Enjoy!


xo


April


Ingredients:
Pastry Dough:
3 cups all-purpose flour, sifted
2 1/2 teaspoons (1 packet or 1/4 oz) active dry yeast
Pinch salt
1 cup sour cream
2 sticks unsalted butter, room temperature
Filling:
1 1/2 cups all purpose flour
1 1/2 cups sugar
1 1/2 sticks unsalted butter
2 teaspoons vanilla extract
1/2 teaspoon salt
1 teaspoon cinnamon
Chopped pecans

1-2 egg yolks, for the egg wash

Directions:
For the dough:

  1. Place the sifted flour into a stand mixer with a paddle attachment, add the yeast and salt, and mix it in. Add the sour cream and butter, mixing until it is evenly moistened and it looks like coarse meal. Switch to a dough hook and mix on medium-low speed for 5-10 minutes, or until the dough no longer sticks to the bowl. Cover and refrigerate for 3-5 hours, or overnight.
For the Filling:
  1. Make the filling: Mix the flour, sugar, salt, cinnamon and butter in a medium bowl with your hands, until it looks like clumpy, damp sand. Set it aside
Make the Nazook:
  1. Preheat the oven to 350F. Cut the refrigerated dough into quarters. Form them into balls. On a lightly flour surface, roll out the dough into a large rectangle or oval. It should be thin but not quite transparent. 
  2. Place a quarter of the filling evenly over the rolled out door, leaving a 1-inch border. Carefully roll the dough across, the long way. Gently pat down the loaf with your palm and apply the egg wash using a pastry brush. Cut the log into 10 evenly sized pieces and place on an ungreased cookie sheet. Bake for 25-30 minutes or until the tops are golden brown. Enjoy!


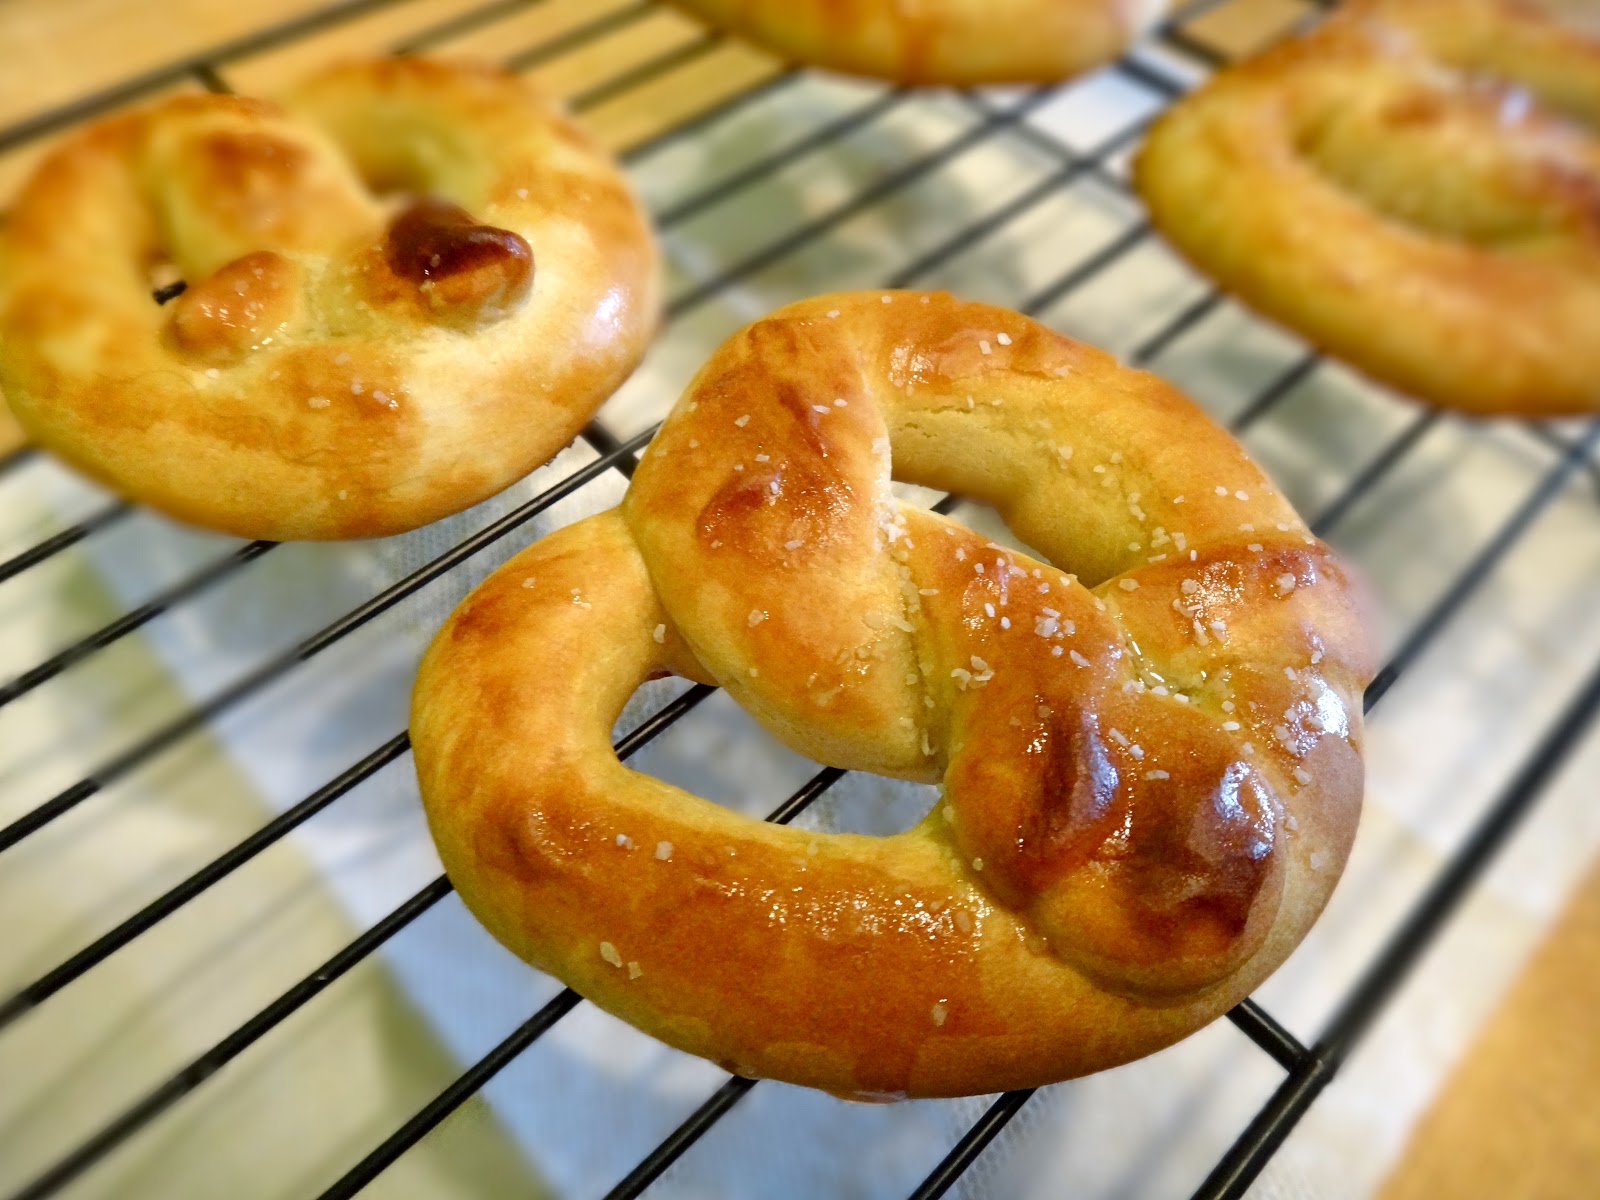
Simple Soft Pretzels


Whenever I go to a mall, an Auntie Annie's soft pretzel is always hard to resist! However, since I have been in college, I rarely go to a mall, especially since I don't have much time or money for it. This can be problematic, because then I go through soft pretzel withdrawals (even my boyfriend experienced it, too). When I was younger, I remember my parents making soft pretzel dough in our bread machine. Us kids got to mold them into what looked nothing like pretzels but they would taste like darn good ones! This got me thinking, why not make soft pretzels at home like my parents did for us! Luckily, I was able to find a recipe that didn't call for a bread machine or bread hook attachment for a stand mixer (since I don't have any of these fancy kitchen gadgets). It is a simple and tasty recipe! Oh, and did I mention fun? My boyfriend and I made them together and it was a fun time, especially when we tried to see who could make the best looking pretzel (mine won, of course!).


Simple Soft Pretzels
adapted from Budget Savvy Diva

Ingredients
3 3/4 c. flour
1 1/2 tsp. table salt
1 tsp. vegetable oil
1 tsp. melted butter
3/4 c. plus 1 Tbsp. powdered sugar
1 Tbsp. plus 1/2 tsp. (or one packet) active dry yeast
1 1/4 c. plus 2 Tbsp. warm water

To create the signature brown outside:
2 c. warm water
2 Tbsp. baking soda

Instructions
1. Place yeast in a mixing bowl with the warm water. Add in oil and stir.
2. In a separate bowl, combine powdered sugar, butter and flour. Add in the yeast mixture and stir with a wooden spoon.
3. Add salt and mix.
4. Sprinkle a clean surface and knead the dough for about 10 minutes.
5. Cover dough ball with a light layer of flour and place in a lightly floured bowl. Cover with plastic wrap and let the dough double in size. This will take about 2 to 3 hours.
6. Preheat oven to 425 degrees and clear a large, clean work surface to shape the pretzels.
7. Take the dough in sections (about 8, depending on desired size), roll out and make into pretzel shapes.
8. Warm up 2 cups of water and add 2 Tbsp. baking soda, mix. Dip each pretzel into the mixture and place on parchment paper that is on a cookie sheet.
9. Place in oven for about 10 minutes or until the pretzels are brown.
10. Brush warm pretzels with butter and sprinkle with kosher salt, if desired. Place on a cooling rack.
11. Enjoy with your favorite dipping sauces or plain!


Saturday, April 21, 2012

Morel Mushroom Fettuccine


I have been counting down the days to the first Madison Farmers Market all month and it finally came!! My roommate and I are going big this year, and we got a wagon for all our market goodies! Go big or go home right? I got rhubarb, asparagus, spinach, pumpkin butter, green onions, cheese curds and my weight in pastries. It was a wagon full of success. The BEST thing I got though was morel mushrooms. On the first lap around the square I was eyeing up the morel mushrooms for sale. On the second lap, I had $13 left and decided to go for it and buy some. Best decision ever, not only because the man selling them was super good looking (I will be visiting him next weekend), but the mushrooms cook up to be delicious bite size morsels (this was my first time cooking with them). Try them, they are worth the money.


I used homemade fettuccine noodles, but if you buy store bought this dish is finished in a flash. The homemade noodles just make this simple dish, extra special. I used only a 1/4 pound of morels, but I would recommend using more or adding in some less expensive mushrooms. Do not be afraid to salt the mushrooms generously, they like it. You won't regret making this, enjoy!

xo

April

Serves 2
Ingredients:
1/2 pound fettuccine noodles
3 tablespoons butter
1/4 pound morel mushrooms, sliced in half or quarters and cleaned with a damp or dry cloth
1/2 teaspoon salt
Pepper, freshly ground
1 green onion, thinly sliced
2 cloves of garlic, minced
1/4 cup white wine
Zest of 1 lemon
Parsley, for garnish

Instructions:
  1. Bring a large pot of salted water to a boil, and then adding the noodles. Meanwhile, in a large skillet, melt the butter over medium heat. Add the morels, salt and pepper and saute for 3 minutes. Then add the green onion and garlic, sauteing for 1 minute and then add the white wine, cooking off all the alcohol. Add the lemon zest and remove from heat.
  2. Toss the noodles with the morels, over low heat for a few minutes. Add water as needed for the desired consistency.


Friday, April 20, 2012

Nicole's Banana Bread

This recipe is the ultimate comfort food for me! It became that way freshman year of college. Anytime I would visit home or family came my way, I would get a delicious homemade loaf of my sister's banana bread, normally made with chocolate chips (the best way to make banana bread, of course!)


This week when I just wasn't feeling bananas but had a bushel, I decided it was time to try to get my sister's secret banana bread recipe. To my surprise, she didn't put up a battle but was so willing to give me the recipe, I got an email for it that night! Thank you again, Nicole! I was a little nervous to make the bread because I had to live up to Nicole's loafs. Thankfully, it turned out just as good as her's! Plus, I learned the recipe is quite easy. You could easily make it without a hand mixer and overall it is a quick prep and easy clean up.

Nicole's Banana Bread


Ingredients
3 or 4 ripe bananas
1/3 c. melted butter
3/4 c. sugar
1/4 c. brown sugar
1 egg
1 tsp. vanilla
1 tsp. baking soda
pinch of salt
1 1/2 c. flour
1/2 c. chocolate chips or 1/4 c. walnuts

Instructions
1. Preheat oven to 350 degrees.
2. In a large bowl, smash bananas with the melted butter with a wooden spoon.
3. Add in sugar, egg, vanilla and mix.
4. Sprinkle in baking soda and salt.
5. Add flour, mix in.
6. Butter 4x8 loaf pan and pour mixture into it.
7. Bake 45 minutes to 1 hour and test with a toothpick - if it comes clean, pull out.
8. Enjoy warm or cool on rack!


LinkWithin

Related Posts Plugin for WordPress, Blogger...