Showing posts with label Mexican. Show all posts

Thursday, May 15, 2014

Chicken Quinoa Pita Pockets

Guys, I have a confession to make.  Sometimes when a new fad or trend comes around I will be super resistant to jump on the bandwagon.  But then eventually I will fall for it, and fall hard.  Skinny jeans for example.  I used to be super critical.  Why would I want denim all up on my calves all day long?  And now, skinny jeans are all I wear.  Well, except for jeggings.


Or quinoa.  Four years ago had anyone ever even heard of quinoa?  No.  And then it made it's breakthrough and took the food magazine and blogging worlds by storm.  It appeared in anything and everything, being dubbed a superfood or something like that.  I eventually won a bag in a giveaway, and it sat in my cupboard for months untouched.  Until finally a couple of weeks ago while (sort of) participating in a week long healthy eating challenge (another fad, I know) it was called for as a side so I finally dusted off the bag and gave it a shot.


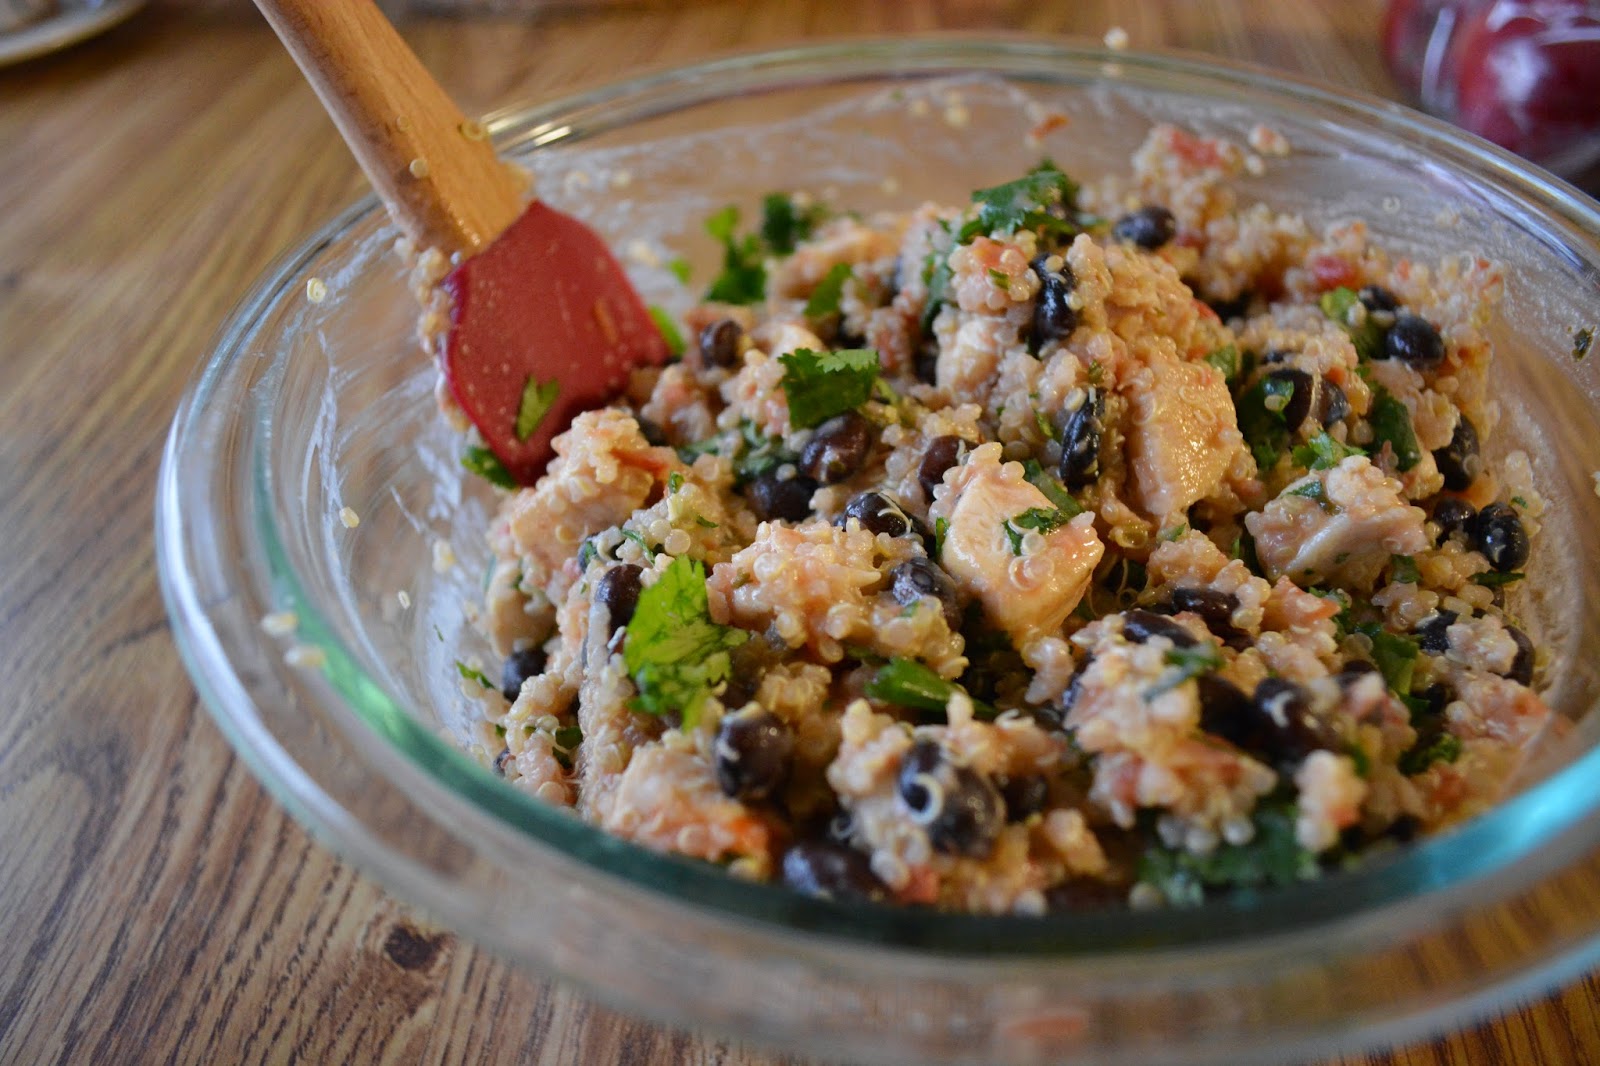
Let me tell you I am hooked; hook, line and sinker.  I'm looking forward to trying out many more quinoa recipes, but for now here is the version of healthy chicken quinoa pita pockets that I came up with, inspired by my big sister.  Feel free to adjust any of the ingredients as you please.  Depending on what type of salsa you use and how much kick you like, you may want to use more or less.  It's a pretty quick weeknight meal to make, the longest part being cooking the quinoa.

Ingredients
1 package of pita pockets
12 oz chicken breasts, cut into 1/2 inch pieces, cooked
1 cup cooked quinoa
1 can black beans, rinsed
2 tablespoons plain greek yogurt
1/2 cup salsa
1/4 cup cilantro, diced
Avocado (for garnish)

Directions
  1. Combine chicken, quinoa, black beans, greek yogurt, salsa and cilantro in a medium bowl.  Stir until ingredients are dispersed evenly.
  2. Spoon desired amount into pita pocket. Garnish with an avocado slice.
I'm thinking next time I make this I might shred the chicken instead of cubing it so that it sits in the pitas better.  The leftovers reheated well and tasted great just eaten plain.  Don't have plain greek yogurt on hand?  Try substituting sour cream, it will just be a little less healthy.  You could also substitute tortillas for the pita pockets if you prefer.


Sunday, March 2, 2014

Chicken Fajitas


The other day I was getting really excited about a new dessert recipe that I'm going to try making this weekend and I started thinking about this blog.  And how I missed it.  Did you know that it's been about a year and a half since I've posted?  Well it has, believe it or not.


Since then a lot of change has happened.  I graduated from college.  Moved out of the college apartment with the kitchen that my cooking adventures began in with Brittany and Emily.  Had a short stint living at home with the parents.  Moved into an apartment with the boy where I now have my own kitchen that actually gets natural lighting (exciting stuff for a food blogger.)  Started a professional job where my cooking habits have drastically changed (getting home from work at 6:00 is the poops.)  And I've had a major camera upgrade!


I went through and was cleaning pictures off of my fancy shmancy camera (which I still barely know how to use) a couple days ago and discovered these chicken fajita pictures that I shot back in the fall (hence the spiderweb place mats.)  If I recall correctly they were pretty easy to make, don't actually take that long to make if you pre-cut all the vegetables and of course are mighty tasty!


Recipe from Skinnytaste.

Ingredients:

  • 16 oz boneless skinless chicken breasts
  • 1 red bell pepper, cut in strips
  • 1 green bell pepper, cut in strips
  • 1 medium onion, cut in strips
  • 3 tbsp lime juice (I substituted lemon since that's what I already had)
  • 1 tsp ground cumin
  • 1 tsp garlic powder
  • pinch ancho Mexican chili powder, to taste
  • salt and pepper to taste
  • 2 tbsp olive oil
  • 8 reduced carb whole wheat flour tortillas
  • Optional garnishes: sour cream, guacamole, reduced fat shredded Mexican cheese
Directions:
  1. Marinate chicken with lime juice and season with chili powder, salt, pepper, garlic powder and cumin.
  2. Season vegetable with salt and pepper and toss with olive oil.
  3. Cook vegetables over medium heat in a skillet for 16-18 minutes covered, until the peppers and onions are soft.
  4. While the vegetables are cooking, grill chicken, either outdoors on a grill or indoors using a grill pan on the stove, until cooked through.  Cut into strips.
  5. Combine chicken and vegetables and serve immediately on warmed tortillas with desired garnishes.

Wednesday, July 25, 2012

Green Tomatillo Guacamole


My parents had their Monday night crew of friends over this week, and of course I jumped on the opportunity to show off my mad kitchen skills. They were going to order pizzas. Why do that when it is so easy just to throw some homemade ones together?


I got to be creative with two and my mom made two. Whenever my mom and I try to cook in the kitchen together these days, it turns into a bit of a competition. My dad can attest to my great concern that mom was going to show me up and steal my thunder. Worried all day. Thought my pizzas might be too weird, aka adventurous. Beet pizza. Zucchini and roasted tomato pizza. I just struggle to keep things on the straight and narrow normal path.


So much for all of my fretting, mine were the bomb. Who had one of their whole pizzas devoured? This kid right here. Victory! Hers were good too, she just failed to steal my thunder. Enough bragging and onto the guacamole, which is not your regular guacamole. Which is silly because my whole reasoning behind making it was to quell my concerns about my pizzas.


It was a hit. This is based on a recipe by Rick Bayless, forgot my trusty cookbook at my apartment. The tomatillo mixture makes this guac nice and tangy. It also ends up being less thick than your traditional guac. The addition of lime juice, just a squeeze, is optional. I tasted it and thought maybe it needed more tang. After I added the lime I thought maybe it was better without, but I couldn't go back and compare, obviously. It was a hit though, and will for sure impress!

xo
April

Ingredients:
3-4 medium tomatillos, husked and rinsed
2 serrano peppers, stemmed
3 cloves of garlic, peeled
Cilantro
1/2 a small onion, finely chopped
3 avocados
1/2 teaspoon salt
1/2 lime (optional)

Instructions:

  1. Turn your ovens broiler to high. Arrange the tomatillos, serranos and garlic on a rimmed baking sheet, placing it under the broiler for 5-8 minutes. Half way through or when the tomatillos are nicely charred with brown spots, flip them over and return them to the oven. Once nicely charred on both sides, remove from the oven and allow to cool.
  2. Once cooled, add the tomatillos, serranos, garlic, cilantro, and a scant 1/4 cup of water to a blender or food processor, blending until smooth. 
  3. Cut the avocados in half, remove the pit, and scoop out the flesh into a medium bowl, adding the onion and tomatillo mixture. Mix with a fork to your desired consistency (I like mine fairly smooth). Add more cilantro, squeeze of lime and salt to taste.

Friday, May 4, 2012

Margarita Cupcakes

I have been planning to make these cupcakes all week, by Thursday night all the anticipation turned into was me craving a real margarita. On a Thursday night, you can't say no to that craving and needless to say giving in made the wait for these guys a lot less painful. Not only is tomorrow Cinco de Mayo but Mifflin Street block party too. These were perfect for my more classy weekend plans. I don't actually plan to go to Mifflin. Instead, I will be enjoying one of these bad boys, with a real margarita on the side watching the chaos from my balcony. There might also be one or all of these in addition to the cupcakes to make it a real fiesta: black bean & bacon taquitos, red chile rice, drunken pinto beans, tomatillo salsa or Mexican macaroni. Its a go big or go home kind of day!


Now about the cupcakes. They actually taste like a margarita, without the tequila being overpowering (for the tequila haters out there). I would recommend using a decent white/silver tequila. The same thing holds true with booze as wine: cook with something you would want to drink. The buttermilk and lime juice adds a nice tang to the super moist cupcake. The frosting is sweet and a bit salty, just like a margarita should be. These are not just good for Cinco de Mayo but any summer pot luck or BBQ. They don't take any more time than your standard cupcake, but the wow factor is bigger. When you do make these, which I know you will, plan on making them in the afternoon and enjoy a nice margarita on the side while they bake and cool.

xo

April

Makes 12 cupcakes, adapted from Brown Eyed Baker
Ingredients:
Cupcake:
1 1/2 cups unbleached all-purpose flour
1 1/2 teaspoons baking powder
1/4 teaspoon salt
1/2 cup (1 stick) unsalted butter, softened
1 cup sugar
2 eggs
Zest and juice of 1 1/2 limes
3 tablespoons white tequila (such as Jose Silver, Milagro or Patron)
1/4 teaspoon vanilla
1/2 cup buttermilk
Frosting:
2 sticks butter, softened
2 cups powdered sugar
2 tablespoons tequila
Juice of 1/2 a lime (about 1 tablespoon)
A pinch of coarse salt

Instructions:
  1. Preheat the oven to 325F. Line a 12 cup muffin pan with liners and set aside. In a medium bowl whisk together the flour, baking powder and salt.
  2. In a mixer with a paddle attachment on medium-high speed, beat the butter and sugar until light and fluffy (about 5 minutes). Reduce the speed medium, adding the eggs one at a time until incorporated.
  3. Scrape the sides down and add the lime zest and juice, tequila and vanilla, mixing until well combined (it will start to curdle, but do not worry it will all come together).
  4. Reduce the mixer speed to low, adding the flour and buttermilk in alternating batches, starting and ending with the flour. Mix until just combined and give it one last stir with a spatula. 
  5. Divide the batter evenly between the tins and bake for 20-25 minutes or until slightly golden and when a toothpick is inserted moist crumbs come out. Cool the cupcakes in the pan for 5 minutes and then transfer to a rack to cool and brush with 1 tablespoon of tequila (I put the tequila in a glass to make a margarita in later with the leftover tequila!). Cool completely before frosting.
  6. To make the frosting, whip the butter in an electric mixer on medium-high for 5 minutes. Reduce the speed to low and gradually add the powdered sugar, scraping down the sides occasionally. Once it is well incorporated, add the tequila, lime juice and salt and mix until the frosting is light and fluffy. Frost the cupcakes and garnish with a lime wedge and zest. Enjoy!

Saturday, February 11, 2012

Drunken Pinto Beans


I made this for the family during the Super Bowl along with tacos. They were a huge hit; everyone was fighting over them! The first time I made them I used fresh serrano chiles instead of jarred jalapenos, but both ways tasted wonderful. Using the jarred jalapenos, makes this an even faster and easy side dish. You can really control the heat in this too by adding as many jalapenos as you like or not taking the seeds out of the serrano.


This is just a simply delicious and flavorful side. It takes about 20 minutes in total. The addition of water adds body to the over all texture of the dish. The water also helps to get all the yummy caramelized bits from the bottom of the pan. If you don't like tequila, no fears the end product is not like drinking or smelling tequila. I love tequila in any form, so it is not a problem for me!

Serves 4
Adapted from Ricky Bayless
Ingredients:
8 slices of bacon, cut into 1/4 inch pieces
1 small white onion, chopped
1/4 cup canned jalapeno slices chopped or 1-2 serrano chiles sliced
1/2 teaspoon oregano
2 garlic cloves, minced
2x 16 ounce cans pinto beans
1/2 cup water
1-2 tablespoons tequila
Instructions:

  1. In a medium sized skillet, fry the bacon, until crisp, about 10 minutes.With a slotted spoon, remove the bacon, leaving 2 tablespoons of the drippings. Over medium heat, fry the onion, jalapenos and oregano until deep golden brown, about 10 minutes. In the last 2 minutes of frying, add the minced garlic. 
  2. Add the beans into the skillet and 1/2 cup water. Simmer over low heat until most all the liquid is evaporated and the beans are heated through. Remove from heat and season with salt and stir in the tequila. Serve in bowls topped with the crumbled bacon.


Thursday, January 26, 2012

Mexican Macaroni and Cheese


I have been craving cheese like no ones business lately. Maybe I am just getting excited for cheese club to start in a couple of weeks? Anyways, I had some jack cheese and cheddar in the fridge that needed to be used up. In addition I had a jar of jalapeno slices in the cupboard. The combination of those ingredients inspired me to do a macaroni and cheese with a Mexican flair.


I decided to put the jalapenos in the topping because I don't care for things mixed in with the cheese and noodles. A good breadcrumb topping can make or break macaroni and cheese, but I still like to get creative with it sometimes. If you don't mind additions to the cheese and noodles, go ahead and add the jalapenos to the cheese sauce. A quick tip on telling when the milk has thickened to the right point. Using a spoon, run your finger in a line down the back and if it holds the line it is ready.

Ingredients:
1 pound pasta (penne, rigatoni, spirals, fusilli etc.)
Salt
Pepper
4 tablespoons unsalted butter
4 tablespoons flour
2 cups skim milk
1/2 cup heavy cream
2 cups (6 ounces) monetary jack cheese, grated
1 cup (4 ounces) sharp cheddar cheese, plus some for the topping, grated
4 slices of whole wheat bread
1 teaspoon dried oregano
1/4 teaspoon ground cumin
1/2 cup jalapeno slices


Instructions:
  1. Preheat oven to 400F. Bring a pot of water to a boil and cook the pasta to al dente (under cooked, about 2 minutes less than normal).
  2. In a food processor, combine the bread slices, oregano and cumin, pulsing to make crumbs. Add the jalapeno slices into the food processor, and pulse 4 times to give them a coarse chop and to combine. 
  3. In a medium pot heat 4 tablespoons of butter over medium heat and add 4 tablespoons of flour, whisking constantly until thickened and golden. Add both milks and increase heat to medium-high. Whisk until combined and small bubbles form around the edge, reducing heat to medium until thickened. 
  4. Add the jack cheese and cheddar, stirring until melted. Add the noodles stirring to combine. Pour the mixture into a baking dish and top with the bread crumb and cheese mixture. Place in the oven and cook until the top is melted and golden (about 10 minutes). Enjoy!

Saturday, January 21, 2012

Roasted Tomatillo-Serrano Salsa

My love affair with Rick Bayless continues! I made this to go along with homemade quesadillas, yummy. You can find everything in a regular grocery store and the process is very simple. In total, thirty minutes are spent actively cooking.


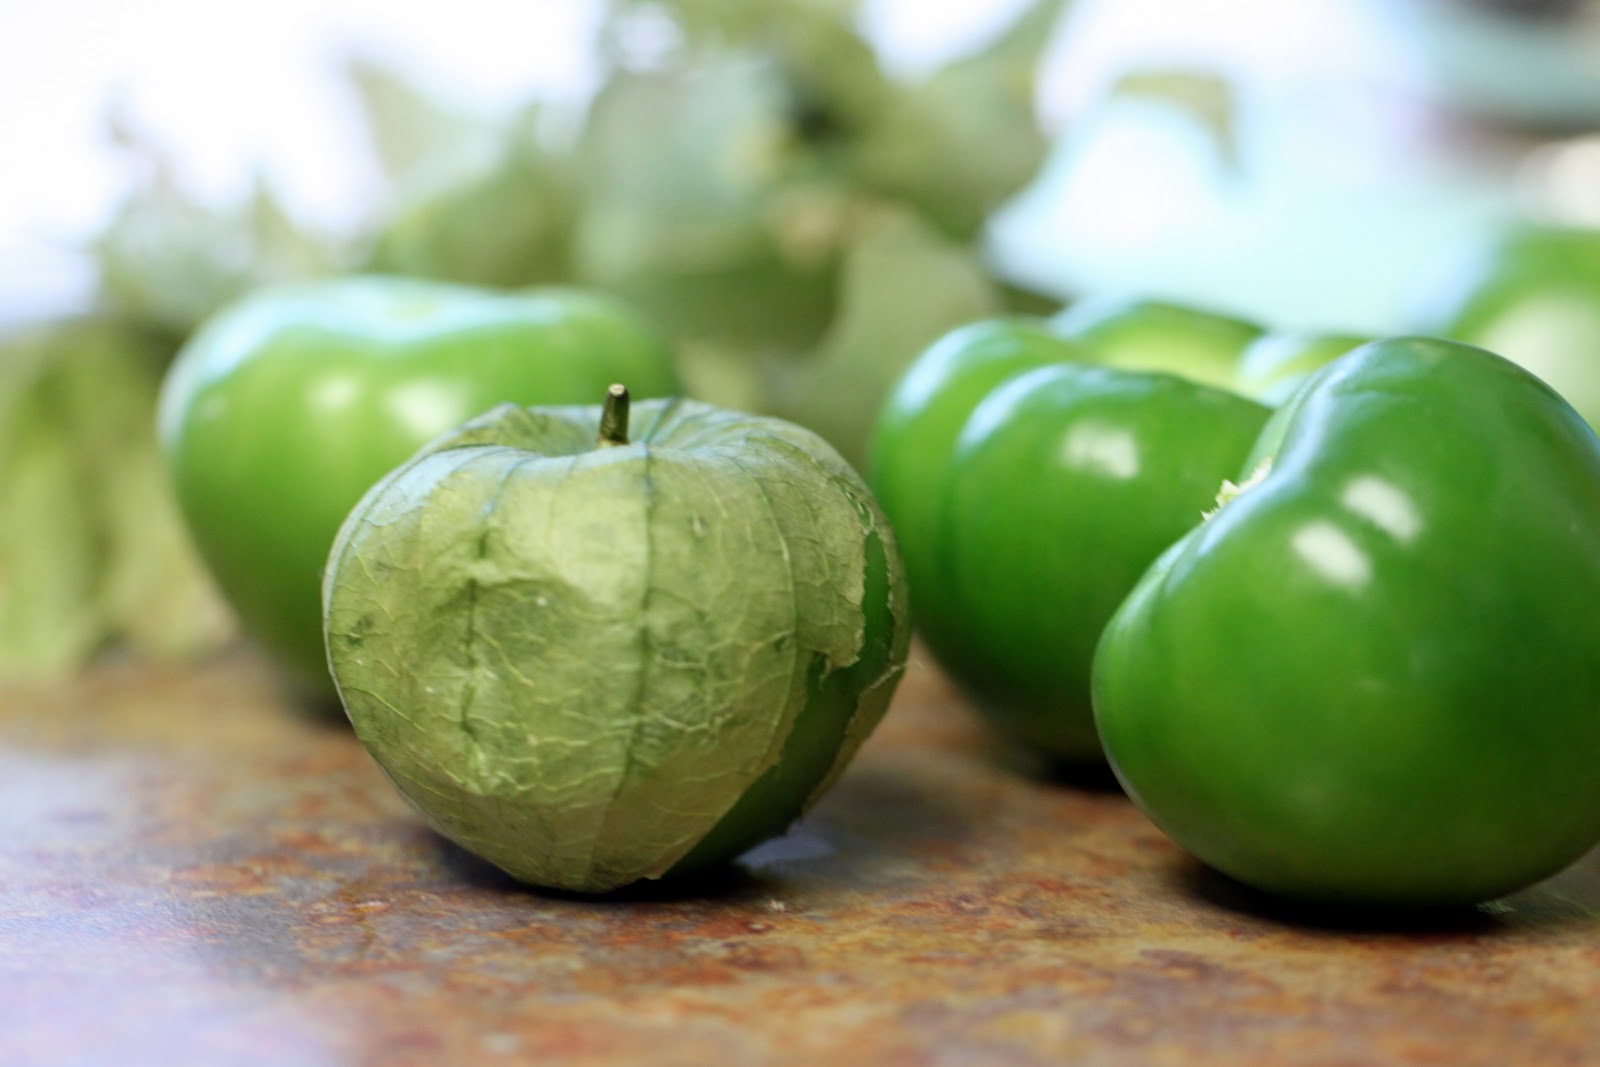
Tomatillos are a pale yellow to green fruit, covered in a papery lantern like husk. They are not green tomatoes though. Tomatillos are more tangy and citrusy than a green tomato. Make sure to pick ones that have grown fully into their husk. When you peel off the husk, rinse the sticky coating off that can sometime make them hard to peel.


The recpie asks you to rinse the chopped onion under cold water. This may seem silly, but is really worth it. When you give the chopped onions a rinse, the taste of onion does not overpower everything else like it sometimes can. I would suggest using this trick whenever you make salsa or guacamole. This salsa is also used in an amazing Tomatillo-Green Guacamole, recipe to come in the future!


Recipe courtesy of Rick Bayless
Ingredients:
1 pound (10-12 medium) tomatillos, husked and rinsed
1 to 3 fresh serrano chiles to taste
2 large garlic cloves, unpeeled
1 small white onion, finely chopped
1/4 cup roughly chopped cilantro
Salt, about 1 teaspoon
Sugar, about 1 scant teaspoon (if tomatillos are too acidic)
Instructions:
  1. Turn broiler to high. Place tomatillos on a baking sheet and place 4 inches below a very hot broiler. When the tomatillos blister, blacken and soften on one side, about 5 minutes, turn them over and roast the other side. Cool completely. Roast the chiles and garlic in a ungreased skillet over medium heat, turning occasionally, until blackened in spots and soft, 5 to 10 minutes for the chiles, about 15 minutes for the garlic. Cool, then pull the stems from the chiles and peel the garlic
  2. In a food processor or blender, add the roasted tomatillos, garlic and chiles (I used one and a half), pulsing until everything is reduced to a coarse puree. Scrape the salsa into a serving bowl, adding a 1/4 cup of water if it is too thick. You can complete all of these steps up to 2 days ahead of time.
  3. Right before you are ready to serve, scoop the onion into a strainer, rinse under cold water and shake off any excess water. Add the onion and cilantro to the salsa, seasoning to taste with salt and sugar.

Tuesday, November 29, 2011

Crispy Black Bean-Bacon Tacos

These are basically homemade taquitos. The recipe suggested serving it on a bed of lettuce and tomatoes, Mexican BLT anyone? We live in Wisconsin and in my opinion tomatoes are not worth it this time of year. I decided to go with a rice and beans route instead. Normally both of which are side dishes but with the beans in a taco they make a perfect main. This recipe is from Rick Bayless' Mexican Kitchen cookbook. No big deal, but it is a signed copy. It is no big secret that I love him, his food and restaurants. Anyways, I decided to make this recipe because it calls specifically for store bought corn tortillas and I am expecting a tortilla press from Santa this year (homemade are thinner). 


The process may seem difficult, but in reality it is very straightforward and quick. It is a perfect meal to cook with a friend. After the bean mixture is finished, one person can flash fry the tortillas, and the other can fill and roll them. I used to hate using corn tortillas until I tried the flash frying method--no tearing or breaking. Make sure that the oil is hot enough before you start the rolled and filled tacos. I did not use a thermometer. Instead I dropped a stray bean into the hot oil, if it sinks, bubbles and rises to the top quickly the oil should be hot enough. If you are going to make this for more than four people I suggest doubling the beans, there were no leftovers when I made this for my parents as a Thanksgiving Eve meal (although my Dad and I can really put it away). Try serving it with Red Chile Rice and enjoy!

Ingredients:
8 slices bacon
1 medium white onion, chopped
15 ounce can black beans, drained and rinsed
2-3 pickled jalapenos (seeded, stemmed and chopped) or 1/4 cup jalapenos slices chopped
Vegetable oil
12 corn tortillas
2/3 cup crumbled Mexican queso fresco

Instructions:
  1. In a 10- to 12-inch skillet, cook the bacon until crispy over medium heat. Remove the bacon to paper towel. Pour off all but a thin coating of the drippings. Add the onion and cook until deep golden brown, about 10 minutes. Stir in the beans, then coarsely mash the beans with the back of a wooden spoon. Crumble in the bacon along with the jalapenos. Season with salt and set aside in a bowl. This could be made several days ahead if you wanted.
  2. Clean the skillet, pour in a splash of oil and heat over medium-high. One by one, quick fry the tortillas for several seconds to soften and pat dry on paper towels. Add more oil as needed. Remove the oil from the heat. Fill each tortilla with 2 tablespoons of the bean mixture, sprinkle with 1 tablespoon cheese, and roll up. 
  3. Add 1/2 inch of oil to the pan and heat over medium to medium-high heat (about 375F). Fry the taquitos 4 at a time, placing them flap-side down in the oil. Fry on each side for about 2 minutes. Remove with a slotted spoon or tongs, drain on paper towels and tip them to be sure no oil is inside. Serve with rice.


Friday, November 25, 2011

Red Chile Rice

I made this the other night to go along with Crispy Black Bean-bacon Tacos. Everything about this was amazing, especially the rice being cooked perfectly. You will have leftover seasoning paste, which you could use as a rub on chicken or fish. I used the leftover paste to make more rice and the rice was cooked perfectly again. I added a can of beans and a cup of corn after the rice was cooked to make it into a meal for myself, delicious.


The seasoning paste was not as spicy as I was expecting it to be. If you want it to be spicier add a few dashes of cayenne pepper or use dried guajillos instead of the anchos. You will need a food processor or blender to make the paste. It is a lot easier to make than it may seem and well worth it. 


Recipe courtesy of Rick Bayless
Ingredients:
Essential Sweet and Spicy Ancho Seasoning Paste:
8 garlic cloves, unpeeled
8 medium (4 ounces) dried ancho chiles, stemmed and seeded
1 1/2 teaspoons dried oregano
1/2 teaspoon freshly ground black pepper
1/8 teaspoon ground cumin
1/4 teaspoon ground cloves
1 teaspoon salt
2/3 cup chicken broth or water
Rice:
1 tablespoon vegetable oil
1 cup white rice
1 medium white onion, diced
1 2/3 cups chicken broth or water
Instructions:
Ancho Seasoning Paste:

  1. Heat a heavy skillet over medium heat. Place the garlic in the pan and roast for 15 minutes until softened (they will blacken in spots); cool and peel. While the garlic roasts, open the chilies and lay them flat in the pan one at a time pressing down with a spatula for a few seconds on each side until you hear it crackle or send up a wisp of smoke.  Put the chilies in a small bowl with hot water and let re-hydrate for 30 minutes.
  2. In a food processor or blender, combine the oregano, black pepper, cumin, cloves, salt, peeled garlic, chilies and 2/3 cup broth or water. Process to a smooth puree.
The Rice:
  1. In a large measuring cup, heat the broth and 5 tablespoons of ancho seasoning paste in the microwave on high for 3 minutes. 
  2. In a medium saucepan heat the oil over medium heat. Add the onion and rice, stirring regularly, until the rice looks chalky, about 5 minutes. Pour in the broth and ancho seasoning paste with the rice, stirring a few times and scraping down any stray kernels from the side. Turn the heat to low, cover and cook for 15 minutes. Uncover and check a few grains of rice; it should be nearly cooked through. If it is just about ready, turn off the heat and let it it sit covered for 10 minutes. If it is far from done, replace the lid and cook for another 5 minutes. Enjoy!

Friday, October 14, 2011

Chicken-pumpkin Enchiladas

There has been a plethora of sweet pumpkin recipes lately and I wanted to try using pumpkin in a savory way. I thought about pumpkin raviolis (next weekend?), but I decided that this was a much more original idea and slightly less work. I have been very excited all week to make these and was a bit panicked that I wouldn't be able to find anyone to make them for. My favorite part of cooking is sharing it with other people. I was thrilled when my roommate said she would love for me to make her enchiladas despite hating Mexican food and that her co-worker was going to join us too and we would watch the Brewer game. They both loved them despite being skeptical. If you have ever had sweet potato enchiladas they are very similar--a little sweet and spicy. The flavor of these and ingredients can really be tailored to your tastes, which is great. I threw a butternut squash in because it needed to be used. I decided to flash fry the corn tortillas to add a bit of flavor to them and make them more malleable. It is not necessary but I think it adds a nice touch. Hope you enjoy!

Ingredients:

Corn tortillas
3/4 cup grated pepper jack cheese

Enchilada Sauce:
1/4 cup vegetable oil
1/4 cup (scant) New Mexico chili powder
2 tbs flour
1 3/4 cup chicken broth
1 (80z) can tomato sauce
1/4 tsp (rounded) cumin
1/4 tsp onion salt
1/4 tsp cinnamon
2 garlic cloves grated or minced
salt to taste

Filling:
1 rotisserie chicken
1 small pumpkin (any works, I used a sugar pie)
1 small butternut squash
Vegetable oil
8oz goat cheese
3/4 tsp cumin
3/4 tsp chili powder
1/4 tsp cayenne pepper
1/4 tsp cinnamon
1/4 tsp salt

Instructions:
  1. Preheat oven to 350F. Cut the pumpkin/squash in half and remove seeds. Drizzle the insides with vegetable oil and sprinkle with a generous pinch of cumin and salt. Place them cut side up on a rimmed baking sheet and place on the middle rack on the oven for 30-40mins or until tender.
  2. For the sauce place the vegetable oil, chili powder and flour in a medium sauce pan over medium-high heat. Stir constantly, so it does not burn, until it starts to thicken and turn darker (about 1-3mins). Turn the heat down to medium and pour in the chicken broth, tomato sauce, cumin, onion salt, garlic and cinnamon. Stir to combine and thicken and remove from heat. Season to taste with salt.
  3. Shred the chicken using a fork and place in a medium bowl.
  4. When the pumpkin is cool enough to handle, spoon the flesh into a food processor along with the goat cheese, cumin, chili powder, cayenne pepper, cinnamon and salt. Pulse until combined to a somewhat smooth consistency.
  5. Put 3/4 cup of the pumpkin mixture into the enchilada sauce and stir to combine. Place the remaining pumpkin mixture in the bowl with the chicken and stir to combine.
  6. Preheat oven to 350F. In a 9x13 baking dish, spread 3/4 cup of the sauce evenly over the bottom of the dish. Heat a small skillet with 1/2 tsp vegetable oil over medium to medium- high heat. Place the corn tortillas in the pan one at a time and fry on each side for 15secs or until browned in spots, add more oil as needed. Fill each tortilla with 1/2 a cup of the pumpkin-chicken mixture and wrap closed, placing them seam side down in a the baking dish. Cover with 3/4 cup of sauce and sprinkle cheese over the top. Place in the oven and bake for 20mins or until cheese is melted and slightly golden.


LinkWithin

Related Posts Plugin for WordPress, Blogger...