Showing posts with label baking. Show all posts

Friday, May 22, 2015

Roasted Strawberry-Rhubarb Buckwheat Biscuit Cake

Happy Memorial Day weekend, friends! I have this to die for strawberry-rhubarb biscuit cake. Ah-mazing.


Before we get to the food, I have to share how difficult it has been to get this post up. My cat has been a relentless snuggle bean. I can't sit down without her showing up and climbing into my lap.

I often complain how she doesn't give me enough loving, finding it very hard to kick her off my lap. When she was too slow to get on my lap before my computer, she still climbs on. Sprawled out, one leg on the keyboard, belly up. Cuteness.


As I write this she is sitting on my belly giving me the stink-eye. She has obviously claimed my lap as her own and has some computer jealousy.

It may be that she knows her mother, me, is about to leave her for two weeks and she wants all the snuggles she can get before that day arrives.
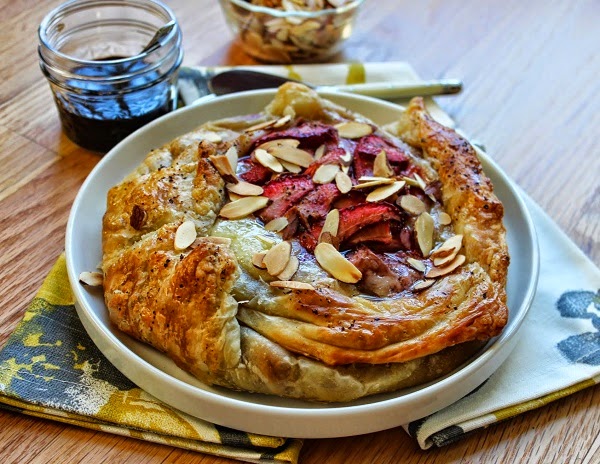
Now about this cake, cobbler, fruit and biscuit situation. It is maybe the most delicious thing I've ever made. I had frozen strawberries from last summer and rhubarb from the farmers market.

If you are using frozen berries, be sure to drain them. If you don't, you'll end up with way too much liquid. Which is bad. We don't want that. Set them in a strainer overnight on the counter or in the refrigerator.

Did I mention how easy this is to make? It took like 45 minutes all together, including dishes. The cake was gone in about the same amount of time. Remember, this is a judge free zone.

The biscuits come together really quickly, they are fairly doughy and dense, not so light and fluffy, but it worked for me. Using all white flour is totally acceptable.

I sort of just used what I had on hand. You could substitute creme fraiche or sour cream for the yogurt.


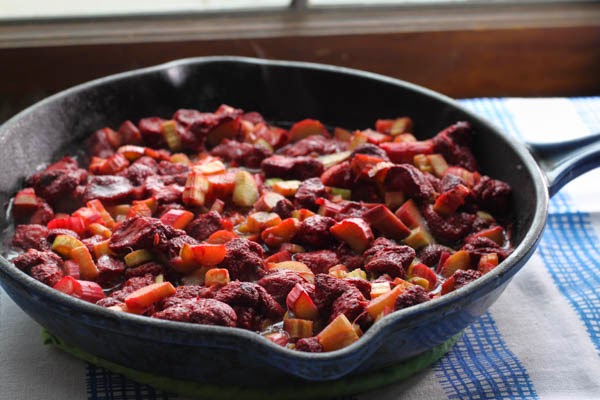
Roasting the fruit results in a super jammy and buttery consistency. I would have slathered it all over myself, if I had more of it. That is right, it is that good.

It is so good you want to sit down all alone, dim the lights and turn on your favorite cooking show and savor the moment.
xo
April

Ingredients:
for the fruit:
2 cups rhubarb, cut into 1/4 inch pieces
2 cups strawberries, fresh or frozen, if frozen, defrost and drain first
2 tablespoons granulated sugar
1/2 teaspoon vanilla
1/2 vanilla bean, scraped
2 tablespoons cornstarch
3 tablespoons butter
for the biscuits:
1 cup all purpose flour
1/2 cup buckwheat flour
1 1/2 tablespoons sugar
1 1/2 teaspoons baking powder
1/2 teaspoon sea salt
8 tablespoons butter, cold, cut into quarter inch cubes
1/2 cup full fat greek yogurt or creme fraiche
1/2 vanilla bean, seeds removed and scraped
for the egg wash:
1 large egg
splash of water or milk
brown sugar

Instructions:
  1. Place a rack in the middle of the oven, preheat the oven to 375F. 
  2. In a medium bowl, combine the first six ingredients for the fruit, tossing to fully coat the fruit. Place the fruit mixture into an 8-inch oven proof skillet or metal baking dish, placing small pads of butter on top of the fruit. Place in the oven to roast for 12 to 15 minutes. While the fruit roasts, prepare the biscuit dough.
  3. To make the biscuits, in a medium bowl whisk together flour, sugar, baking powder and salt. Add the cold butter and vanilla bean seeds and use your fingers to quickly break the butter down into the flour and sugar mixture. Some of the butter pieces will be the size of oat flakes, others will be the size of small peas.
  4. Create a well in the center of the flour mixture and add the cold yogurt . Stir with a spoon. The mixture will be rather wet. Shape the dough into a rough disk, dividing the dough into 6 pieces. Brush the top of each biscuit with the egg wash (whisk together one egg with a splash of milk or water) and top with brown sugar.
  5. Remove the strawberries from the oven and carefully place the biscuits over the hot strawberries. Return the skillet to the oven and bake for another 15-20 minutes, or until the biscuits are cooked through and the biscuits are golden.
  6. Remove from the oven, allow to cool until the strawberries are no longer bubbling, and serve warm.

Wednesday, March 25, 2015

Everyday Granola

Simple, homemade, good for you granola is tough to beat.


I buy a lot of granola at the store, but when I have the time I like to make it myself. By no means am I a super healthy eater. I eat what I want.

Sometimes it might be organic other times it might be super processed, deliciously fake cheese. Cheetos! I digress.

When I buy granola though, I'm buying it to be somewhat healthy. Some whole grains. A few nuts. The perfect snack or fiber for your morning yogurt.


What I am trying to say is that I like to have a little control over what goes into my granola, specifically sugar. There does not need to be much in your granola, in terms of fats or sugars.

It can be hard to find a store-bough granola with just a few ingredients. Hence, making it is the way to go, when time permits. It is simple, clean and easy to make.

This is a pretty basic granola, hence "Everyday Granola." Original, I know, but everyone needs a good and safe based to venture out on their own from, knowing they can always come back.

I sort of just use what I have in my cupboard. All the little leftover handfuls of nuts. You know what I'm talking about. A recipe called for all but 1/4 cup of slivered almonds, what to do with the leftovers? Stash 'em away for some granola. 


Perfect opportunity to use up various seeds, like sesame or flax, as in this recipe. So many sesame and flax seeds, with so few opportunities to use them and then there was granola. Everyone gets to play! No, your granola is not going to taste like sesame.

Any flavorful oil will work in here. Until coconut oil was all the rage, I used olive oil. The coconut oil also does not make this taste overwhelmingly like coconut, for all those coconut haters out there.

Egg whites make your granola a bit more crunchy and you could add up to about 3 tablespoons. I used egg beaters and would probably skip egg whites, if I had not had egg beaters on hand. The protein bonus does not hurt either.


If you like granola that is in bigger pieces, press the granola down firmly, with a spatula, not stirring it for the remainder of time in the oven.

After it comes out of the oven do the same thing, letting it cool completely before breaking it up, tossing in the fruit at this point.

If you have not gotten the gist by now, this recipe is flexible. Change the amount of oil or honey you add, maybe it is too much for. Maybe it isn't sweet enough. That is okay. Not offended, promise.


Spread you wings and play around with the ingredients. Use what you have on hand. Go wild. It will be fun. You deserve it.

xo
April 

Ingredients:
2 cup old-fashioned oats
1 cup slivered almonds
3/4 cup chopped walnuts
1/2 cup macadamia nuts, chopped
1/4 cup sunflower seeds
1 tablespoon sesame seeds
1 tablespoon flax seeds

3 tablespoon honey
3 tablespoons coconut oil
1 tablespoon egg white
1/4 teaspoon sea salt
1/2 teaspoon cinnamon

1/2 cup dried fruit

Instructions:
  1. Preheat oven to 300°F. Line rimmed baking sheet with parchment. Mix first 7 ingredients in large bowl. Stir honey and oil in saucepan over medium-low heat until smooth, or microwave in a measuring cup for 30 seconds. Pour honey mixture and salt over oat mixture; toss. Add tablespoon of egg; toss. Spread on prepared sheet. Bake until golden, stirring every 15 minutes, about 40 minutes. 
  2. Place sheet on rack, to cool. Stirring immediately for a less chunky mixture or let cook fully for bigger chunks. Mix in fruit. Granola will keep for up to a week, in a air-tight container.

Wednesday, February 11, 2015

Chocolate Merlot Truffle Cupcakes with Mascarpone Cream Cheese Frosting

These cupcakes are amazing. Totally perfect for Valentines Day, whether you love Valentines Day or think its just another hallmark holiday, marketing ploy, in that case they are any day perfect.


They might as well be a love potion, these cupcakes. You will love yourself more for making these on this fine upcoming hallmark holiday of love. Believe me.

Truffles are stuffed inside of each one for a little chocolate surprise. Who wouldn't love that? I sure don't know of anyone who wouldn't like it. I'd convert them with these cupcakes though. I'm sure of it.

A lot of recipes call for a little coffee when there is chocolate involved. Coffee and chocolate are a natural pair, but wine and chocolate are too. They both enhance the chocolate factor by 10.

It is quite possible that wine and chocolate are a better pair than chocolate and coffee...particularly if it is afternoon because it is more acceptable to drink after noon. Don't judge me. I'm still a college student for a few more months.


The truffle stuffed inside makes a little semi-molten extra rich chocolate center. These cupcakes are super moist (I'm sorry if you hate that word, but it is true AND have you ever looked at "moist" synonymous; way worse than moist when talking about food. Gross.) all on their own with no truffle but why you wouldn't want the chocolate center, I don't know.

Red wine makes these seem like a red velvet cake. Someone asked me if they were red velvet, which they might as well be.  Red wine velvet cupcakes.

Use any sort of somewhat fruity, well-rounded, smooth red wine that you would normally drink. I used a Merlot.

The wine complements the chocolate by bringing out the fruitiness found in chocolate. It is amazing. These cupcakes are the best cupcakes I've ever made. Maybe the best I've ever consumed. I wouldn't lie to you. Pinky swear.


The frosting in this recipe is probably my favorite frosting of all time. The combination of butter, cream cheese and mascarpone cheese are perfect. I'm always looking to get my boyfriend to say whatever I've cooked for him is the best he has ever had the pleasure of consuming.

This frosting did it. Best he ever had. It isn't too sweet either, which I like. It is honestly the only frosting I ever make. It is just the best. You must try it. Promise me.

Adding a little wine to the frosting is optional. I felt like it made it curdle a little bit, but gave it a lightly pink-red-wine color that I liked. I'd suggest not adding it if you are serving this to children.

These may be adult only cupcakes all together, between a glass of wine and a few cupcakes, I'm not entirely sure if the alcohol cooks off or not. I will let you make the call on serving these to children or not.


The cupcakes come together in around an hour, not counting cooling time. That is okay though. Just think of the time it takes for the cupcakes to cool as the perfect excuse for a glass of wine.

You should probably be drinking a glass while making these. Hell, you should probably just buy two bottles of wine.

Maybe save the second bottle of wine for after the cupcakes are out of the oven, you don't want it going to your head. Dry, overcooked cupcakes are bad, but not as bad as a fire.Either situation is no good though.


I bet you can find time to make these this week. Maybe this weekend, more time to enjoy some wine on a weekend. Treat yourself either way on this lovely hallmark holiday weekend.

I know I'll be treating myself to a to be determined home cooked meal, with white Russians and the Big Lebowski for dessert. I want to know what your plans are! How are you treating yourself this Valentine's day?

xo
April 

Makes about 24 cupcakes
Ingredients:
 for the cupcakes:
24 cupcake liners
24 truffles, such as Lindt Irresistibly Smooth Dark Chocolate Truffles
2 cups all-purpose flour
3/4 cup natural unsweetened cocoa powder, sifted
1 1/4 teaspoon baking soda
1 teaspoon baking powder
1 teaspoon cinnamon
1/2 teaspoon kosher salt

1 cup (2 sticks) unsalted butter, at room temperature
1 1/2 cups granulated sugar
2 large eggs
1 teaspoon vanilla
1 cup Merlot wine (or other red wine)

for the frosting:
1 cup (2 sticks) unsalted butter at room temperature
1 cup (8 ounces) cream cheese at room temperature
2 cups powdered sugar
1 teaspoon vanilla extract
3-4 tablespoons Merlot wine (or other red wine)
Pinch of kosher salt
1 cup (8 ounces) mascarpone (Italian cream cheese, available at most grocery stores)

1/4 cup cocoa powder, for dusting

Instructions:
for the cupcakes:
Heat the oven to 350°F. Line a cupcake pan with 24 cupcake liners, placing a chocolate truffle (I used Lindt truffles) in each cupcake liner. Combine the flour, baking soda, baking powder, salt and cinnamon in a medium bowl, sifting the 3/4 cup cocoa over the top of the flour mixture.

Cream the butter and sugar in an electric mixer, beating until the mixture is light and fluffy, 3 to 5 minutes. Add the eggs, one by one, and then the vanilla, and continue beating 1 to 2 minutes. With the mixer on low, mix in a third of the flour mixture into the wet ingredients and then pour in a third of the Merlot. Mix ingredients together until just combined. Continue this process two more times, alternating between the flour mixture and the wine into the cake batter. (be sure to not over mix the batter, in between each addition it is okay if they are not fully combined until the end.)

Fill each cupcake liner 3/4 of the way full, baking for 15 to 20 minutes; a metal skewer inserted in the cupcake (slightly off to the edge because of the truffle) should come out clean. Let the cupcakes cool 10 minutes in the pans, then place them on a rack to cool completely. While the cupcakes cool, make the frosting.

for the frosting:
In the large bowl of an electric mixer fitted with the paddle attachment, beat the butter, cream cheese, and powdered sugar on medium-high speed until light and fluffy. Scrape down the edges of the bowl and add the vanilla, mixing on low to combine. Then with the mixer going, stream in the 3-4 tablespoons of wine, until combined.

Beat in the mascarpone on very low speed until just combined. (Be careful; once you've added the mascarpone, excessive beating can make the frosting curdle.)

Frost the top of each muffin with the icing.

To finish the cupcakes, sift a little cocoa powder over the top of each one and then top with a truffle (optional).

Frosting slightly adapted from The Pastry Queen Christmas

Wednesday, February 4, 2015

One XL Chocolate Cookie


Have you ever had that deep craving that just won't go away? Especially when you're right in the middle of the week feeling great because you've worked out and eaten healthy? But that craving just keeps creeping in until you finally beg your fiancé to go get frozen yogurt? Unfortunately this happened to me (not unlike any other week) AND I got a disappointing answer from the fiancé. I get it, it's the middle of winter so who really wants a cold dessert. I was just looking for something on the less unhealthy side and something that would be one and done.

You see, I'm not the liker of the cake/cookie/brownie in a mug. That would be a good one and done dessert. But, they are unsatisfying to me. Am I crazy or have I just not found the right recipe yet? Anyway, I wanted something super good and satisfying to kick this craving to California. So, I knew the recipe needed to use the oven and eggs. But I didn't want a dozen and a half cookies or bars staring at me all week, asking to be eaten. One and done, guys, one and done.


This recipe does it all for me! Super quick and all the ingredients are already in my kitchen. The cookie was soft but had a crunchy outside, my favorite! And the chocolate flavor was perfect! I shared this bigger than I was expecting cookie with my fiancé. And I'm planning on making this again for Valentine's Day! It's a fun and special dessert just for two (or one, we're not judging!). Plus, no leftover dessert to crave over the next day, perfect for me and my fiancé who are trying to get into wedding attire shape :)


Slightly adapted from Sally's Baking Addiction

Ingredients
2 Tbsp. room temperature butter
2 Tbsp. granulated sugar
2 Tbsp. light brown sugar
2 Tbsp. beaten egg
1/2 tsp. vanilla extract
1/4 c. all-purpose flour
2 Tbsp. unsweetened cocoa powder
1/2 tsp. baking soda
Pinch of salt
1/4 c. chocolate chips

Instructions
1. Preheat oven to 350F degrees. Line a baking sheet with parchment paper.
2. In a medium sized bowl, cream the butter and sugars with a fork. Mix in the egg and vanilla.
3. In a separate small bowl, add flour, cocoa powder, baking soda, and salt. Pour into wet ingredients bowl and combine with fork. Fold in chocolate chips.
4. Mold dough into a ball and place in the center of the baking sheet. Bake for about 15 minutes.
5. Enjoy warm with your bestie or all by yourself!

Cheers,
Brittany

Wednesday, November 12, 2014

French Toast Bake


Another recipe for breakfast for a crowd is here again! I think this is the perfect time to give you all ideas on how to satisfy the breakfast cravings of your soon to be holiday guests. Holiday breakfasts are some of my favorite recipes. I just love how breakfast can be such a comfort food and what memories it brings back! Holiday breakfast is especially meaningful to me because every Christmas Eve morning just the immediate family gets together. Of course I love seeing all my uncles, aunts, cousins, and grandparents but there's something I just love about the small, intimate group of Christmas Eve morning.

For Christmas Eve morning, each of my sisters, myself and my parents prepare some sort of dish. Egg bakes are normally the hit of the table, but the spread also almost always includes fruit, monkey pull-apart bread, mimosas and a few desserts (because we don't get enough of those during the holidays). This year, I wanted to find a recipe that didn't fit the traditional ham and egg bake mold. So, off to search Pioneer Woman's website, because does Ree ever leave you disappointed? And then I found it!


This french toast bake is sweet and delicious. It closely resembles regular french toast but the nice thing about it is that you're not stuck in the kitchen flipping toast all morning. You can prepare it all the night before. The next day, all you do is pop it in the oven and voilà! You have french toast for all to enjoy at the same time! Needless to say, I think this recipe will make it onto the Christmas Eve morning table.

Enjoy!
Brittany

Slightly adapted from Pioneer Woman

Ingredients
French Toast
1 loaf crusty french bread
8 eggs
2 c. milk
1/2 c. heavy cream
1/2 c. sugar
1/2 c. brown sugar
1 Tbsp. vanilla extract

Topping
1/2 c. flour
1/2 c. brown sugar
1 Tbsp. cinnamon
1/4 tsp. salt
1/2 tsp. nutmeg
1 stick cold butter

Instructions
1. Grease a 13x9 pan with butter.
2. Cut the french bread into cubes and add to pan.
3. In a large bowl, whisk together the eggs. Next, add the milk, cream, sugars, and vanilla extract. Pour over bread cubes.
4. Cover and place in refrigerator overnight. This step can be reduced or skipped all together.
5. For the topping, mix the flour, brown sugar, cinnamon, salt, and nutmeg in a bowl.
6. Cut the cold butter into small pieces and scatter into bowl. Using a fork or pastry cutter, work in the butter until the mixture resembles corse pebbles. This, too may be refrigerated in a bag or container. Makes things a bit easier the next morning :)
7. The next morning, or when you're all set to bake the dish, preheat oven to 350.
8. Sprinkle topping over the soaked bread.
9. Bake on the middle rack for 45-60minutes. 45 minutes will give you a nice bread pudding texture; 60 minutes will yield a crispy and firmer texture.
10. Enjoy with your favorite traditional french toast toppings: syrup, fruit, powdered sugar, etc!


Wednesday, October 22, 2014

Pumpkin Snickerdoodle Cookies

First there was Dulce de Leche Pumpkin Cake (yum), then there was Pumpkin Pound Cake (delish), and now I bring you Pumpkin Snickerdoodle Cookies because Badger Kitchen is currently chugging along on a pumpkin sweets train this month.


You know how there are those special moments in life that are just so memorable that you'll never forget?  I remember picking out our family dog because my sister and I decided he had the softest fur and getting to have him sit on my lap for half the ride home (sharing is caring).  I remember getting engaged and crying my eyes out for a good ten minutes afterwards.  I also remember the first time I baked and ate pumpkin snickerdoodle cookies in my college apartment on a crisp October.

Being the good daughter I am (and because my parents lived 20 minutes away so I'd go home to do laundry), I took my mom a couple of cookies to enjoy and shared the recipe upon request.  It then got shared with Gramma, sisters, aunts and so on.  And now here I am sharing it with you!


To say that these cookies are life changing isn't too far from the truth.  They are superior to the average snickerdoodle cookie thanks to the added pumpkin and spices.  The additional moisture from the pumpkin puree also keeps the cookies chewy, which is good if you're not a fan of hard cookies like me.

The original recipe that I found is so good that has received such rave reviews that I've never felt the need to alter it.  The only change I make is that sometimes I will add a little more pumpkin than the recipe calls for, depending on if I'm in a super pumpkiney mood or not.  Oh, and don't discriminate, pumpkin snickerdoodle cookies can be enjoyed year round!

Enjoy!
Kelsey


Recipe from Sweet Pea's Kitchen.

Ingredients:

  • 2 3/4 cup all-purpose flour
  • 2 teaspoons cream of tartar
  • 1 teaspoon baking soda
  • 1/2 teaspoon salt
  • 1/2 teaspoon pumpkin pie spice
  • 1 3/4 cup sugar, divided
  • 1 cup unsalted butter, softened
  • 1 large egg
  • 3/4 cup pumpkin puree (increase to 1 or 1 1/4 cups if desired)
  • 2 tablespoons ground cinnamon
Directions:
  1. Preheat oven to 400 degrees.  Line two baking sheets with parchment paper.
  2. In a large bowl, whisk together flour, cream of tartar, baking soda, salt and pumpkin pie spice.
  3. In the bowl of a stand mixer (or different large bowl to be used for mixing) cream butter and 1 1/2 cups sugar until light and fluffy, or about two minutes.  Beat in egg.  Then beat in pumpkin puree.  Add dry ingredients from separate bowl and slowly beat in.
  4. In a separate small bowl, stir together 1/4 cup sugar and cinnamon.
  5. Form dough into 1 1/2 inch balls and roll in cinnamon-sugar mixture until coated.  Space apart evenly on baking sheet.
  6. Bake one cookie sheet of cookies at a time for 10-12 minutes, or until edges of cookies are starting to brown but centers are still puffy and soft.
Tip: Cookies freeze well either after baking and fully cooled, or in dough ball form without cinnamon-sugar coating.

If you like this recipe, be sure to check out:

Wednesday, October 15, 2014

Pumpkin Pound Cake


I could start this post taking about how much I love pumpkin and how when baking this recipe I was drinking pumpkin spice flavored coffee and had a pumpkin scented candle burning, but then this would sound like every other wonderful pumpkin blog post out there. When it comes to fall, who doesn't like pumpkin [cough, besides my fiancé, cough]?

Earlier in the summer when Badger Kitchen was thinking up the coming months' themes, pumpkin just couldn't be overlooked. But come October (ok, ok I was thinking about this since September), I just couldn't decided on a recipe to try. I really wanted to step out of my comfort zone and try something, non-baked good recipe. You know, get away from the traditional cinnamon, nutmeg, pumpkin trio recipe. But I was afraid of not liking it and my fiancé not even trying it. So, baked good it is. However, I've never had pumpkin pound cake before. I was pretty excited when I found this.


This recipe is super easy. Believe me, I made this after a very long wedding weekend while finishing up scientific figures for a grant and doing laundry and keeping the dog occupied. It reminds me of banana bread in the fact that it's really good without much effort. Also, this pound cake has the texture like banana bread in that it's dense but [dare I use the word] moist. Also, that cup of pumpkin goes a long way! I was afraid of it being bland but this pound cake is far from! The only thing I would do differently next time is maybe add a walnut or oatmeal topping to give it more texture diversity.

Bon Appétit,
Brittany

Slightly adapted from Something Swanky

Ingredients
1 1/2 c. All Purpose Flour
1 tsp. Ground Cinnamon
1/2 tsp. Salt
1/2 tsp. Baking Soda
1/2 tsp. Baking Powder
1/4 tsp. Ground Cloves
1/4 tsp. Ground Nutmeg
1 c. Granulated Sugar
1/2 c. Brown Sugar
1/2 c. Vanilla Yogurt
3 Egg Whites
1 c. Canned Pumpkin

Fall sprinkles optional (but why not? After all, it is cake)

Instructions
1. Preheat oven to 350 degrees. Grease bread pan or mini loaf pan.
2. Combine flour, cinnamon, salt, baking soda, baking powder, cloves and nutmeg.
3. In a separate bowl add together the sugars, yogurt and egg whites. Mix until blended.
4. Fold pumpkin into the wet ingredients. Then add the dry ingredients. Stir just until all is blended together.
5. Pour into pan (should make about 8-9 mini loaves).
6. Bake for 60 minutes if large bread pan or 25 minutes if mini loaf pan.
7. Enjoy!


Wednesday, October 8, 2014

Dulce de Leche Pumpkin Cake

Its pumpkin time! Hopefully you aren't already sick of everything pumpkin because we got a lot of pumpkin coming your way.


Do we all remember better than sex cake from about 10 years ago? That is what I was going for here, pumpkin better than sex cake. Because I can't seem to help myself, I not only changed the cake to pumpkin but changed the sweetened condensed milk to dulce de leche.


This is not a typical recipe for me at all. I'm usually very against boxed cake. It doesn't take that long to mix up your ingredients, lets be honest, but sometimes you have to trash things up and make them super easy, semi-homemade and decadent, because sometimes they just taste better that way.

Whip cream is another easy thing to make at home, but it doesn't really stand up to cool whip. I'm secretly a huge fan of cool whip amongst other super processed dairy items. Nacho cheese, anyone? Velvetta?!  Love. I try to avoid them because they are so processed, but sometimes you just have to give into that guilty pleasure.


Back to the cake, you can choose to use the sweetened condensed milk and not turn it into dulce de leche, but I think you would be missing out. There isn't any work involved in making it, other than making sure it stays covered in water. You wouldn't want it to explode. Not to alarm you, but honesty is important in any relationship.


The cake is sort of dense, chewy and moist. It isn't overly sweet. I really like that some, but not all, of the dulce de leche soaks into the cake while some rests on top too. So indulgent and fall like! It got rave reviews from all my friends and by friend I mean my boyfriend and dearest friend, Leah, who also happens to be the photographer for this post!

xo,
April

Ingredients:
1 can sweetened condensed milk (label removed)

1 box yellow cake mix
1 14 oz. can pumpkin puree
1- 8oz container cool whip
1/2 cup heath bits

Instructions:
Dulce de leche:
  1. In a large pot, fill with water to cover the can of sweetened condensed milk. Over high heat, bring to a boil Let simmer for 2 1/2 to 3 hours, making sure to add more water as necessary. Remove the can of dulce de leche from the water and let cool to room temperature.
Pumpkin cake:
  1. Preheat an oven to 350F. Grease a 9 x 13 inch baking dish and set aside. 
  2. In a large bowl, combine cake mix and pumpkin puree (add only the pumpkin puree to the cake mix; DO NOT add any of the ingredients listed on the box, like eggs), until a smooth batter forms.
  3.  Pour batter into prepared pan (it was pretty thick and made a thin layer, not to fear though!) and bake for 20 to 25 minutes. 
  4. Remove cake from pan and let cool for 10 minutes. Using the end of a wooden spoon, poke holes all over the cake. 
  5. Place the dulce de leche in a microwave safe container and reheat for 30 seconds and pour over the cake, spreading evenly over the cake and filling in the holes (a spatula is helpful here depending on how viscous the dulce de leche is). Refrigerate the cake for 30 minutes or overnight.
  6. Spread cool whip evenly over cake and sprinkle heath bits evenly on top. Cake is best enjoyed in 2 to 3 days.
Similar posts: Pumpkin Cheese Cake, Pumpkin Chocolate Chip Bars, Cranberry Upside Down Cake

Thursday, September 4, 2014

Butterscotch, Chocolate Chip, Pretzel Cookies

I made these salty, sweet, crunchy, chocolaty cookies for my birthday! I am that person who makes their own birthday treats or dinner because that is what I love doing.


I brought them to share at work, but they were not necessary! My sweet co-worker brought in a Chocolate Shoppe ice cream cake and serenaded me while I worked the patio. It was embarrassing and sweet. The cake was amazing! AMAZING! Yum.

No fear though I shared these with friends after work and they got rave reviews. Because who doesn't love salty and sweet? It is the only way to go.


When I made these I didn't break up the pretzels before adding them to the batter like I write in the instructions. When I make compost cookies its fun to find whole pretzels in your cookie, having little pockets of pretzel pieces works better I think for these cookies though. You get a little pretzel in every bite this way.

If you didn't have pretzels on hand you could totally try adding potato chips instead! Anything that is  salty and crunchy.


You could easily use mini chocolate chips or all chocolate chips instead of butterscotch pieces. I had butterscotch pieces to use up and I like them together with chocolate so it just made sense.


Adding a little pretzel on top is a cute little way to let people know what is in your cookie. It is not necessary, but pretty dang cute I think. I bet you have all these ingredients in your cupboard and these are a fun and easy treat for you and your friends.


xo,
April

Ingredients:
1/2 cup unsalted butter, softened to room temperature
1/2 cup light brown sugar, packed
1/3 cup granulated sugar
1 large egg
1 teaspoon pure vanilla extract
1 1/4 cup all-purpose flour
1/2 teaspoon baking soda
1/4 teaspoon sea salt
1/2 cup chocolate chips
1/2 cup butterscotch chips
1/2 cup salted pretzels, broken up into medium pieces

Instructions:

Place a rack in the center and upper third of the oven and preheat oven to 350 degrees F. Line two baking sheets with parchment paper. Set aside.

In the bowl of a stand mixer fitted with a paddle attachment, cream together butter, brown sugar and granulated sugar. Cream until butter is pale and fluffy, about 3 minutes. Beat in egg and vanilla extract for one more minute. Add the flour, baking soda and salt and beat on low until almost just combined. Add the chocolate and butterscotch chips and pretzel pieces until just combined.

Scoop dough by the heaping tablespoonful onto the prepared baking sheet. Optional: place a whole pretzel on top of each cookie, pressing it in just slightly. Bake for 10 to 13 minutes or until the edges and tops are golden. Remove from the oven, allow to rest on the baking sheet for 5 minutes then transfer to a cooling rack to cool completely.

Store cookies in an airtight container at room temperature.

Friday, July 25, 2014

Zucchini Bread

Back in May when I was picking out the seedlings to plant in my garden, I grabbed one for a zucchini mound kind of on a whim.  I had mostly planned out my garden ahead of time and hadn't been planning on growing zucchini, but boy I'm sure glad I did.


It's been a major confidence booster every since the start.  It was kind of unnerving when two weeks after planting my very first garden, the tomatoes and cucumbers all looked like they were dying but the zucchini was clearly growing.  And when I saw those first blossoms appear, I knew I must be doing something right.  I go one day to find that an actual little zucchini was growing (holy cow I can grow my own food!) and four days later when I go back the same one is now 16 inches long, 4 inches in diameter ripe for the picking.  Talk about success!


That first zucchini that I grew is the special ingredient that went into this zucchini bread.  I knew that I had a lot of the vegetable on hand so I chose to double the recipe and put both of my bread pans to good use.  Two loaves of bread only ended up using about a third of my giant zucchini, plus the four other ones that are sitting in my kitchen right now; I think I've got a lot of roasting to do.


Makes one loaf.

Ingredients:
  • 3/4 cup whole wheat flour
  • 3/4 cup all purpose flour
  • 1/2 cup sugar
  • 1 teaspoon cinnamon
  • 1 teaspoon baking soda
  • 1/2 teaspoon ground nutmeg
  • 1/4 teaspoon salt
  • 1/3 cup canola oil
  • 1/3 cup unsweetened applesauce
  • 2 large eggs
  • 1 1/4 cups coarsely grated zucchini
  • (Optional) 1/3 cup walnuts or chocolate chips
Directions:
  1. Preheat oven to 350 degrees.  Grease loaf pan.
  2. In a large bowl, mix together dry ingredients (flours, sugar, cinnamon, baking soda, nutmeg, and salt).
  3. In a different large bowl, whisk together oil, applesauce, and eggs.  Then stir in the zucchini.
  4. Stir the wet ingredients into the dry ingredients.  Stir in optional additions, such as walnuts or chocolate chips, if desired.
  5. Pour batter into greased loaf pan.  Bake 50-60 minutes, or until a toothpick inserted into the center comes out clean.
  6. Cool on wire rack for 15 minutes before removing bread from pan.

Friday, June 13, 2014

Cinnamon Bread


So I have a confession. First time I tried to make this bread I was overconfident. So overconfident that it would be easy-peasy that I killed the yeast in a milk-butter bath that was too hot. Oops. Even though the bread looked oh so good and smelled even better, it was dense and disappointing. But, I wasn't going to give up on my quest to conquer yeast! You see, I don't bake with yeast often. And I feel yeast gets a bad rep. I feel we think that whatever recipe contains yeast will be tough and time-consuming and not worth it. Well I wanted to prove that wrong. Luckily, the second time through was a success! I may have cheated a little, see the recipe below for my secret weapon! The bread was mouth-watering delicious. It was fluffy and had just enough kick of cinnamon. My fiancé said it was good enough to be from Panera! Why, thank you hun!


This recipe comes from my dear friend, Ree (well I wish we were on a first-name basis). I've just recently become a fan of her and her cooking. I also love her life-style. Although much different than the city feel of Madison, it sounds nice to live on the hill-side with cattle and cowboys. Not sure if the fiancé and I would ever make such a drastic move, knowing going to a grocery store would be an all-day affair. However, slowing down and taking in fresh air and sunsets, that sounds just lovely.

Even after admitting my fault for murdering the first round yeast, I have to say this recipe is easy. Really, believe me! It does take time to get to the final product (I'd suggest making it the day before if you're looking for a breakfast treat). However, there's not much labor on the baker's part. A lot of it is just having the patience for the yeast to do it's work. I made this bread on a lazy Sunday. We were home almost all day, which made it easy come time to knead or roll dough. So give this baby a try...it's worth it!

Smiles,
Brittany

Ingredients
1 c. milk
8 tbsp. butter
1 packet active dry yeast
2 eggs
2/3 c. sugar
3 1/2 c. all-purpose flour
1 tsp. salt
2 tbsp. cinnamon

Instructions
1. Get out the ultra-secret weapon: the bread machine! Add ingredients in order listed: milk, 6 tbsp. butter, eggs, salt, 1/3 c. sugar, flour and then the yeast. You want the yeast to be on top of the flour island, free from touching the salt or liquids.
2. Set the bread machine to the dough setting. And let the machine do the work!
*I do not have a kitchen aid mixer; however, it would be a great alternative to the bread machine. You're probably thinking, who has bread machines nowadays anyways? If a stand mixer is not in your kitchen either, trust me, you can do it! Let the yeast become activated in a luke-warm milk and butter bath. Combine the flour and salt. Add sugar and eggs. Then, add the yeast bath. Mix until combined. Knead dough for 10-15min. Store in a warm place for 2 hours.
3. Turn dough onto work surface. Knead for about 2 min by hand.
4. Roll into a rectangle, have the short side the same length as your bread pan. Have the longer side 18-24 inches.
5. Smear 2 tbsp. melted butter over dough.
6. Mix the remaining 1/3 c. sugar with the cinnamon. Spread evenly over the melted butter.
7. Roll dough up, keeping it tight and the length of your bread pan.
8. Place dough, seam side down into a buttered bread pan. Cover.
9. Let the dough rise for about 2 hours.
10. Once risen, bake for 40-45min in a preheated 350 degree oven.
11. Enjoy as bread, toast or use for french toast!

Check out the last time I used yeast on Badger Kitchen: Cinnamon Rolls

Wednesday, June 11, 2014

Baked Brie with Strawberries, Almonds and Balsamic Vinegar

Strawberry month continues! I have not been able to keep my mind off of strawberries. Its been all strawberry this strawberry that all up in my noggin lately.


I'm working on a frozen treat involving strawberries, but it needs a bit more work. Joy the Baker is having a "Baking Boot Camp" and I made this triple berry cinnamon swirl bread. Hopefully I can tweak some of the things I've been working on and share them with you all!

I want to roast all the strawberries there ever were and devour them. If you've never tried roasting fruit, you should. No pressure, but really you should. I also just ordered a ice cream maker. I'm giddy about it. Maybe there will be a roasted strawberry ice cream situation in the future. At the very least there will be buckets of ice cream in my future.


Now for the real strawberry situation at hand, strawberries and cheese. This is a pretty simple, easy and straightforward gooey, salty, tangy and cheesy situation. My first go around at making this resulted in spilled cheese, which is better than spilled milk. Promise. You can still eat spilled cheese.

I tweaked a few things to prevent a spilled cheese situation from happening again. I went for less liquid for the strawberries and created a balsamic glaze instead.


As I tend to do, there is not much added sugar to the strawberries. I like the tartness. The exposed top makes this almost a cross between a gallette and traditional baked brie. Leaving the opening at the top allows the strawberries to become sort of like roasted strawberries - jammy, melty and tart.


The balsamic adds a nice sharp tang on top, while the toasted almonds add a crunch. The pepper is not at the forefront here, but I do think it adds a little something. You could always add more pepper, if you wanted a real peppery kick.


You won't want to drizzle all of the balsamic glaze over the baked brie all at once, but reserve some for you and your friends to drizzle on as much or little as they want. I won't judge though if you just eat this all by yourself. I begrudgingly shared with my father because well he is my father.

Cheers,
April 

Ingredients:
For the brie: 
8oz strawberries, sliced into quarters
1 tablespoon balsamic vinegar
2 teaspoons honey
2 teaspoons all purpose flour
1/8 teaspoons freshly ground black pepper

1/3 cup slivered almonds, toasted

For the balsamic glaze:
1/4 cup balsamic vinegar
2 teaspoons honey
Freshly ground black pepper

Egg wash:
1 large egg, beaten in a small bowl, with a splash of water

Instructions:
  1. Preheat your oven to 375 degrees F. Line a baking sheet with parchment paper and set it aside.
  2. Combine strawberries, balsamic vinegar, honey, flour and black pepper in a bowl. Set aside.
  3. Slice the rind off of the top of the brie and set aside.
  4. Lightly flour your surface with flour and roll out the thawed puff pastry to a 12" by 12" (being a little shy of 12" is better than being to wide/thin). Trim off the corners to make a circle/oval (using a 10" plate is a useful guide, but you want your circle to be slightly larger than 10").
  5. Place the brie in the center of the dough. Drain the strawberries, reserving the juice for later. Add the strawberries on top of the brie (it may seem like they won't all fit and if a few fall along the sides of the brie, that is okay).
  6. Fold the edges of the dough over in small sections, overlapping as you go. Brush it all over with egg wash.
  7. Transfer to the oven and bake for 20-30 minutes, until the pastry is golden brown. Allow the baked brie to cool for 10 minutes. Place slivered almonds on tin foil and place in oven, until golden and nutty, about 3 to 5 minutes.
  8. While the brie is cooling, lets make the balsamic glaze. To a small saucepan, set over medium heat, mix together the reserved strawberry juice, honey, balsamic vinegar and pepper. Simmer for 3-6 minutes, until slightly thickened and sweet. Turn off the heat and drizzle a little over the baked brie. Garnish with a few slivered almonds; serve with remainder of almonds, glaze and crackers. 
Two years ago: Strawberry Shortcake, Chocolate Brownie Cookies

Wednesday, June 4, 2014

Strawberry Banana Bread


Here at Badger Kitchen headquarters we are officially declaring June to be Strawberry Month!  Check back each Wednesday this month for a new recipe using strawberries.  We're kicking off the month with this recipe for strawberry banana bread.


I finished my undergrad degree about a year ago now and having been working in the professional world (well part of the time working on getting into the professional world) ever since.  I've always enjoyed learning and generally speaking liked going to classes, but the main part of school that I do not miss is spending my free time studying.  Evenings that are free to do whatever I want you say?  Sold.

Which is why when I signed up to take the LSAT exam, it has been a little bit of a struggle to get back into studying mode.  No, I don't really want to come home from a day of work and spend my free time studying, but I better if I want to do well on this test!  Which is why I had been studying a little bit here and there for a while, but as the the test date is quickly approaching it has become my free time.


So when world collided this weekend and I had ripe bananas sitting on the counter, fresh strawberries in the fridge and was looking for a reason to take a study break, this strawberry banana bread was born.  If I had wanted to take a trip to the grocery store I would've made a healthier version, throwing in some applesauce and greek yogurt, but I had all the ingredients for this version already so I went with it.  I can at least pretend it's healthier since I didn't throw any chocolate chips in, right?

The strawberries add a nice twist to your typical banana bread recipe.  The banana flavor isn't super strong, so if that's the way you like it then perfect, otherwise you may want to try and sneak in another banana.  I had intended to freeze half the loaf but it made such a great study snack that before I knew it, it was almost gone anyways.

I hope you enjoy!
Kelsey


Recipe from Chew Out Loud

Ingredients
  • 2 cups fresh strawberries, sliced
  • 2 very ripe bananas, mashed
  • 1/2 cup packed brown sugar
  • 1/4 cup granulated sugar
  • 1 1/2 cups all purpose flour
  • 1 tsp baking powder
  • 1/2 tsp baking soda
  • 1/4 tsp salt
  • 1 tsp cinnamon
  • 2 large eggs, room temperature
  • 1/2 tsp vanilla extract
  • 1/2 cup salted butter, melted
Directions
  1. In a bowl, toss sliced strawberries with granulated sugar, making sure all are coated.  Let sit.
  2. Preheat oven to 350 degrees.  Grease and flour a loaf pan.
  3. In a medium bowl, whisk together flour, baking powder, baking soda, salt and cinnamon.
  4. In a separate large bowl, beat eggs until slightly foamy.  Mix in vanilla, brown sugar and melted butter.  Add in macerated strawberries and mashed bananas.
  5. Using a rubber spatula, fold flour mixture into wet mixture until dry ingredients are just mixed in.
  6. Scrape into prepared loaf pan and bake for an hour, with additional time if needed so that toothpick inserted in the center comes out almost clean, with just a few crumbs.
  7. Let bread cool in pan on wire rack.  Wait until fully cooled before removing.
Two Years Ago: Caramel Oatmeal Chewies

LinkWithin

Related Posts Plugin for WordPress, Blogger...