Showing posts with label chicken. Show all posts

Wednesday, January 7, 2015

Cowboy Skillet Chicken


The super cold weather has set in, leaving me drinking hot chocolate with a fire going as I write this post. Sure I love to snuggle with a blanket and have a fire going, but isn't this a bit too cold? I mean -11, seriously Madison, WI? This cold weather has got me thinking about the warm summer months where the best part of the week is the Farmer's Market! I had first made this recipe over the summer with green beans and fingerling potatoes from the Madison farmer's market. Ok, fingerling potatoes are my absolute favorite. They're so cute and so tasty!  


Besides being able to use farmer's market fresh goods, this recipe is perfect for the I-only-want-to-make-one-thing-for-dinner meal. It's all in one skillet and it's hearty ingredients make a well-rounded dish! I called it Cowboy Skillet Chicken because it reminded me of what a cowboy might cook over a fire. Well and because the cook book I got it from had a three lined title just explaining the ingredients. Boring. Although...looking at my pictures, I must be a very sophisticated cowboy. There's no fire or spurs or rustic anything. But trust me, this recipe is great for the cowboys or the city dwellers. It's so good.

Enjoy!
Brittany


Adapted from one of my favs, The Cast Iron Skillet Cookbook
(and I hear there's a second edition!!)

Ingredients
1 lb. fingerling potatoes
8 oz. green beans, ends removed
4 Tbsp. extra virgin olive oil
4 chicken breasts
1 c. chopped yellow onion
1 clove garlic, minced
12 oz. andouille sausage, cut into 1/4 inch thick slices
1/2 c. chicken stock
Salt and pepper to taste

Instructions
1. Boil the potatoes in a pot until tender
2. At the same time, add green beans to a pot with boiling water. Cook until they start to soften, about 3-5 minutes
3. Drain the potatoes and beans and set aside.
4. Warm a large 12 inch cast iron skillet over medium-high heat. Add 2 tablespoons of olive oil.
5. Season the chicken with salt and pepper and cook for about 4 minutes on each side. Set aside on a platter.
6. Add remaining 2 tablespoons of olive oil to the skillet and reduce heat to medium. Add the onions and garlic, stir occasionally.
7. Add in the sausage and cook for a few minutes. Add in the potatoes and green beans. Mix all together.
8. Add the chicken over the top, cut beforehand if desired.
9. Add the chicken stock and loosely cover skillet with foil. Reduce heat to medium-low and cook for 12-15 minutes.
10. Serve and enjoy from the skillet!

Wednesday, August 27, 2014

Skillet Chicken with Cherry Tomatoes and Garlic

It's the last Wednesday in August so you know what that means, the last installment of Tomato Month!  We've already brought you a salad, a pasta and a sandwich, so now I'm coming at you with this Skillet Chicken with Cherry Tomatoes and Garlic.


One thing that having a garden has really helped me with is eating more seasonable produce.  You're basically forcing it on yourself because, well, it pops up in your garden right when it's in season.  Besides when you grow it yourself, there are just so many other benefits to eating seasonably; from lower prices to having it likely grown locally so you're probably helping small businesses and farmers (especially if you hit up the farmer's market on the regular) while also reducing your produce's carbon footprint.


This dish is really a great way to maximize on seasonable produce right now.  Raise your hand if you have tomatoes coming out of your ears.  Yup, me too.  And while I love just popping cherry tomatoes in my mouth as a snack or tossing them in a salad, it's great to mix up the flavors a little bit and this skillet chicken definitely delivers on flavor.  The seasoned chicken tastes totally delicious and every time you bite into a cherry tomato it's like a miniature explosion of juices in your mouth.  Not only is it tasty but it definitely falls into the healthy category and takes minimal time and effort to make so it's a perfect weeknight dinner option.

Hope you enjoy!
Kelsey

Ingredients
  • 2 large chicken breasts (I cut mine in half so they would cook better)
  • 1/2 teaspoon salt
  • 1/2 teaspoon black pepper
  • 1/2 teaspoon crushed red pepper
  • 1 tablespoon olive oil
  • 2 cups cherry tomatoes
  • 2 large garlic cloves, minced
  • 3 tablespoons cider vinegar
  • 2 tablespoons water
  • 1 teaspoon Italian seasoning
Directions
  1. Spray large skillet with non-stick spray and set over medium heat.  Sprinkle chicken breasts with 1/4 teaspoon salt, 1/4 teaspoon pepper and 1/4 teaspoon crushed red pepper.  Add chicken to heated skillet and cook until golden and cooked through, about 15 minutes depending on size.  Try to only flip chicken once.  Remove from skillet and set aside.
  2. Add olive oil to same skillet and heat over medium.  Add garlic and tomatoes and stir until garlic is golden, 1-2 minutes.  Add water, vinegar, Italian seasoning, 1/4 teaspoon salt, 1/4 teaspoon pepper and 1/4 teaspoon crushed red pepper.  Continue stirring until tomatoes are softened, 2-4 minutes.
  3. Spoon tomato and garlic mixture over chicken breasts and enjoy!

Monday, July 7, 2014

Farmer's Market Stir Fry with Peanut Sauce


I work on the Capitol Square which is also home to the Dane County Farmer's Market on Saturday mornings.  It's said to be the largest produce only farmer's markets in the country which means tons of selection, but also lots of crowds.  Since I'm no longer living in the downtown area, I rarely make the trek on Saturday mornings, but I have gotten in the habit of taking a break at work to head to the much smaller, Wednesday markets.

This past week at the market it seemed like there was a really good variety of vegetables at some great prices, so as I was walking around I decided to get ingredients to make a stir fry.  I had to take a couple laps around the stalls to get all my supplies and ended up with summer squash, green onion, broccoli, asparagus and sugar snap peas.  I also took home a head of lettuce and a couple khalorabi, all for only $13!  Usually when I make stir fry I go with a spicier szechuan sauce, but decided to go with a subtler peanut sauce this time.  It still put lots of flavor in the dish and didn't leave out a little spicy kick either.

Hope you enjoy!

Kelsey


Ingredients:
  • 2 cups brown rice (measured before cooking), cooked
  • 2 chicken breasts, cut into 1 inch pieces
  • Choice of seasonal vegetables (I used sugar snap peas, green onion, asparagus, summer squash and broccoli)
  • Desired amount of peanut sauce (I used about half, or a little over 1/4 cup)
  • Olive oil
For the peanut sauce:
  • 1/4 cup rice vinegar
  • 1/4 cup soy sauce
  • 2 teaspoons granulated sugar
  • 4 teaspoons peanut butter
  • 2 tablespoons water
  • 2 teaspoons Asian chili garlic paste
Adapted from Food and Family.

Directions:
  1. Prepare peanut sauce by mixing ingredients in a small bowl.  Heat in microwave in 20 second increments, stirring in between,  until peanut butter is no longer in large clumps. (It's okay if it's not completely melted into the mixture, the hot skillet will take care of that later.)
  2. Drizzle olive oil in skillet (or wok if you have one) and cook chicken.  Set aside.
  3. Pour desired amount of peanut sauce in skillet and sauté vegetables until they begin to soften.  Add chicken to mixture and stir until coated with sauce.
  4. Serve over rice.
Linking up with Time to Sparkle.

Friday, June 27, 2014

Lemon Chicken Kabobs


Oh boy! I found my new favorite grill recipe. The other weekend, I was visiting my future in-laws and we had chicken kabobs for dinner. The kabobs were store bought from the meat department. You know, the ones that are pre-prepared, quick and easy. They were delicious! Ever since then, I've been stuck on kabobs. I wanted to make them the next day, no joke. My fiancé advised we wait a bit. Although reluctantly agreeing, I finally got to test out a recipe. The flavor was worth the wait.  


Yum! These chicken kabobs were juicy and flavorful. With only adding lemon zest, you get this perfect but not overly powerful citrus flavor. It compliments the garlic and pepper very nicely. I chose to add bell peppers and onions, because they're my favorite and add some nice color. However, feel free to get creative with your vegetables (or even the meat). The choices are endless! 

Ingredients
1 pound chicken breast, cut into large cubes
2 bell peppers
1 onion

Marinade
3 tbsp. extra virgin olive oil
Zest of 1 lemon
3 garlic cloves, minced
1 tbsp. fresh parsley
1 tsp. kosher salt
1 tsp. ground pepper


Instructions
1. In a small bowl, combine marinade ingredients. Stir well
2. In a shallow dish, arrange chicken pieces into one or close to one layer
3. Pour marinade over chicken. Toss to coat pieces and cover.
4. Marinade chicken in refrigerator for at least 30 minutes but up to 8 hours.
5. Chop pepper and onion to similar size as the chicken, about 3/4-inch pieces.
6. Skew chicken, pepper and onion onto skewer sticks, alternating items.
7. Grill kabobs 45min, rotating often.
8. Enjoy!

Bon Appétit!
Brittany

Thursday, May 15, 2014

Chicken Quinoa Pita Pockets

Guys, I have a confession to make.  Sometimes when a new fad or trend comes around I will be super resistant to jump on the bandwagon.  But then eventually I will fall for it, and fall hard.  Skinny jeans for example.  I used to be super critical.  Why would I want denim all up on my calves all day long?  And now, skinny jeans are all I wear.  Well, except for jeggings.


Or quinoa.  Four years ago had anyone ever even heard of quinoa?  No.  And then it made it's breakthrough and took the food magazine and blogging worlds by storm.  It appeared in anything and everything, being dubbed a superfood or something like that.  I eventually won a bag in a giveaway, and it sat in my cupboard for months untouched.  Until finally a couple of weeks ago while (sort of) participating in a week long healthy eating challenge (another fad, I know) it was called for as a side so I finally dusted off the bag and gave it a shot.


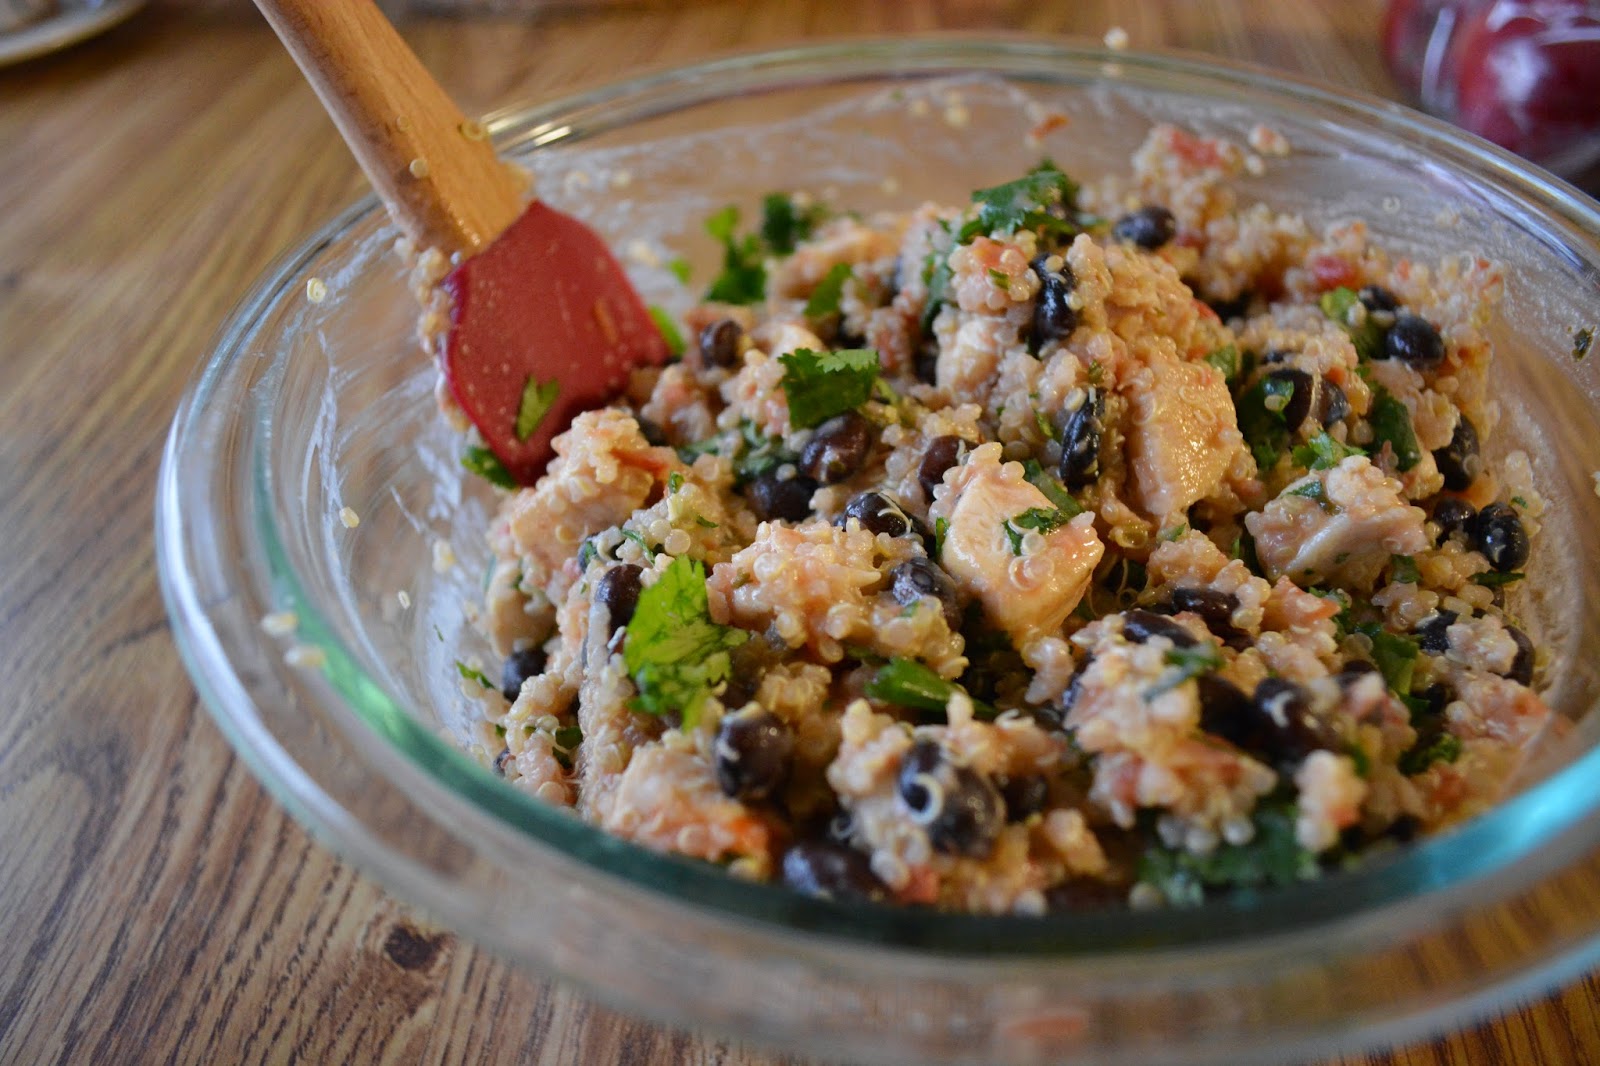
Let me tell you I am hooked; hook, line and sinker.  I'm looking forward to trying out many more quinoa recipes, but for now here is the version of healthy chicken quinoa pita pockets that I came up with, inspired by my big sister.  Feel free to adjust any of the ingredients as you please.  Depending on what type of salsa you use and how much kick you like, you may want to use more or less.  It's a pretty quick weeknight meal to make, the longest part being cooking the quinoa.


Ingredients
1 package of pita pockets
12 oz chicken breasts, cut into 1/2 inch pieces, cooked
1 cup cooked quinoa
1 can black beans, rinsed
2 tablespoons plain greek yogurt
1/2 cup salsa
1/4 cup cilantro, diced
Avocado (for garnish)

Directions
  1. Combine chicken, quinoa, black beans, greek yogurt, salsa and cilantro in a medium bowl.  Stir until ingredients are dispersed evenly.
  2. Spoon desired amount into pita pocket. Garnish with an avocado slice.
I'm thinking next time I make this I might shred the chicken instead of cubing it so that it sits in the pitas better.  The leftovers reheated well and tasted great just eaten plain.  Don't have plain greek yogurt on hand?  Try substituting sour cream, it will just be a little less healthy.  You could also substitute tortillas for the pita pockets if you prefer.


Friday, March 14, 2014

Hearty Chicken Pot Pie


Chicken pot pie has been my new craze! Since fall, whenever I've gone out to eat, I check to see if they serve chicken pot pie. Best of the best pies here in Madison has to be from the Great Dane. Hands down. Plus they serve it with a warm beer bread roll. My favorite! Pair it with a crisp glass of chardonnay and you're good to go.

Although there's butter galore and a flaky crust topping, I still would classify this recipe as a hearty and health dinner. Packed with vegetables and a lean protein, you're sure to hit a few food groups on this main dish. Plus, since it's all in one bowl, feel free to skip sides all together. Want another positive to this recipe? It can be prepared ahead of time and popped into the oven the day you want to eat it. For me, I made the pie the night before. I even had enough to freeze half to thaw the next time a crave this scrumptious pie.


Savory and filling, this chicken pot pie recipe is sure to please. And, excuse the nerd in me, but this recipe is coming just in time for Pi day! Yes, I planned making this recipe because of the mathematical day that gives us an excuse to make, eat and share all things pie.

Enjoy,
Brittany

Chicken Pot Pie

adapted from Tasteofhome.com

Ingredients
1 c. diced potatoes
1 c. sliced carrots
1/2 c. butter
1/3 c. chopped onion
1/2 c. flour
1 tsp. salt
1/2 tsp. thyme
1/2 tsp. pepper
2 tbsp. fresh parsley
1 1/2 c. chicken broth
3/4 c. milk
2 c. cubed chicken
1/2 c. frozen peas
1/2 c. frozen corn

Store-bought or homemade pie pastry, chilled

Instructions
1. Preheat oven to 425 degrees.
2. Cook cubed chicken on a skillet. Season with salt and pepper to taste. Set aside.
3. In a large saucepan, cover potatoes and carrots with water. Bring to a boil. Once boiling, reduce heat; cover and cook for another 8-10 minutes.
4. In a dutch oven, melt butter over medium heat. Add onion and stir until translucent.
5. Stir in flour and seasonings. Gradually stir in broth and milk. Bring to a boil. Reduce heat and stir constantly until thickened.
6. Stir in chicken, peas, corn and potato/carrot mixture. Remove from heat.
7. Unroll pie pastry and place in 9-in pie plate. Add chicken mixture. Cover with remaining pastry.
8. Bake 35 minutes or until crust is browned and mixture is hot.
9. Enjoy!

Sunday, March 2, 2014

Chicken Fajitas


The other day I was getting really excited about a new dessert recipe that I'm going to try making this weekend and I started thinking about this blog.  And how I missed it.  Did you know that it's been about a year and a half since I've posted?  Well it has, believe it or not.


Since then a lot of change has happened.  I graduated from college.  Moved out of the college apartment with the kitchen that my cooking adventures began in with Brittany and Emily.  Had a short stint living at home with the parents.  Moved into an apartment with the boy where I now have my own kitchen that actually gets natural lighting (exciting stuff for a food blogger.)  Started a professional job where my cooking habits have drastically changed (getting home from work at 6:00 is the poops.)  And I've had a major camera upgrade!


I went through and was cleaning pictures off of my fancy shmancy camera (which I still barely know how to use) a couple days ago and discovered these chicken fajita pictures that I shot back in the fall (hence the spiderweb place mats.)  If I recall correctly they were pretty easy to make, don't actually take that long to make if you pre-cut all the vegetables and of course are mighty tasty!


Recipe from Skinnytaste.

Ingredients:

  • 16 oz boneless skinless chicken breasts
  • 1 red bell pepper, cut in strips
  • 1 green bell pepper, cut in strips
  • 1 medium onion, cut in strips
  • 3 tbsp lime juice (I substituted lemon since that's what I already had)
  • 1 tsp ground cumin
  • 1 tsp garlic powder
  • pinch ancho Mexican chili powder, to taste
  • salt and pepper to taste
  • 2 tbsp olive oil
  • 8 reduced carb whole wheat flour tortillas
  • Optional garnishes: sour cream, guacamole, reduced fat shredded Mexican cheese
Directions:
  1. Marinate chicken with lime juice and season with chili powder, salt, pepper, garlic powder and cumin.
  2. Season vegetable with salt and pepper and toss with olive oil.
  3. Cook vegetables over medium heat in a skillet for 16-18 minutes covered, until the peppers and onions are soft.
  4. While the vegetables are cooking, grill chicken, either outdoors on a grill or indoors using a grill pan on the stove, until cooked through.  Cut into strips.
  5. Combine chicken and vegetables and serve immediately on warmed tortillas with desired garnishes.

Wednesday, September 26, 2012

Cheesy Jalapeño Stuffed Chicken

I'm back!  That's right, my last post was in May, can you even believe it!  I spent 8 weeks this summer in Europe studying abroad in Toledo, Spain and then doing a little backpacking as well with my fellow blogger Emily.  When I got back in mid-August who knows what happened because I had been wanting to cook and bake the entire time I was in gone.  For some reason it took until now to get things rolling again.  But here I am, finally back at it again and with this cheesy jalapeño stuffed chicken to get things started again.


Bear with me as I have downgraded my camera since my last post.  (My mom wanted hers back apparently.)  I'm thinking a new camera is going to be the main item on my Christmas list this year!  Not to mention I haven't really gotten this whole lighting and editing thing down yet.  My photography skills are a work in progress to say the least.


I hope you enjoy!  I served my chicken with roasted red potatoes, a simple vinaigrette salad, and a tall glass of milk to balance out the hotness from those jalapeños (I left the seeds in.)

Recipe adapted from Skinnytaste.

Ingredients

  • 2 slices center cut bacon, cooked and crumbled
  • 2 jalapeños (remove seeds if prefer more mild)
  • 3 oz 1/3 less fat cream cheese (about 1/3 cup)
  • 2 oz reduced fat shredded cheddar cheese (about 1/4 cup)
  • 2 oz shredded pepperjack cheese (about 1/4 cup)
  • 2 tablespoons green onion, chopped
  • 6 skinless chicken breast cutlets, about 3 oz each
  • 1/2 cup panko breadcrumbs with italian seasoning
  • 2 limes, juice of
  • 1 tablespoon olive oil
  • salt and fresh pepper
  • olive oil non-stick spray
Directions
  1. Wash and dry chicken cutlets and season with salt and pepper.
  2. Preheat oven to 450 degrees.  Lightly spray baking dish with non-stick spray.
  3. In a medium bowl, combine cream cheese, cheeses, green onion, jalapeños and bacon crumbles.
  4. Lay out chicken cutlets and spread an equal amount of cheese mixture on each.  Roll each cutlet and secure ends with toothpicks.
  5. Combine olive oil and lime juice in a small bowl.  Place bread crumbs in another.
  6. Dip chicken in liquid mixture and then in bread crumbs.  Set seam-down in baking dish.
  7. Lightly spray top of chicken with olive oil spray.
  8. Cook for about 25 minutes and serve.

Sunday, July 29, 2012

Crunch Chicken Tenders

Over the weekend, my boyfriend and I spontaneously decided to have lunch at Fratello's, a super good restaurant (one of my favorites) that is in my hometown, Appleton. Fratello's has two locations in Appleton and one in Oshkosh. I recommend going to any of them if you ever get the chance. Besides great and unique food, the atmosphere is classy and romantic. Another bonus is that everything is priced well, even for college students like my boyfriend and I. Stuart and I were running errands in our comfy clothes, picking up a golf glove for me and Brewers T's when we got pretty hungry. We really didn't want fast food from the Fox River Mall food court and that is when we spotted Fratello's. The one we went to is actually attached to the mall, so it's not as fancy and doesn't have a water view, like the other two. I would never wear athletic shorts and a t-shirt to the water front locations, but hey, this one is in the mall so we figured it would be fine.


Ok, ok, I'll stop raving about Fratello's...lets get to the recipe. So Fratello's is known (at least in my family) for their crunch chicken tenders. They're served as an appetizer but I think they would make a perfect meal, too. They are sweet and crunchy strips of lightly breaded chicken tenders served with honey dijon mustard. After Stu and I went there for lunch and split the chicken tenders, I wanted to recreate them at home.


And that is exactly what I did! They turned out pretty close to Fratello's. I was impressed with myself and I think Stu was too.

Crunch Chicken Tenders 

Ingredients
1 lb chicken breasts, precut into strips (I was feeling a bit lazy with cutting the chicken myself)
approx. 3 c. Cap'n Crunch cereal
1 c. milk
1 egg, scrambled (optional, I didn't have an egg so I used more milk)
1 1/2 c. pancake mix
2 Tbsp. butter
Kosher salt
small amount of sugar

Instructions
1. Pour the Cap'n Crunch into a large ziplock bag. Crush with hands or a rolling pin but be careful not to puncture the bag. You could use a blender or food processor also.
2. Add some salt and sugar to the crushed cereal. I didn't actually measure anything. These two ingredients I did to my taste preference.
3. Place the cereal, milk, pancake mix and scrambled egg into separate bowls.
4. Dip a chicken strip into the milk and then coat with the pancake mix.
5. Then dip the strip into the egg (or milk if you don't have an egg, like me) and coat with the cereal.
6. Place strip on a plate and repeat 4-6 for all the chicken strips.
7. Heat up a skillet with the butter at about medium heat. Add the chicken strips once the butter is melted.
8. Cook for about 4 minutes on each side or until there is no pink left.
9. Enjoy with your favorite sides (I did onion rings and peas)!

Sunday, May 20, 2012

Grilled Chicken Breasts with Red Chile Oil

Summer weather is finally here to stay and so is this chicken. My dad LOVES this chicken. It has pretty much become a staple in our summer repertoire. Is it bad that I made this for mothers day, last weekend, when it is my dads favorite? My mom doesn't dislike, so I will go with its okay. Since this dinner was truly a family affair, it was rough trying to snap some pictures. My brother was hovering like a ravage beast. Apparently no one feeds him? When I was finally done, he polished off his chicken breast in record breaking speed. My dad jumped when I told him I was making this and my brother nearly chewed his hand off waiting to eat this; maybe it is a sign this is the perfect chicken for the men in your life.


The chicken gets brined, making it unbelievably juicy and moist. If you have never brined anything before, you don't know what you are missing. Make sure you let the water cool after you add the sugar and salt. If you don't, like me, nothing that terrible happens. It is probably just better to let it cool, not cooking the chicken slightly with boiling water. The little effort of a brine goes a long ways. The leftover chile oil is perfect on sweet potatoes too. If you don't want any leftover chile oil, half it. I recommend using it on veggies though or making chicken again this week!

xo

April

Courtesy of Fine Cooking
Ingredients:
For the chicken:
2 tablespoons granulated sugar
2 tablespoons kosher salt
2 cups water
6 boneless, skinless chicken breasts

For the chile oil:
1 tablespoon ground cumin
1 tablespoon ground coriander
1 teaspoon ground caraway seed
3 tablespoons ancho chili powder
1 teaspoon cayenne
2 garlic cloves, minced or grated on a micro plane
Salt
1 cup extra-virgin olive oil
1/2 teaspoon red wine vinegar

Instructions

  1. In a measuring cup, boil 2 cups of water combined with sugar and salt and stir to dissolve. Cool completely. Add the chicken breasts, cover, and refrigerate for 2 to 4 hours.
  2. To make the chile oil, combine all the ingredients in a medium mason jar (it is easier to mix as the spices and garlic settle) or measuring cup. Stir or shake before using. 
  3. Prepare a medium  gas grill. While the grill heats, remove the chicken from the brine, pat dry with paper towels, and let sit at room temperature.
  4. Toss the chicken in 4 tablespoons of the chile oil. Grill the chicken without moving until golden brown grill marks form, 4 to 6 minutes. Flip the chicken and grill until just cooked through. Transfer to a plate to rest a few minutes before serving. Serve and enjoy with the remaining chile oil on the side for dipping.


Monday, April 16, 2012

Cajun Chicken Pasta

I have learned to tolerate mushrooms.  I have never enjoyed them before now and would always pick them off my veggie pizza or ask them to be taken out of my dish at a restaurant.  I'm not sure if it was the thought of eating fungus or the texture, but I hated them.  I have realized though that mushrooms appear in many healthier recipes and that maybe I should start eating them.  That is how I have grown to tolerate mushrooms.


A couple of suggestions that I have for this recipe are to not be shy with the cajun spices.  I would've liked to have made it a little spicier.  Also, the final product ended up being a bit soupy.  I would suggest either making more noodles to start with, or just cooking some extra when it's time for leftovers (if there is any left!)  Also, make sure to remember to have all your veggies cut up before you start cooking.

Makes 7 1/2 cups.


Ingredients
  • 8 oz uncooked whole wheat linguine
  • 1 lb chicken breast strips
  • Cajun seasoning to taste (1-2 tsp)
  • Garlic powder to taste
  • 1 tbsp olive oil
  • 1 medium red bell pepper, thinly sliced
  • 1 medium yellow bell pepper, thinly sliced
  • 8 oz fresh mushrooms, sliced
  • 1/2 red onion, sliced
  • 3 cloves garlic, minced
  • 2 medium tomatoes, diced
  • 1 cup fat free low sodium chicken broth
  • 1/3 cup skim milk
  • 1 tbsp flour
  • 3 tbsp light cream cheese
  • fresh cracked pepper
  • 2 scallions, chopped
  • salt to taste
  • Smart Balance cooking spray
Directions
  1. Start preparing noodles according to packaging directions.  Set aside when ready.
  2. Combine milk, flour, and cream cheese in a small blender (like a Magic Bullet) to make a slurry.  Set aside.
  3. Generously season the strips of chicken with cajun seasoning, garlic powder and salt.
  4. Heat a large, nonstick skillet over medium-high heat.  Spray with cooking spray.  
  5. Add chicken and sauté until done, about 5-6 minutes.  Set aside.  (Depending on size of skillet you may want to cook half of chicken at a time.)
  6. Add olive oil to skillet and reduce to medium.
  7. Add bell peppers, onions, and garlic to skillet and sauté for 3-4 minutes.
  8. Add tomatoes and mushrooms to skillet and sauté until vegetables are tender, about 3-4 more minutes.
  9. Season with 1/4 tsp salt, garlic powder, and cracked pepper to taste.
  10. Reduce heat to medium-low and add chicken broth.  Pour in slurry stirring for about 2 minutes.
  11. Add chicken to skillet and adjust seasoning to taste, cooking another couple of minutes until hot.
  12. Add noodles and toss until well coated.
  13. Top with chopped scallions.
Slightly adapted from Skinnytaste.


Tuesday, March 6, 2012

Chicken and Broccoli Noodle Casserole


One of the things that I enjoy doing to give myself little breaks between during studying or while I'm drinking my coffee in the morning is to peruse around on Pinterest, Foodgawker, or other similar sites.  I have repeatedly come across recipes from a blog called Skinnytaste and I decided to check it out a little more closely.  Turns out this is a really awesome site and I suggest you take a look at it if you have never heard of it.  Gina, the author of the blog, posts low fat recipes complete with nutritional information, weight watchers points, and plenty of flavor!  This chicken and broccoli noodle casserole was the first recipe of hers I've tried, but don't be surprised if I post about more in the future.


Ingredients
  • 6 oz. Ronzoni Smart taste noodles (I used whole wheat egg like noodles, or you can use no-yolk)
  • 2 tsp oil
  • 4 cloves garlic, sliced thin
  • 12 oz (or about 2 1/2) cups fresh broccoli florets, chopped
  • 1 tbsp butter
  • 1 medium shallot, minced (I could not find a shallot, so I just used some yellow onion)
  • 3 tbsp all purpose flour
  • 1 3/4 cups fat free chicken broth
  • 1 cup 1% milk (I used skim)
  • 12 oz (I used 2 chicken breasts) shredded chicken breast*
  • 4 oz shredded reduced fat sharp cheddar cheese
  • Cooking spray
  • 3 tbsp shredded parmesan cheese
  • 2 tbsp whole wheat bread crumbs
Directions
  1. Cook noodles according to package directions until al dente.  Set aside.
  2. Heat oil in a skillet.  Add garlic and cook on medium heat until golden, about 1 minute.  Add broccoli and a little salt, sauté covered for about 3 minutes on medium heat until the broccoli begins to soften.  Set aside.
  3. Preheat oven to 375 degrees.  Spray a 9x12 inch casserole dish with cooking spray. (I used my 9x13 pyrex dish.)
  4. In a large pot, heat butter over medium-low heat.  When melted add the shallot and cook until soft 2-3 minutes.  Add the flour and a pinch of salt and stir well, cooking an additional 2-3 minutes on medium-low heat.
  5. Slowly whisk in the chicken broth until well combined over medium heat, making sure to whisk well for about 30 seconds.  Add milk and bring to a boil.  Simmer on medium heat, mixing occasionally until it thicken, about 6-7 minutes.  Remove from heat and add reduced fat sharp cheddar and 1 tablespoon of the parmesan cheese.  Mix well until the cheese melts.
  6. Add the shredded chicken, noodles and broccoli to the sauce and mix well until evenly coated.
  7. Pour into casserole dish and top with remaining parmesan cheese and bread crumbs.  Spray a little more cooking spray on top and bake for about 20-25 minutes.  Place the casserole under the broiler a few minutes to get the crumbs crisp and golden, being careful not to burn. (I did not do this last part with the broiler.)
Recipe courtesy of Skinnytaste.


*I decided to boil my chicken in water to keep it nice and moist.  This was the first time I had every cooked chicken this way.  I put the chicken breasts in a medium pot and covered them with water.  Bring the water to a boil and then reduce to a simmer.  Let chicken breasts simmer for 7-9 minutes.  Remove a piece and cut a slit in it to check for pinkness.  Cook more if needed.  Drain water and pull apart chicken with two forks.

Thursday, February 2, 2012

Michigan Chicken


If I had to pick my least favorite kind of cheese it would be blue cheese.  After that though, it would be Swiss.  I remember making a big deal the first time my mom said she was going to make this recipe that she found in our church cookbook because I did not want Swiss cheese anywhere near my piece of chicken.  My piece did not have any Swiss on it, but I soon learned that it is even more delicious with!  This recipe easily became a favorite of the entire family.


Recipe serves 8.  (I usually just buy one package of chicken that has 3 breasts in it and just half the recipe.  Sometimes I don't even half it if I'm really in the mood for the stuffing topping!)

Ingredients
  • 8 (1/2) boneless, skinless chicken breasts (raw)
  • 8 slices Swiss cheese
  • 1 can cream of chicken soup
  • 1 (8 3/8 oz.) chicken-flavored Stove Top stuffing
  • 1/4 cup water
  • 1/4 cup butter
Directions
  1. Preheat oven to 350 degrees.
  2. Place chicken breasts in a single layer in a 9x13 inch pan.
  3. Place one piece of Swiss cheese on top of each piece of chicken.
  4. Mix together water and soup in a small bowl.
  5. Spoon water and soup mixture over chicken pieces.
  6. Sprinkle stuffing over chicken pieces as well.
  7. Melt butter.  Drizzle over stuffing.
  8. Cook for about 55 minutes (covered for the first 40 minutes, uncovered for the last 15 minutes.)
Recipe Courtesy of Lil Haegele from the St. Andrews Parish Cookbook


As a side note, I have no idea what the significance of the name Michigan Chicken is.  I assumed it is a family recipe of some sort from the lady who submitted it to the church cookbook but I did some research using google and it looks like there's some more similar recipes out there!


Saturday, January 14, 2012

Chicken Fajita Pasta


Earlier this week I was trying to decide something to cook for dinner, and I came across this recipe that I had saved a couple of months ago to make at some point.  It's a pretty healthy meal to make which is great since I'm trying to eat healthier.  It ended up being pretty easy and quick to make once all of the vegetables were cut up and tasted delicious as well!

Ingredients
  • 6 oz whole wheat penne noodles
  • 2 teaspoons vegetable oil
  • Half of a large white onion cut into strips
  • 1 green pepper cut into strips
  • 2 garlic cloves, minced
  • 1 large chicken breast, cut into strips
  • 1 teaspoon cumin
  • 1 teaspoon dried oregano
  • 1/2 teaspoon salt
  • 1/2 teaspoon pepper
  • 1 cup chicken broth
  • 2 teaspoons corn starch
  • 1 tomato seeded and chopped
  • Reduced fat Mexican cheese
Directions
  1. Start cooking pasta according to package directions.
  2. In a large pan over medium heat, warm oil.
  3. Add onion and pepper and sauté.
  4. Once onion and pepper are softened, add minced garlic and chicken.
  5. Sprinkle spices onto chicken and vegetables once chicken is almost fully cooked.
  6. Whisk together chicken broth and cornstarch in a bowl and pour over chicken and vegetables.
  7. Once sauce has thickened, chicken is fully cooked, and noodles are done, toss contents of the sauté pan with the noodles and tomato.
  8. Top with cheese as desired.  Enjoy!
Recipe adapted from Mama Grubbs Grub


Friday, October 14, 2011

Chicken-pumpkin Enchiladas

There has been a plethora of sweet pumpkin recipes lately and I wanted to try using pumpkin in a savory way. I thought about pumpkin raviolis (next weekend?), but I decided that this was a much more original idea and slightly less work. I have been very excited all week to make these and was a bit panicked that I wouldn't be able to find anyone to make them for. My favorite part of cooking is sharing it with other people. I was thrilled when my roommate said she would love for me to make her enchiladas despite hating Mexican food and that her co-worker was going to join us too and we would watch the Brewer game. They both loved them despite being skeptical. If you have ever had sweet potato enchiladas they are very similar--a little sweet and spicy. The flavor of these and ingredients can really be tailored to your tastes, which is great. I threw a butternut squash in because it needed to be used. I decided to flash fry the corn tortillas to add a bit of flavor to them and make them more malleable. It is not necessary but I think it adds a nice touch. Hope you enjoy!

Ingredients:

Corn tortillas
3/4 cup grated pepper jack cheese

Enchilada Sauce:
1/4 cup vegetable oil
1/4 cup (scant) New Mexico chili powder
2 tbs flour
1 3/4 cup chicken broth
1 (80z) can tomato sauce
1/4 tsp (rounded) cumin
1/4 tsp onion salt
1/4 tsp cinnamon
2 garlic cloves grated or minced
salt to taste

Filling:
1 rotisserie chicken
1 small pumpkin (any works, I used a sugar pie)
1 small butternut squash
Vegetable oil
8oz goat cheese
3/4 tsp cumin
3/4 tsp chili powder
1/4 tsp cayenne pepper
1/4 tsp cinnamon
1/4 tsp salt

Instructions:
  1. Preheat oven to 350F. Cut the pumpkin/squash in half and remove seeds. Drizzle the insides with vegetable oil and sprinkle with a generous pinch of cumin and salt. Place them cut side up on a rimmed baking sheet and place on the middle rack on the oven for 30-40mins or until tender.
  2. For the sauce place the vegetable oil, chili powder and flour in a medium sauce pan over medium-high heat. Stir constantly, so it does not burn, until it starts to thicken and turn darker (about 1-3mins). Turn the heat down to medium and pour in the chicken broth, tomato sauce, cumin, onion salt, garlic and cinnamon. Stir to combine and thicken and remove from heat. Season to taste with salt.
  3. Shred the chicken using a fork and place in a medium bowl.
  4. When the pumpkin is cool enough to handle, spoon the flesh into a food processor along with the goat cheese, cumin, chili powder, cayenne pepper, cinnamon and salt. Pulse until combined to a somewhat smooth consistency.
  5. Put 3/4 cup of the pumpkin mixture into the enchilada sauce and stir to combine. Place the remaining pumpkin mixture in the bowl with the chicken and stir to combine.
  6. Preheat oven to 350F. In a 9x13 baking dish, spread 3/4 cup of the sauce evenly over the bottom of the dish. Heat a small skillet with 1/2 tsp vegetable oil over medium to medium- high heat. Place the corn tortillas in the pan one at a time and fry on each side for 15secs or until browned in spots, add more oil as needed. Fill each tortilla with 1/2 a cup of the pumpkin-chicken mixture and wrap closed, placing them seam side down in a the baking dish. Cover with 3/4 cup of sauce and sprinkle cheese over the top. Place in the oven and bake for 20mins or until cheese is melted and slightly golden.


Thursday, October 6, 2011

Chicken Pesto Pasta


I decided when I got back from class today that I wanted to cook something for dinner, so I started to think about what I had to work with.  I have a plethora of noodles because I like to buy them in all different shapes and sizes.  My noodles take up too much space in my cupboard, so I figured I should clear out some room in there since I only have a limited amount of cupboard space in an apartment of six.

I still consider myself to be a beginner cook and am still learning how to use spices, so I just used a jar of store bought pesto.  


First I put a medium size pot of water with a touch of salt in it on the stove to boil.  At the same time I started warming a large saucer with a large drizzle of extra virgin olive oil (regular olive oil works too).  

While that is going on, I took a large chicken breast and cut it up into strips.  I seasoned the strips with Morton Nature's Seasoning (any similar all seasoning would work) for a little extra flavor.


Once the water is boiling I poured about half a pound of rigatori noodles (any other shaped noodle with grooves in it for the pesto to sit in will work too) into the pot.  


Place the seasoned chicken in a single layer in the frying pan.


As the chicken cooks I cut it into smaller pieces because I like having chicken in as many bites of my pasta as I can!


Once the noodles and chicken are done cooking, strain the noodles and pour them into the frying pan.  Mix them in with the chicken.  Add spoonfuls of pesto and stir in to taste.  (I used about four spoonfuls or so.)


Serve as you wish!  I sprinkled a parmesan/asiago cheese mixture on top of my pasta.  The amount I made left lots of leftovers, which makes a quick and easy lunch when I get back from class and am starving.


Enjoy!

LinkWithin

Related Posts Plugin for WordPress, Blogger...