Showing posts with label cake. Show all posts

Friday, May 22, 2015

Roasted Strawberry-Rhubarb Buckwheat Biscuit Cake

Happy Memorial Day weekend, friends! I have this to die for strawberry-rhubarb biscuit cake. Ah-mazing.


Before we get to the food, I have to share how difficult it has been to get this post up. My cat has been a relentless snuggle bean. I can't sit down without her showing up and climbing into my lap.

I often complain how she doesn't give me enough loving, finding it very hard to kick her off my lap. When she was too slow to get on my lap before my computer, she still climbs on. Sprawled out, one leg on the keyboard, belly up. Cuteness.


As I write this she is sitting on my belly giving me the stink-eye. She has obviously claimed my lap as her own and has some computer jealousy.

It may be that she knows her mother, me, is about to leave her for two weeks and she wants all the snuggles she can get before that day arrives.
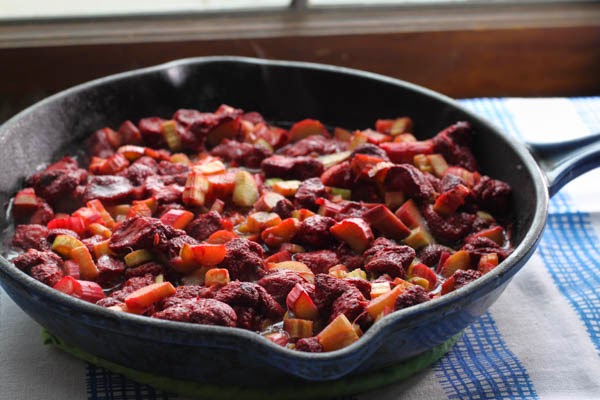
Now about this cake, cobbler, fruit and biscuit situation. It is maybe the most delicious thing I've ever made. I had frozen strawberries from last summer and rhubarb from the farmers market.

If you are using frozen berries, be sure to drain them. If you don't, you'll end up with way too much liquid. Which is bad. We don't want that. Set them in a strainer overnight on the counter or in the refrigerator.

Did I mention how easy this is to make? It took like 45 minutes all together, including dishes. The cake was gone in about the same amount of time. Remember, this is a judge free zone.

The biscuits come together really quickly, they are fairly doughy and dense, not so light and fluffy, but it worked for me. Using all white flour is totally acceptable.

I sort of just used what I had on hand. You could substitute creme fraiche or sour cream for the yogurt.


Roasting the fruit results in a super jammy and buttery consistency. I would have slathered it all over myself, if I had more of it. That is right, it is that good.

It is so good you want to sit down all alone, dim the lights and turn on your favorite cooking show and savor the moment.
xo
April

Ingredients:
for the fruit:
2 cups rhubarb, cut into 1/4 inch pieces
2 cups strawberries, fresh or frozen, if frozen, defrost and drain first
2 tablespoons granulated sugar
1/2 teaspoon vanilla
1/2 vanilla bean, scraped
2 tablespoons cornstarch
3 tablespoons butter
for the biscuits:
1 cup all purpose flour
1/2 cup buckwheat flour
1 1/2 tablespoons sugar
1 1/2 teaspoons baking powder
1/2 teaspoon sea salt
8 tablespoons butter, cold, cut into quarter inch cubes
1/2 cup full fat greek yogurt or creme fraiche
1/2 vanilla bean, seeds removed and scraped
for the egg wash:
1 large egg
splash of water or milk
brown sugar

Instructions:
  1. Place a rack in the middle of the oven, preheat the oven to 375F. 
  2. In a medium bowl, combine the first six ingredients for the fruit, tossing to fully coat the fruit. Place the fruit mixture into an 8-inch oven proof skillet or metal baking dish, placing small pads of butter on top of the fruit. Place in the oven to roast for 12 to 15 minutes. While the fruit roasts, prepare the biscuit dough.
  3. To make the biscuits, in a medium bowl whisk together flour, sugar, baking powder and salt. Add the cold butter and vanilla bean seeds and use your fingers to quickly break the butter down into the flour and sugar mixture. Some of the butter pieces will be the size of oat flakes, others will be the size of small peas.
  4. Create a well in the center of the flour mixture and add the cold yogurt . Stir with a spoon. The mixture will be rather wet. Shape the dough into a rough disk, dividing the dough into 6 pieces. Brush the top of each biscuit with the egg wash (whisk together one egg with a splash of milk or water) and top with brown sugar.
  5. Remove the strawberries from the oven and carefully place the biscuits over the hot strawberries. Return the skillet to the oven and bake for another 15-20 minutes, or until the biscuits are cooked through and the biscuits are golden.
  6. Remove from the oven, allow to cool until the strawberries are no longer bubbling, and serve warm.

Wednesday, February 11, 2015

Chocolate Merlot Truffle Cupcakes with Mascarpone Cream Cheese Frosting

These cupcakes are amazing. Totally perfect for Valentines Day, whether you love Valentines Day or think its just another hallmark holiday, marketing ploy, in that case they are any day perfect.


They might as well be a love potion, these cupcakes. You will love yourself more for making these on this fine upcoming hallmark holiday of love. Believe me.

Truffles are stuffed inside of each one for a little chocolate surprise. Who wouldn't love that? I sure don't know of anyone who wouldn't like it. I'd convert them with these cupcakes though. I'm sure of it.

A lot of recipes call for a little coffee when there is chocolate involved. Coffee and chocolate are a natural pair, but wine and chocolate are too. They both enhance the chocolate factor by 10.

It is quite possible that wine and chocolate are a better pair than chocolate and coffee...particularly if it is afternoon because it is more acceptable to drink after noon. Don't judge me. I'm still a college student for a few more months.


The truffle stuffed inside makes a little semi-molten extra rich chocolate center. These cupcakes are super moist (I'm sorry if you hate that word, but it is true AND have you ever looked at "moist" synonymous; way worse than moist when talking about food. Gross.) all on their own with no truffle but why you wouldn't want the chocolate center, I don't know.

Red wine makes these seem like a red velvet cake. Someone asked me if they were red velvet, which they might as well be.  Red wine velvet cupcakes.

Use any sort of somewhat fruity, well-rounded, smooth red wine that you would normally drink. I used a Merlot.

The wine complements the chocolate by bringing out the fruitiness found in chocolate. It is amazing. These cupcakes are the best cupcakes I've ever made. Maybe the best I've ever consumed. I wouldn't lie to you. Pinky swear.


The frosting in this recipe is probably my favorite frosting of all time. The combination of butter, cream cheese and mascarpone cheese are perfect. I'm always looking to get my boyfriend to say whatever I've cooked for him is the best he has ever had the pleasure of consuming.

This frosting did it. Best he ever had. It isn't too sweet either, which I like. It is honestly the only frosting I ever make. It is just the best. You must try it. Promise me.

Adding a little wine to the frosting is optional. I felt like it made it curdle a little bit, but gave it a lightly pink-red-wine color that I liked. I'd suggest not adding it if you are serving this to children.

These may be adult only cupcakes all together, between a glass of wine and a few cupcakes, I'm not entirely sure if the alcohol cooks off or not. I will let you make the call on serving these to children or not.


The cupcakes come together in around an hour, not counting cooling time. That is okay though. Just think of the time it takes for the cupcakes to cool as the perfect excuse for a glass of wine.

You should probably be drinking a glass while making these. Hell, you should probably just buy two bottles of wine.

Maybe save the second bottle of wine for after the cupcakes are out of the oven, you don't want it going to your head. Dry, overcooked cupcakes are bad, but not as bad as a fire.Either situation is no good though.


I bet you can find time to make these this week. Maybe this weekend, more time to enjoy some wine on a weekend. Treat yourself either way on this lovely hallmark holiday weekend.

I know I'll be treating myself to a to be determined home cooked meal, with white Russians and the Big Lebowski for dessert. I want to know what your plans are! How are you treating yourself this Valentine's day?

xo
April 

Makes about 24 cupcakes
Ingredients:
 for the cupcakes:
24 cupcake liners
24 truffles, such as Lindt Irresistibly Smooth Dark Chocolate Truffles
2 cups all-purpose flour
3/4 cup natural unsweetened cocoa powder, sifted
1 1/4 teaspoon baking soda
1 teaspoon baking powder
1 teaspoon cinnamon
1/2 teaspoon kosher salt

1 cup (2 sticks) unsalted butter, at room temperature
1 1/2 cups granulated sugar
2 large eggs
1 teaspoon vanilla
1 cup Merlot wine (or other red wine)

for the frosting:
1 cup (2 sticks) unsalted butter at room temperature
1 cup (8 ounces) cream cheese at room temperature
2 cups powdered sugar
1 teaspoon vanilla extract
3-4 tablespoons Merlot wine (or other red wine)
Pinch of kosher salt
1 cup (8 ounces) mascarpone (Italian cream cheese, available at most grocery stores)

1/4 cup cocoa powder, for dusting

Instructions:
for the cupcakes:
Heat the oven to 350°F. Line a cupcake pan with 24 cupcake liners, placing a chocolate truffle (I used Lindt truffles) in each cupcake liner. Combine the flour, baking soda, baking powder, salt and cinnamon in a medium bowl, sifting the 3/4 cup cocoa over the top of the flour mixture.

Cream the butter and sugar in an electric mixer, beating until the mixture is light and fluffy, 3 to 5 minutes. Add the eggs, one by one, and then the vanilla, and continue beating 1 to 2 minutes. With the mixer on low, mix in a third of the flour mixture into the wet ingredients and then pour in a third of the Merlot. Mix ingredients together until just combined. Continue this process two more times, alternating between the flour mixture and the wine into the cake batter. (be sure to not over mix the batter, in between each addition it is okay if they are not fully combined until the end.)

Fill each cupcake liner 3/4 of the way full, baking for 15 to 20 minutes; a metal skewer inserted in the cupcake (slightly off to the edge because of the truffle) should come out clean. Let the cupcakes cool 10 minutes in the pans, then place them on a rack to cool completely. While the cupcakes cool, make the frosting.

for the frosting:
In the large bowl of an electric mixer fitted with the paddle attachment, beat the butter, cream cheese, and powdered sugar on medium-high speed until light and fluffy. Scrape down the edges of the bowl and add the vanilla, mixing on low to combine. Then with the mixer going, stream in the 3-4 tablespoons of wine, until combined.

Beat in the mascarpone on very low speed until just combined. (Be careful; once you've added the mascarpone, excessive beating can make the frosting curdle.)

Frost the top of each muffin with the icing.

To finish the cupcakes, sift a little cocoa powder over the top of each one and then top with a truffle (optional).

Frosting slightly adapted from The Pastry Queen Christmas

Wednesday, October 8, 2014

Dulce de Leche Pumpkin Cake

Its pumpkin time! Hopefully you aren't already sick of everything pumpkin because we got a lot of pumpkin coming your way.


Do we all remember better than sex cake from about 10 years ago? That is what I was going for here, pumpkin better than sex cake. Because I can't seem to help myself, I not only changed the cake to pumpkin but changed the sweetened condensed milk to dulce de leche.


This is not a typical recipe for me at all. I'm usually very against boxed cake. It doesn't take that long to mix up your ingredients, lets be honest, but sometimes you have to trash things up and make them super easy, semi-homemade and decadent, because sometimes they just taste better that way.

Whip cream is another easy thing to make at home, but it doesn't really stand up to cool whip. I'm secretly a huge fan of cool whip amongst other super processed dairy items. Nacho cheese, anyone? Velvetta?!  Love. I try to avoid them because they are so processed, but sometimes you just have to give into that guilty pleasure.


Back to the cake, you can choose to use the sweetened condensed milk and not turn it into dulce de leche, but I think you would be missing out. There isn't any work involved in making it, other than making sure it stays covered in water. You wouldn't want it to explode. Not to alarm you, but honesty is important in any relationship.


The cake is sort of dense, chewy and moist. It isn't overly sweet. I really like that some, but not all, of the dulce de leche soaks into the cake while some rests on top too. So indulgent and fall like! It got rave reviews from all my friends and by friend I mean my boyfriend and dearest friend, Leah, who also happens to be the photographer for this post!

xo,
April

Ingredients:
1 can sweetened condensed milk (label removed)

1 box yellow cake mix
1 14 oz. can pumpkin puree
1- 8oz container cool whip
1/2 cup heath bits

Instructions:
Dulce de leche:
  1. In a large pot, fill with water to cover the can of sweetened condensed milk. Over high heat, bring to a boil Let simmer for 2 1/2 to 3 hours, making sure to add more water as necessary. Remove the can of dulce de leche from the water and let cool to room temperature.
Pumpkin cake:
  1. Preheat an oven to 350F. Grease a 9 x 13 inch baking dish and set aside. 
  2. In a large bowl, combine cake mix and pumpkin puree (add only the pumpkin puree to the cake mix; DO NOT add any of the ingredients listed on the box, like eggs), until a smooth batter forms.
  3.  Pour batter into prepared pan (it was pretty thick and made a thin layer, not to fear though!) and bake for 20 to 25 minutes. 
  4. Remove cake from pan and let cool for 10 minutes. Using the end of a wooden spoon, poke holes all over the cake. 
  5. Place the dulce de leche in a microwave safe container and reheat for 30 seconds and pour over the cake, spreading evenly over the cake and filling in the holes (a spatula is helpful here depending on how viscous the dulce de leche is). Refrigerate the cake for 30 minutes or overnight.
  6. Spread cool whip evenly over cake and sprinkle heath bits evenly on top. Cake is best enjoyed in 2 to 3 days.
Similar posts: Pumpkin Cheese Cake, Pumpkin Chocolate Chip Bars, Cranberry Upside Down Cake

Thursday, August 30, 2012

Poppy Seed Cake with Lemon Buttercream

Awhile back my boyfriend's mom found a recipe in a Penzey's spices magazine she wanted to try. Knowing how much I like to be in the kitchen, she photocopied this recipe for a poppy seed cake and gave it to me. So, when my boyfriend and I decided to visit his parents this past weekend, I had to make this cake for them!


 I always get nervous baking for anyone. There is so much pressure I put on myself to make it perfect! But I didn't just have the cake to make right. I had an hour and a half drive that the cake had to outlast. First obstacle was the 90 degree weather with humidity on Friday. I made the cake Thursday night and then I was going to frost it Friday right before we left town. We didn't have our air conditioning on at the apartment so I was super nervous the frosting was just going to melt off. Luckily, it lasted. I packed ice to go over my new glass cake set (I found it at Target!) for the car ride. This seemed to work well. However, there was one more obstacle, being in a bumpy car. I actually had the cake at my feet (where the air conditioning could blow at it). My feet straddled it and they cramped up a few times to say the least...

Unfortunately, the cake still ended up bumping around and frosting seemed to be everywhere! Fortunately, my boyfriend's parents are forgiving and were still pleasantly surprised! Well, and I fixed it up quickly when no one was in the kitchen. 


Everyone enjoyed the cake! It was moist and light. The poppy seed flavor was perfect and of course the famous complement of lemon was not hidden nor too overpowering. This is a perfect spring or summer treat, especially in hot weather. I think it would be perfect for a brunch dessert but it would make a great ending to any meal of course. 

Poppy Seed Cake
adapted from Penzeys

Ingredients
1/2 c. whole poppy seeds
1 c. milk
3/4 c. butter, room temperature
1 1/2 c. sugar
1 tsp. vanilla extract
2 c. cake flour
2 tsp. baking powder
4 egg whites

Instructions
1. Soak the poppy seeds in the milk for at least 2 hours.
2. Preheat the oven to 375.
3. Cream the butter until fluffy. Add the sugar and vanilla and mix.
4. Add the poppy seeds/milk mixture.
5. Gradually add the dry ingredients (cake flour, baking powder).
6. Beat in a separate bowl the egg whites and add to the other ingredients once frothy.
7. Pour batter into 2 greased 9-inch cake pans, trying to add the same amount to each. Bake in preheated oven for about 25 minutes.
8. Let the pans cool for at least 5 minutes before transferring the cakes to wire racks to finish cooling.
9. Completely cool before frosting. Try the lemon buttercream recipe below or use a filling and frosting of your own!
10. Enjoy!

Lemon Buttercream Frosting

Ingredients
1 c. butter, room temperature
3 3/4 c. powdered sugar
1 medium lemon, zest and juice
1 tsp. vanilla extract
pinch of salt
*milk may be needed

Instructions
1. Cream butter, vanilla extract and salt.
2. Add the lemon zest and juice (don't let the seeds fall in).
3. Gradually add the powdered sugar to create a consistency that allows peaks to form when a spatula or fork leaves the frosting. You may not need to add all the powdered sugar. If the frosting becomes too firm, add a small amount of milk (a tablespoon or two) to thin it out.
4. Frost on the poppy seed cake from above (or this frosting would taste great on lemon or vanilla cakes).

Saturday, June 16, 2012

Perfect White Cake


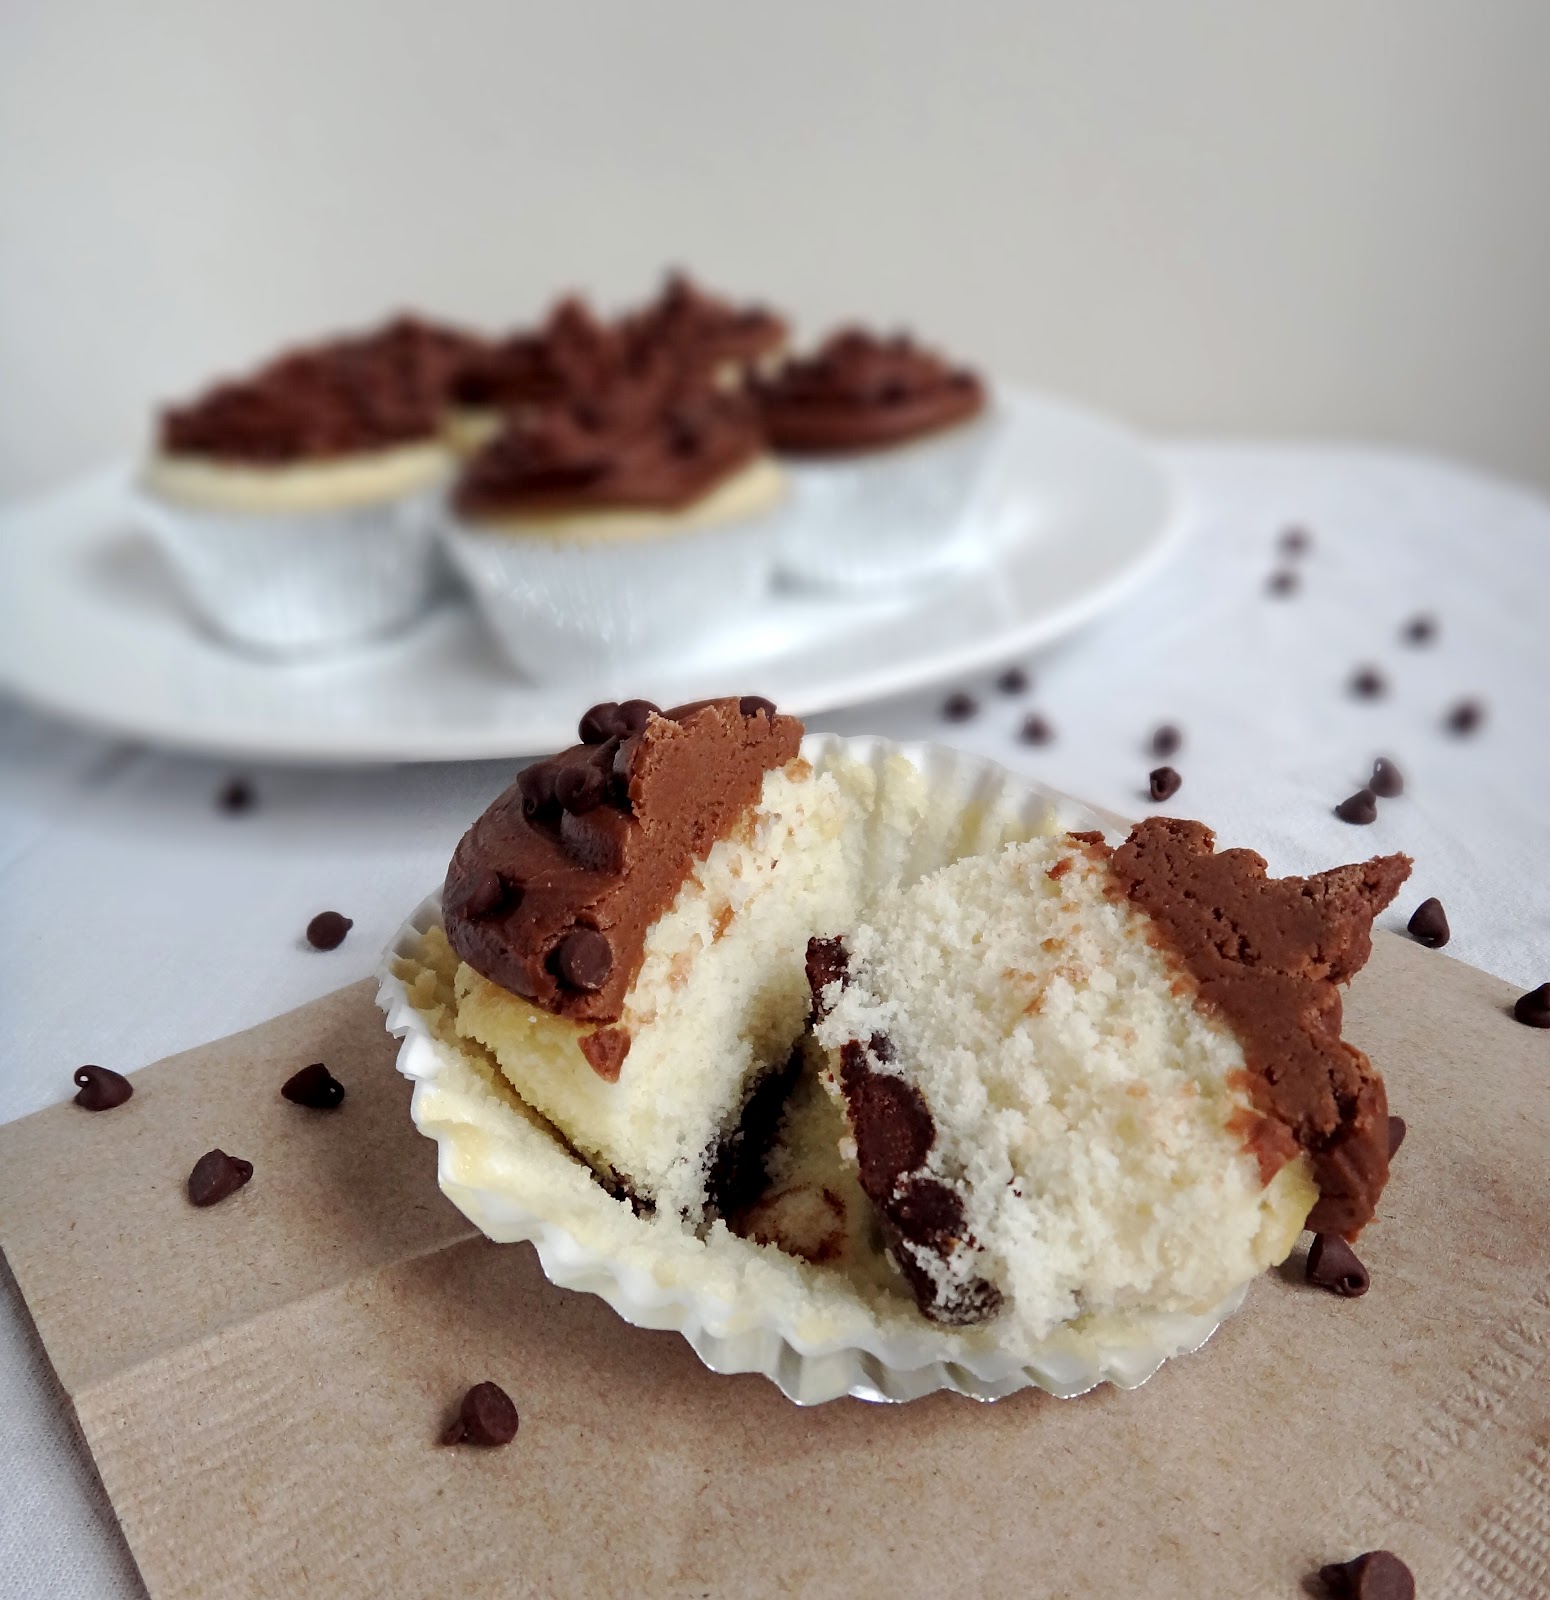
Earlier this week I found out great news from my boyfriend - he got a raise at work! He deserved it and I couldn't be prouder of him! I wanted to celebrate so I asked him to pick a dessert that I could make. With some deliberation, we decided on white cupcakes with chocolate chips and Ghirardelli chocolate frosting. The last time I made white cupcakes, found here, I thought they were a little too dense and tasted a bit like pancakes (yes, I just said pancakes). So I was determined to find a better recipe that would make a fluffy, light but still moist cake. This recipe does the job, hands down! It is light and has the perfect flavor to accent any type of frosting.


The recipe calls for cake flour, which I have never worked with before. I did some research and found that cake flour is better for fluffier results. I had to try it, especially because that was one of my complaints about the last cupcakes. I was very happy with the results! The only problem with these extra light and tasty cupcakes is that our chocolate chips sank to the bottom! However, it makes for a yummy surprise!

Perfect White Cake 
adapted from allrecipes

Ingredients
2 3/4 c. sifted cake flour
4 tsp. baking powder
3/4 tsp. salt
4 egg whites
1 1/2 c. white sugar
3/4 c. butter
1 c. milk
1 tsp. vanilla extract 
1 1/2 c. Ghirardelli chocolate chips

Instructions
1. Sift together cake flour, baking powder and salt. Set aside.
2. In a mixing bowl, beat egg whites until frothy. Add 1/2 cup of sugar gradually and beat until soft peaks form. Set aside. 
3. In another bowl, cream butter and the remaining cup of sugar. Alternating between sifted ingredients and milk, gradually add to bowl and mix. 
4. Add in vanilla extract and meringue (the egg whites/sugar mixture). Be careful not to over-mix. To help avoid over-mixing, I folded in the meringue instead of using a hand mixer. Fold in chocolate chips, if desired.
5. Spread batter in a large cake pan or scoop into a lined cupcake pan. The recipe makes a few more than 24 cupcakes.
6. Bake at 350 degrees for 30 to 35 minutes for a cake, 20 to 25 minutes for cupcakes. Cool in pan for 5 minutes and then transfer to a wired rack.
7. Frost with your favorite recipe or the one below once completely cooled. 


We made chocolate frosting found on the can of Ghirardelli's sweet ground chocolate and cocoa for these cupcakes. I struggled to get the perfect consistency. I actually made the frosting twice! The first time I added too much sugar so I scraped it off and tried again. The second round turned out great! It still had a bit more powdered sugar than the recipe called for so it was a good thickness. So don't be afriad to use a little more than the recipe calls for.

Ghirardelli Chocolate Frosting

Ingredients
1/4 c. butter
3 Tbsp. milk
1/2 c. Ghirardelli sweet ground chocolate and cocoa
2 1/2 c. powdered sugar
1/2 tsp. vanilla extract
dash of salt

Instructions
1. Melt butter in a saucepan on low heat. Add milk and ground chocolate and cocoa. Remove from heat
2. Add powdered sugar, salt, and vanilla.
3. Beat until smooth
4. Frost onto the cupcakes above or your favorite baking good

Friday, June 8, 2012

Strawberry Shortcake


The roomie and I went on a Target run the other day. Honestly I don't remember what we needed in the first place, but we for sure left with more junk than we needed. Target, the best place ever. Anyways, we were in the refrigerator aisle, with the Jell-O. Turns out she really likes the Jello-O Mousse Temptations. Personally I think they are sick. Your spoon leaves a perfect indent where you scooped, the texture is all wrong and the list goes on. Maybe I deserved her next comment after sharing my thoughts on Jell-O Mousse. She compared my butterscotch pudding to these pre-packaged mousse puddings. That right there is a total food foul, an insult!


The moral of the above story is comparing my food to packaged, processed food is not the way to make me like you. She won't be hearing the end of that one for awhile. A better way to make me your best friend is to tell me its the best you ever had, like this shortcake. A friend told me this shortcake is better than his aunts. Score! That is saying a lot too, when the family gathering is centered around strawberries. Those are the sorts of food praises I never forget. Why you ask is it the best?


This shortcake is not your overly crumbly or dry shortcake. It is super moist and a cross between dense and fluffy. The perfect shortcake. The outside has a slightly crunch sugar coating from sprinkling the pan and top of the cake with sugar. Try it out for yourself, I promise you will like it. Who knows, maybe it will even be the best shortcake you have ever had!

xo

April

From Epicurious
Ingredients:
Nonstick vegetable oil spray
1 1/2 cups cake flour
1 1/2 teaspoons baking powder
Pinch of salt
1 cup plus 1 tablespoon sugar
1/2 8-ounce package cream cheese, room temperature
1/4 cup (1/2 stick) unsalted butter, room temperature
3/4 cup whole milk
2 large eggs
1/3 teaspoon vanilla extract
1 quart strawberries; rinsed, hulled and sliced
Sugar, depending on their sweetness

Instructions:
  1. Preheat oven to 350F. Spray a 9-inch diameter pan with 2-inch-high sides with nonstick spray. Sprinkle bottom and sides of pan with sugar; tap out any excess sugar. Whisk flour, baking powder, and sugar in a medium bowl. Using a stand mixer, beat 1 cup sugar, cream cheese, and butter to blend. Beat milk, eggs and vanilla in a measuring cup to blend. Beat milk mixture into cream cheese mixture. Add dry ingredients; beat until smooth. Transfer batter to prepared pan. Sprinkle remaining 1 tablespoon sugar over top of the batter. 
  2. Bake until the cake is golden brown on top and tester inserted into center comes out clean, about 35-40 minutes. Cool in pan, on a rack.
  3. For the strawberries, add enough sugar for the desired sweetness. Let strawberries stand at room temperature for at least 30 minutes or until some of their juices are released.


Monday, May 28, 2012

Chocolate Upside-down Cake


This is one of my all-time favorite chocolate desserts for more than one reason. It is super simple, has little ingredients, and a rich flavor. However, it's at the top of the list because it is close to my heart. This recipe was rarely made for special occasions or on holidays. It was a recipe my mom would make for my sisters and me when we needed a pick-me-up or when we all craved some delicious chocolate! It is the ultimate chocolate comfort food.

For the past couple of years, no one in the family has made Chocolate Upside-down cake. My mom passed away the summer before my senior year of high school. I guess we all stayed away from this recipe because it was too hard. This passed Mother's Day, I made Chocolate Upside-down cake for the first time without my mom. It was bittersweet. However, today I see this dessert as a way to preserve a memory of a wonderful mother that will always be missed.   


Chocolate Upside-down Cake

Ingredients

Cake:
3/4 c. white sugar
3 Tbsp. cocoa
1 1/2 Tbsp. melted butter
1/2 c. milk
1 1/2 tsp. baking powder
1/8 tsp. vanilla extract 
3/4 c. chopped nuts (optional) 

Sauce:
1/2 c. white sugar
1/2 c. brown sugar
3 Tbsp. cocoa
1 1/3 c. boiling water

Instructions
1. Preheat oven to 300 degrees.
2. Mix cake ingredients in a large bowl.
3. Pour into a 2 quart baking dish.
4. Mix sauce ingredients in the same bowl and pour on top of the cake batter. 
5. Place in oven and bake for 45 minutes.
6. Sprinkle cocoa on top if desired and serve warm.
7. Enjoy!


Friday, May 4, 2012

Margarita Cupcakes

I have been planning to make these cupcakes all week, by Thursday night all the anticipation turned into was me craving a real margarita. On a Thursday night, you can't say no to that craving and needless to say giving in made the wait for these guys a lot less painful. Not only is tomorrow Cinco de Mayo but Mifflin Street block party too. These were perfect for my more classy weekend plans. I don't actually plan to go to Mifflin. Instead, I will be enjoying one of these bad boys, with a real margarita on the side watching the chaos from my balcony. There might also be one or all of these in addition to the cupcakes to make it a real fiesta: black bean & bacon taquitos, red chile rice, drunken pinto beans, tomatillo salsa or Mexican macaroni. Its a go big or go home kind of day!


Now about the cupcakes. They actually taste like a margarita, without the tequila being overpowering (for the tequila haters out there). I would recommend using a decent white/silver tequila. The same thing holds true with booze as wine: cook with something you would want to drink. The buttermilk and lime juice adds a nice tang to the super moist cupcake. The frosting is sweet and a bit salty, just like a margarita should be. These are not just good for Cinco de Mayo but any summer pot luck or BBQ. They don't take any more time than your standard cupcake, but the wow factor is bigger. When you do make these, which I know you will, plan on making them in the afternoon and enjoy a nice margarita on the side while they bake and cool.

xo

April

Makes 12 cupcakes, adapted from Brown Eyed Baker
Ingredients:
Cupcake:
1 1/2 cups unbleached all-purpose flour
1 1/2 teaspoons baking powder
1/4 teaspoon salt
1/2 cup (1 stick) unsalted butter, softened
1 cup sugar
2 eggs
Zest and juice of 1 1/2 limes
3 tablespoons white tequila (such as Jose Silver, Milagro or Patron)
1/4 teaspoon vanilla
1/2 cup buttermilk
Frosting:
2 sticks butter, softened
2 cups powdered sugar
2 tablespoons tequila
Juice of 1/2 a lime (about 1 tablespoon)
A pinch of coarse salt

Instructions:
  1. Preheat the oven to 325F. Line a 12 cup muffin pan with liners and set aside. In a medium bowl whisk together the flour, baking powder and salt.
  2. In a mixer with a paddle attachment on medium-high speed, beat the butter and sugar until light and fluffy (about 5 minutes). Reduce the speed medium, adding the eggs one at a time until incorporated.
  3. Scrape the sides down and add the lime zest and juice, tequila and vanilla, mixing until well combined (it will start to curdle, but do not worry it will all come together).
  4. Reduce the mixer speed to low, adding the flour and buttermilk in alternating batches, starting and ending with the flour. Mix until just combined and give it one last stir with a spatula. 
  5. Divide the batter evenly between the tins and bake for 20-25 minutes or until slightly golden and when a toothpick is inserted moist crumbs come out. Cool the cupcakes in the pan for 5 minutes and then transfer to a rack to cool and brush with 1 tablespoon of tequila (I put the tequila in a glass to make a margarita in later with the leftover tequila!). Cool completely before frosting.
  6. To make the frosting, whip the butter in an electric mixer on medium-high for 5 minutes. Reduce the speed to low and gradually add the powdered sugar, scraping down the sides occasionally. Once it is well incorporated, add the tequila, lime juice and salt and mix until the frosting is light and fluffy. Frost the cupcakes and garnish with a lime wedge and zest. Enjoy!

Saturday, March 17, 2012

Irish Car Bomb Cupcake


Think of these cupcakes as a boozy deliciousness wrapped up in a pot o' gold. What could be better? These cupcakes are fashioned after the popular Irish Car Bomb drink, which is a variation on the Boilermaker cocktail. The Irish Car Bomb cocktail consists of dropping a shot of whiskey and Baileys into a 3/4 pint of Guinness. You have to drink it quickly or it will curdle! They are actually pretty tasty. If you have never tried one, you're in luck! There will be enough Guinness leftover to make your own while the cupcakes bake. 


Surprisingly these are not too boozy tasting. The Guinness in the cupcake batter enhances the flavor of the chocolate, similar to the way adding coffee would. These cupcakes have great flavor on their own. Make just the cupcake batter and top with your favorite frosting. You can pick up the flavor of the whiskey and Baileys in the chocolate filling and frosting but not in a bad way. If you are not into the boozy part of these cupcakes, substitute the Baileys with milk and don't add the whiskey. Happy St. Patty's day!

For the cupcakes:
1 cup Guinness stout
1 cup unsalted butter, at room temperature
3/4 cup Dutch-process cocoa powder
2 cups all-purpose flour
2 cups granulated sugar
1 1/2 teaspoons baking soda
3/4 teaspoons salt
2 eggs
2/3 cups sour cream

To make the cupcakes:
1. Preheat the oven to 350F. Line 24 cupcake cups with liners. In a small saucepan, bring the Guinness and butter to a simmer over medium heat. Remove from the heat and add the cocoa powder and whisk until the mixture is smooth. Set aside to cool.
2. In a medium bowl, whisk the flour, sugar, baking soda and salt to combine. In the bowl of a stand mixer, with a paddle attachment, beat the sour cream and eggs until combined. Add the Guinness-chocolate mixture to the egg mixture and beat to combine. With the mixture on low speed, add the flour mixture, beating until just combined. Divide the batter among the cupcake liners, using a 1/3 cup measuring cup. Bake for about 17 minutes and cool on a rack.

For the whiskey ganache filling:
6 ounces bittersweet chocolate
2 ounces unsweetened chocolate
2/3 cup heavy cream
2 tablespoons unsalted butter, at room temperature
1 tablespoon Irish whiskey

To make the ganache filling:
1. Finely chop the chocolate and transfer it to a medium bowl. Heat the cream in the microwave for 1-2 minutes, just until bubbles form around the edge of the measuring cup. Pour the cream over the chocolate and let it sit for one minute and then stir it until smooth. Add the butter and whiskey and stir until well combined. Let the ganache cool until thick but still soft enough to be piped.
2. To fill the cupcakes, cut the centers of the cupcakes out, to make a 1-inch circle that is 2/3 deep. Fill a sandwich bag with the cooled ganache and snip one corner of the bag to pipe into the cupcake holes.

For the Baileys frosting:
1 stick unsalted butter
2-3 cups powdered sugar
3 tablespoons Baileys Irish Cream

To make the Baileys frosting:
1. Using the whisk attachment of a stand mixer, whip the butter on medium-high speed for 3 minutes, scraping the sides of the bowl occasionally. Reduce the speed to medium-low and gradually add the powdered sugar. Add the baileys, increasing the speed to medium-high and whip for another 2 minutes, until it is light and fluffy.


Tuesday, February 21, 2012

Classic White Cupcakes


There was no special occasion for these cupcakes. Everyone thought I was crazy when I told them my only reason for making them was so I could test out my piping set that I got for Christmas (thank you again, parents!). This was the first time I ever piped frosting. It was an adventure. It was fun but also frustrating. I'm sure it will only get easier as I continue to practice.


This was also (surprisingly) the first time I have made cupcakes and frosting from scratch. I enjoyed it so much more than buying a boxed mix and a tub of frosting. I recommend everyone should try it sometime!

White Cupcakes
recipe from Betty Crocker's The Big Book of Cupcakes

Ingredients
2 3/4 c. flour
3 tsp. baking powder
1/2 tsp/ salt
1 2/3 c. sugar
5 egg whites
2 1/2 tsp. vanilla extract
1 1/4 c. milk
3/4 c. shortening or butter (I did 1:1 shortening and butter to total 3/4c.)

Instructions
1. Preheat oven to 350 degrees. Place 24 paper baking cups in a regular-sized muffin pan(s). This recipe yields 24 cupcakes.
2. In a medium bowl, mix flour, baking powder and salt. Set aside.
3. In a large bowl, beat shortening/butter on medium speed for 30 seconds. Gradually add sugar, beating well after each addition.
4. Add egg whites, one at a time and beat well.
5. Beat in vanilla extract.
6. On a low speed, alternately beat in the flour mixture and milk (adding increments of approximately 1/3c. each time).
7. Divide batter evenly between muffin cups, filling about 2/3 full (I found I had more batter left over if I filled them 2/3 full so I filled them closer to the top).
Note: If you only have one 12-cup muffin pan, allow the pan to cool before filling with the batter and cooking the second round.
8. Bake 18 to 20 minutes. Let cool in the pan for 5 minutes and then transfer to a cooling rack.
9. Enjoy now or frost with the buttercream recipe below when completely cooled.


Chocolate Buttercream Frosting
adapted from Savory Sweet Life

Ingredients
1 c. butter (2 sticks), softened
3 1/2 c. powdered sugar (I used 1/2 c. in addition to thicken)
1/2 c. cocoa powder
1/2 tsp. salt
2 tsp. vanilla extract
4 Tbs. milk
If piping, 1 small spoonful shortening (this will help the frosting maintain shape)

Instructions
1. Cream butter for a few minutes with a hand mixer.
2. Slowly add cocoa powder and powdered sugar until well blended.
3. Add vanilla extract and salt and mix.
4. Slowly add milk and beat for another 3 minutes.
Notes: if the frosting is too thin, add more sugar; if it is too thick, add more milk. The frosting can be refrigerated for a couple of days but allow it to get to room temperature before frosting cakes, cupcakes, etc. 


Tuesday, December 27, 2011

Cocoa "Cup" Cakes

I made this as another Christmas gift to my sister-in-law. The recipe is courtesy of Gale Gand, a Chicago chef. It is from another book, Chocolate and Vanilla, I had the pleasure of having the chef sign! She was outside of Cafe Soleil, before it moved and became Graze, in Madison during a farmers market. My mom thought I should get the book and have her sign it. How could I say no? She also hosted a phenomenal show on the Food Network, Sweet Dreams, a long time ago.
I have made these before with friends and it was loads of fun. Be sure to put these on a rimmed baking sheet. The first time I made them, we got carried away filling them and they overflowed like crazy. It looked really neat though and made for lots of laughing. I did it again this time, but not as bad, only half overflowed. The batter will be very thin, that is okay. If you don't want to make the recipe for 12, I have cut the recipe in half before. I used two eggs because I wasn't sure how to halve three eggs, and it turned out equally as delicious cut in half.
The recipe calls for dutch processed cocoa which has been treated with an alkali, neutralizing acidity unlike natural cocoa powder. It also has a more mellow flavor and dissolves in liquids more easily, according to her book. It needs to be used with recipes using baking powder. Because it is neutral it will not react with baking soda, unless other ingredients are sufficiently acidic. I have only tried making this recipe with dutch-processed, but the instructions only recommend it.
The final "cup" cake is super moist and chocolaty, without being too sweet. You can serve them with whipped cream, frosting, ice cream or marshmallows. If you go with marshmallows, throw the cupcakes back into the oven under the broiler for a few minutes. I hope you enjoy making these and they would even make a great gift!


Ingredients:
12 ceramic 8-ounce coffee cups
A rimmed baking sheet or roasting pan
3 cups sugar
2 3/4 cups all-purpose flour
1 cup plus 2 tablespoons cocoa powder, preferably dutch processed
2 1/4 teaspoons baking powder
2 1/4 teaspoons baking soda
1 1/2 teaspoons salt
3 large eggs
1 1/2 cups whole milk
3/4 cup vegetable oil
1 tablespoon vanilla extract
1 1/2 cups very hot water


Instructions:

  1. Preheat the over to 350F. Place the cups 1 inch apart on rimmed baking sheet.
  2. Combine the sugar, flour, cocoa, baking powder, baking soda and slat in the bowl of an electric mixing bowl with a whisk attachment. Blend to combine.
  3. In a medium bowl, whisk the eggs, milk, oil and vanilla until combined. Add to the dry ingredients, mixing on low speed for 5 minutes. With the mixer on gradually add the the hot water, stirring until well blended. The batter should be thin.
  4. Pour the batter into the coffee cups to halfway. Bake for 25 to 30 minutes. Enjoy them warm or reheated in the microwave!


Saturday, December 17, 2011

Cake Balls


My cousin and me before the
badger football game against Nebraska.
Before driving to our grandma's for Thanksgiving, my cousin, Addison, and I made cake balls. He wanted to learn how to make them and conveniently he goes to Madison, too. He came over to my apartment and the baking began. All you need is a cake mix, frosting, and confectioner's chocolate. Not only are there a small amount of ingredients (only 3!), the instructions are easy to follow. Be warned though, it can be a messy process. Addison was pretty surprised how messy you have to get when you mash the cake, add the frosting, and dip the cake in melted chocolate. None the less, he thought they were fun to make.
Plus, our family thought they were delicious! Even with stuffed bellies of turkey, potatoes, rolls, and snickerdoodle salad, we all made room for the cake balls.
One note I want to add, this cake ball recipe can be adapted to your taste. I used a yellow cake mix, chocolate frosting, and dark chocolate this time. However, feel free to use any kind of combination of cake mix, frosting, and confectioner's chocolate. I'm going to make these again for Christmas and I'm going to use two vanilla cakes, chocolate and vanilla frosting, and dark and white confectioner's chocolate. Plus, I'm going to add red and green sprinkles to decorate them!

Cake Balls
recipe from my fellow blogger, Emily

Ingredients
1 cake mix 
1 can of frosting                               
about 2 pounds confectioner's chocolate

Directions
1. Make the cake as instructed on the box. Allow cake to cool for at least 30 minutes
2. Using clean hands, mash the cake into granular pieces and place in a large bowl
3. Add the can of frosting and mix throughly. I find it is easiest to use your hands here, although you get pretty messy
4. Grab small portions of the cake frosting mixture and roll into balls. Place on wax or parchment paper that is on a cookie sheet. How many that you can make will depend on the size of the cake balls. Addison and I made about two and a half dozen.
*Helpful note: Clean your hands often with water and/or a paper towel because with messy hands, the cake/frosting mixture tends to stick to them and it becomes hard to roll them in nice balls.
5. Freeze/chill the cookie sheet of cake balls for approximately 15 to 20 minutes. This will make it much easier to dip in the melted confectioner's chocolate.
6. Melt the confectioner's chocolate on 50% power in the microwave for about 2 minutes, make sure to stir every 30 seconds.
7. With clean hands (again) dip the cake balls in the confectioner's chocolate and place back on the wax/parchment paper covered cookie sheet. 
*Make sure the cake balls are completely covered. Dip a finger in the melted chocolate and place over any exposed spots on the recently dipped cake ball if you see any cake not covered by chocolate.
8. Allow chocolate on the cake balls to harden by leaving on them on the countertop or placing back in the freezer or refrigerator. 
9. Enjoy once hardened or store in an air tight container on the counter top (or freezer - they're just as good cold!). 

Little update, here are my cake balls from Christmas: 


LinkWithin

Related Posts Plugin for WordPress, Blogger...