Showing posts with label cookies. Show all posts

Wednesday, February 4, 2015

One XL Chocolate Cookie


Have you ever had that deep craving that just won't go away? Especially when you're right in the middle of the week feeling great because you've worked out and eaten healthy? But that craving just keeps creeping in until you finally beg your fiancé to go get frozen yogurt? Unfortunately this happened to me (not unlike any other week) AND I got a disappointing answer from the fiancé. I get it, it's the middle of winter so who really wants a cold dessert. I was just looking for something on the less unhealthy side and something that would be one and done.

You see, I'm not the liker of the cake/cookie/brownie in a mug. That would be a good one and done dessert. But, they are unsatisfying to me. Am I crazy or have I just not found the right recipe yet? Anyway, I wanted something super good and satisfying to kick this craving to California. So, I knew the recipe needed to use the oven and eggs. But I didn't want a dozen and a half cookies or bars staring at me all week, asking to be eaten. One and done, guys, one and done.


This recipe does it all for me! Super quick and all the ingredients are already in my kitchen. The cookie was soft but had a crunchy outside, my favorite! And the chocolate flavor was perfect! I shared this bigger than I was expecting cookie with my fiancé. And I'm planning on making this again for Valentine's Day! It's a fun and special dessert just for two (or one, we're not judging!). Plus, no leftover dessert to crave over the next day, perfect for me and my fiancé who are trying to get into wedding attire shape :)


Slightly adapted from Sally's Baking Addiction

Ingredients
2 Tbsp. room temperature butter
2 Tbsp. granulated sugar
2 Tbsp. light brown sugar
2 Tbsp. beaten egg
1/2 tsp. vanilla extract
1/4 c. all-purpose flour
2 Tbsp. unsweetened cocoa powder
1/2 tsp. baking soda
Pinch of salt
1/4 c. chocolate chips

Instructions
1. Preheat oven to 350F degrees. Line a baking sheet with parchment paper.
2. In a medium sized bowl, cream the butter and sugars with a fork. Mix in the egg and vanilla.
3. In a separate small bowl, add flour, cocoa powder, baking soda, and salt. Pour into wet ingredients bowl and combine with fork. Fold in chocolate chips.
4. Mold dough into a ball and place in the center of the baking sheet. Bake for about 15 minutes.
5. Enjoy warm with your bestie or all by yourself!

Cheers,
Brittany

Wednesday, December 17, 2014

Small Batch Chocolate Chip Cookie Bars


I'll admit, there have been weak points in my life where all I've really wanted to do is indulge in a little bit of cookie dough.  The solution tends to be that I will whip up a batch of chocolate chip cookies, but since the cookies aren't the actual goal, for simplicity's sake the dough just get pressed into a 9x13 pan and voila, cookie bars.


The problem then becomes that you have a large pan of cookie bars sitting around the house that you will be constantly tempted to devour.  When there's only a couple of people in the house, it becomes a real test of your self-control.

To help solve this problem I came up with the very ingenious solution to simply make a smaller batch!  I can still get my cookie dough fix but with much less temptation after the fact.  The cookie bars are now made in a smaller 9x9 pan instead.


The bars don't lose any of their chocolatey cookie goodness with the smaller serving.  My only complaint is that as a middle piece lover, those perfectly soft pieces on all four edges become a hot commodity.  Any other middle piece lovers out there?  Or are you like my mom and sister who fight over the corners?  Not to worry, all pieces middle and edge alike can do the trick, especially when enjoyed with a tall glass of milk.

Enjoy!
Kelsey


Recipe adapted from Nestle Toll House Chocolate Chip Cookies

Ingredients:

  • 1 1/2 cups all purpose flour
  • 1/2 teaspoon baking soda
  • 1/2 teaspoon salt
  • 1/4 cup unsalted butter
  • 1/4 cup vegetable shortening
  • 1/4 cup plus 1 Tablespoon granulated sugar
  • 1/4 cup plus 1 Tablespoon brown sugar
  • 1/2 teaspoon vanilla extract
  • 1 egg
  • 1 cup chocolate chips
  • 1/4 cup dry oats
Directions:
  1. Preheat oven to 350 degrees.  Line a 9x9 pan with parchment paper and non-stick cooking spray.
  2. Combine flour, baking soda and salt in medium bowl.  Set aside.
  3. In a large bowl, mix together butter, vegetable shortening, sugar, brown sugar and vanilla extract.  Beat in egg.
  4. Mix dry ingredients into wet ingredients.
  5. Stir in chocolate chips and oatmeal.
  6. Press cookie dough into prepared pan.
  7. Cook for 20 minutes or until edges are golden brown.

Wednesday, October 22, 2014

Pumpkin Snickerdoodle Cookies

First there was Dulce de Leche Pumpkin Cake (yum), then there was Pumpkin Pound Cake (delish), and now I bring you Pumpkin Snickerdoodle Cookies because Badger Kitchen is currently chugging along on a pumpkin sweets train this month.


You know how there are those special moments in life that are just so memorable that you'll never forget?  I remember picking out our family dog because my sister and I decided he had the softest fur and getting to have him sit on my lap for half the ride home (sharing is caring).  I remember getting engaged and crying my eyes out for a good ten minutes afterwards.  I also remember the first time I baked and ate pumpkin snickerdoodle cookies in my college apartment on a crisp October.

Being the good daughter I am (and because my parents lived 20 minutes away so I'd go home to do laundry), I took my mom a couple of cookies to enjoy and shared the recipe upon request.  It then got shared with Gramma, sisters, aunts and so on.  And now here I am sharing it with you!


To say that these cookies are life changing isn't too far from the truth.  They are superior to the average snickerdoodle cookie thanks to the added pumpkin and spices.  The additional moisture from the pumpkin puree also keeps the cookies chewy, which is good if you're not a fan of hard cookies like me.

The original recipe that I found is so good that has received such rave reviews that I've never felt the need to alter it.  The only change I make is that sometimes I will add a little more pumpkin than the recipe calls for, depending on if I'm in a super pumpkiney mood or not.  Oh, and don't discriminate, pumpkin snickerdoodle cookies can be enjoyed year round!

Enjoy!
Kelsey


Recipe from Sweet Pea's Kitchen.

Ingredients:

  • 2 3/4 cup all-purpose flour
  • 2 teaspoons cream of tartar
  • 1 teaspoon baking soda
  • 1/2 teaspoon salt
  • 1/2 teaspoon pumpkin pie spice
  • 1 3/4 cup sugar, divided
  • 1 cup unsalted butter, softened
  • 1 large egg
  • 3/4 cup pumpkin puree (increase to 1 or 1 1/4 cups if desired)
  • 2 tablespoons ground cinnamon
Directions:
  1. Preheat oven to 400 degrees.  Line two baking sheets with parchment paper.
  2. In a large bowl, whisk together flour, cream of tartar, baking soda, salt and pumpkin pie spice.
  3. In the bowl of a stand mixer (or different large bowl to be used for mixing) cream butter and 1 1/2 cups sugar until light and fluffy, or about two minutes.  Beat in egg.  Then beat in pumpkin puree.  Add dry ingredients from separate bowl and slowly beat in.
  4. In a separate small bowl, stir together 1/4 cup sugar and cinnamon.
  5. Form dough into 1 1/2 inch balls and roll in cinnamon-sugar mixture until coated.  Space apart evenly on baking sheet.
  6. Bake one cookie sheet of cookies at a time for 10-12 minutes, or until edges of cookies are starting to brown but centers are still puffy and soft.
Tip: Cookies freeze well either after baking and fully cooled, or in dough ball form without cinnamon-sugar coating.

If you like this recipe, be sure to check out:

Thursday, September 4, 2014

Butterscotch, Chocolate Chip, Pretzel Cookies

I made these salty, sweet, crunchy, chocolaty cookies for my birthday! I am that person who makes their own birthday treats or dinner because that is what I love doing.


I brought them to share at work, but they were not necessary! My sweet co-worker brought in a Chocolate Shoppe ice cream cake and serenaded me while I worked the patio. It was embarrassing and sweet. The cake was amazing! AMAZING! Yum.

No fear though I shared these with friends after work and they got rave reviews. Because who doesn't love salty and sweet? It is the only way to go.


When I made these I didn't break up the pretzels before adding them to the batter like I write in the instructions. When I make compost cookies its fun to find whole pretzels in your cookie, having little pockets of pretzel pieces works better I think for these cookies though. You get a little pretzel in every bite this way.

If you didn't have pretzels on hand you could totally try adding potato chips instead! Anything that is  salty and crunchy.


You could easily use mini chocolate chips or all chocolate chips instead of butterscotch pieces. I had butterscotch pieces to use up and I like them together with chocolate so it just made sense.


Adding a little pretzel on top is a cute little way to let people know what is in your cookie. It is not necessary, but pretty dang cute I think. I bet you have all these ingredients in your cupboard and these are a fun and easy treat for you and your friends.


xo,
April

Ingredients:
1/2 cup unsalted butter, softened to room temperature
1/2 cup light brown sugar, packed
1/3 cup granulated sugar
1 large egg
1 teaspoon pure vanilla extract
1 1/4 cup all-purpose flour
1/2 teaspoon baking soda
1/4 teaspoon sea salt
1/2 cup chocolate chips
1/2 cup butterscotch chips
1/2 cup salted pretzels, broken up into medium pieces

Instructions:

Place a rack in the center and upper third of the oven and preheat oven to 350 degrees F. Line two baking sheets with parchment paper. Set aside.

In the bowl of a stand mixer fitted with a paddle attachment, cream together butter, brown sugar and granulated sugar. Cream until butter is pale and fluffy, about 3 minutes. Beat in egg and vanilla extract for one more minute. Add the flour, baking soda and salt and beat on low until almost just combined. Add the chocolate and butterscotch chips and pretzel pieces until just combined.

Scoop dough by the heaping tablespoonful onto the prepared baking sheet. Optional: place a whole pretzel on top of each cookie, pressing it in just slightly. Bake for 10 to 13 minutes or until the edges and tops are golden. Remove from the oven, allow to rest on the baking sheet for 5 minutes then transfer to a cooling rack to cool completely.

Store cookies in an airtight container at room temperature.

Monday, November 12, 2012

Compost Cookies


I'm going to be in a wedding! A bridesmaid to be precise! I don't know much about weddings. The last wedding and reception I attended was when I was like 5. We are lucky I remember that (I don't remember my childhood, much less what I did 3 days ago). Now I am in the wedding! We call it a wedding, but really its a statement of vows, or both. There never was a wedding or exchange of vows, whoops. So it is pretty much a wedding, I guess. How could this be, you ask?!

Did you know in Colorado you can have someone stand in for the other half? That is what my brother and now sister-in-law did. The best part was, the stand in for my sister-in-law was a dude. To be precise my parents best man. How cute?


It is probably important to know why they did this. She was at boot camp. He had already finished and was an officer, in the military. It isn't the best to sleep with your boss, ya know? Especially in the military. They just failed to think of this before she was confined to boot camp. Now the wedding is in February. They aren't much for the planning ahead. Excited none the less. Do you know anyone who has gotten married in this way? Or any good wedding laughs? I'd love to hear them!

Believe it or not, the above story is slightly related to these cookies. I'm mailing them to my sister-in-law, in Texas. Another twist to their little love story: they've spent a lot of time apart. BUT she comes home in 2 1/2 weeks, for good!


These cookies are from the Momofuku Milk Bar cookbook. This is a pretty great book. A lot of it is pretty involved  but oh so very interesting. Beet-lime white chocolate ganache? Intrigued. Plus I don't live in New York. AKA New York is being brought to me instead.

I've been wanting to make these for a while and a friend recently was nagging me for the recipe. Perfect reason to make them. Plus, I have been all about the sweet, salty and unexpected. Chips and pretzels in your cookie? YUM!


These come out as giant sized cookies. In case you like 'em smaller, take note of that.  You only use 1/4 of the graham crust, but I took their suggestion and froze it for later use. I plan to make these for the holidays anyways. Screw traditional cookies, someone else will make them. Another great tip, freeze them for later. The finished product is rich and sweet, with whole pretzel crunch surprises.

Ingredients:
Graham Crust:
1 1/2 cups graham cracker crumbs
1/4 cup milk powder
2 tablespoons sugar
3/4 teaspoon salt
4 tablespoons (1/2 stick) butter, melted
1/4 cup heavy cream

Cookie batter:
2 sticks butter, at room temperature
1 cup granulated sugar
2/3 cup brown sugar, tightly packed
1 tablespoon corn syrup

1 large egg
1/2 teaspoon vanilla extract

1 1/3 cups flour
1/2 teaspoon baking powder
1/4 teaspoon baking soda
1 teaspoon kosher salt

3/4 cup mini chocolate chips
1/2 cup butterscotch chips
1/2 cup graham crust
1/3 cup old fashioned oats
2 teaspoons ground coffee

50g (2 cups) chips
50g mini (1 cup) pretzels

Instructions:
  1. Combine the butter, sugars, and corn syrup in the bowl of a stand mixer fitted with the paddle attachment and cream together on medium-high for 2 to 3 minutes. Scrape down the sides of the bowl, add the egg and vanilla, and beat for 7-8 minutes, until pale and fluffy (almost doubled).
  2. In a medium bowl combine the flour, baking powder, baking soda and salt. With the mixer on low, add the flour mixture. Mix just until the dough comes together, no longer than 1 minute (you don't want to over mix the batter!).
  3. Still on low speed, add the chocolate chips, butterscotch chips, graham crust, oats, and coffee and mix just until incorporated, about 30 seconds. Add the potato chips and pretzels and paddle, still on low speed, until just incorporated. Don't overmix or risk breaking too many of the pretzels or potato chips!
  4. Using a 2 3/4-ounce ice cream scoop (or a 1/3-cup measuring cup), portion out the dough onto a parchment-lined sheet pan. Pat the tops of the cookie dough domes flat. Wrap the sheet pan tightly in plastic wrap and refrigerate for at least 1 hour, or up to 1 week. Do not bake your cookies from room temperature--they will not bake properly (did you see all that butter you put in there!?). 
  5. Heat the oven to 375F.
  6. Arrange the chilled dough a minimum of 4 inches apart on parchment- or silpat-lined sheet pans (these cookies do spread like crazy, give 'em space. I put 5 per pan). Bake for 18 minutes (I'd check them at about 16 minutes, depending on your oven). The cookies will puff, crackle, and spread. After 18 minutes, they should be very faintly browned on the edges yet still bright yellow in the center. Give them an extra minute or so if that's not the case.
  7. Cool the cookies completely on the sheet pans before transferring to a plate or an airtight container for storage. At room temp, cookies will keep fresh for 5 days; in the freezer, they will keep for 1 month.

Sunday, November 4, 2012

Sweet & Salty Sugar Cookies

What is your favorite kind of cookie? I asked my sister-in-law that same question and the response was one I wasn't really expecting. Or maybe I should have because she is a bit of a selective eater. Her response was sugar cookies and chocolate chip cookies without the chocolate chips. What do you even call that, when the major ingredient is missing? Sometimes the odd stuff is the best stuff, so she might be onto something?


My favorite cookie has to be chocolate chip though or white chocolate macadamia nut. It is probably a childhood thing. My grandmother would always make billions of chocolate chip cookies and we would eat them all winter long. The macadamia nut is probably picked up from my dad, pretty sure those are his favorite. I also like them because they seem to have this sweet and slightly salty thing going on.


Sweet and salty has to be the ultimate flavor combination. Chocolate covered pretzels. Salted caramel. These almonds .You name it, if it is sweet and salty it will be awesome. That is how these cookies came to be. Plain old sugar cookies seemed boring. They tend to be overly sweet and run of the mill.


These may be sweet too, but in the best way. You can't just eat one, the salt gets you coming back for more.  It might be just the cookie for the person who doesn't like sweets. These are also super easy to make. Everything should be in your pantry or fridge already.


You take a vanilla bean and scrap out its cute little seeds and combine it with sugar. Beat the sugars and butter. Add an egg and some vanilla extract. The addition of vanilla extract combined with the vanilla bean, gives these a vanilla scented quality. It cuts the sweetness a bit and balances the saltiness. Then you add your flour, mix it all up. Scoop, roll, flatten and bake your cookies. Slam, bam and done! The resulting cookie is chewy and soft on the inside, witch crisp edges.


Try them with a cup of coffee, its delicious. These will make the perfect cookie for the upcoming holiday cookie season. Not to mention an unexpected surprise from the traditional sugar cookie. Take them to a holiday party or to work, for a surprise break from the standard sugary sweet holiday cookies. You'll impress people, promise. I want to know what your favorite cookie is, leave a comment!

xo
April

Ingredients:
Yields 24 cookies
Cookies:
2 cups unbleached all-purpose flour
1/2 teaspoons baking powder
1/2 teaspoon sea salt
16 tablespoons unsalted butter (2 sticks), softened
1 cup granulated sugar
1 vanilla bean, scraped
1 tablespoon light brown sugar
1 large egg
1/4 teaspoon vanilla extract

Salty/Sugar Coating:
1/2 cup granulated sugar
1 teaspoon sea salt

Instructions:
  1. Preheat the oven to 375F. Position a rack in the middle of oven.
  2. In a food processor, combine 1 cup sugar and the vanilla bean, pulsing until vanilla is well distributed (If you don't have a food processor, use your hands to break up the vanilla seeds into the sugar, until evenly distributed.)
  3. Combine the flour, baking powder and salt in a medium bowl. 
  4. In a stand mixer or bowl, beat the sugars and butter together for 2-3 minutes, until light and fluffy. Then add the egg and vanilla, beating until well combined. Add the flour mixture, mixing until just combined. 
  5. Line 2 baking sheets with parchment. In a small shallow pan or plate, mix the sugar and salt. Scoop the dough by the tablespoons, a generous one, rolling the dough into a ball. Next, roll the dough into the sugar/salt mixture. Place the cookies, evenly spaced, on the prepared baking sheets. Next, slighlty press each cookie, using a flat bottomed glass, flattening the tops. 
  6. Bake the cookies for about 12 minutes, until their edges are just starting to brown.
  7. Remove the cookies from the oven, and cool on the pan for several minutes before transferring to a rack to cool completely.
  8. Once the cookies are cool, store them in an airtight container and enjoy.
Recipe adapted from Baking Illustrated

Thursday, October 25, 2012

Spiral Sugar Cookies


So a few weeks ago, I got a very exciting email. I found out that I had won Heather Baird's cookbook, Sprinklebakes! I couldn't believe it! I have entered a couple giveaways on blogs before but I have never won. I was never too disappointed because before this email, I had never won any raffle. Ever. One time in elementary school, we had bingo night and I won there, but that is beside the point. Otherwise, I've been going through my whole life without my ticket ever being called off or name being drawn. I guess I should take into account that I don't enter myself into these things often. But lets get back on track, I was checking my email at work and winning this book made my day! I was so excited and nervous I would miss the cut off time to reply, so I immediately replied to the email. Some short days later the book came in the mail! Thank you again Dawn from Vanilla Sugar Blog!


The cookbook not only has great pictures and recipes to go with them, but there are great technique tips to sift through, too. But the best part about the book is that it is all about making your desserts art. And if you know me well, you know there's a little artist trying to peak through the science nerd that I am.

When I was looking through Sprinklebakes, I pick this recipe as my first target. These would be a yummy but neat looking sugar cookie that would be perfect for a Wisconsin Badgers game day! The game against Purdue was away so I figured these cookies would be the perfect munchie while watching the game on TV. Although they can be a bit time consuming, a helper (aka my boyfriend) in the kitchen makes a big difference. The effort and time is definitely worth it! These cookies are the perfect sweetness that are not too soft but not quite crunchy either. All in all, it's hard to only eat one! 


Normally I would post the recipe but I attached the link to when Heather posted the recipe on her Sprinklebakes blog here. I think the pictures that go along with the steps are useful. Also, I'm not going to lie, it has been a busy week of class, exams, work and preparing for my boyfriend's birthday dinner (yay!) so my tired body doesn't even want to type anymore. Hope you check out the recipe!

Friday, July 13, 2012

Flourless Peanut butter Cookies


Why flourless you ask? Well, this weekend my family is coming down to Madison for Art Fair on the Square and I wanted to make a sweet snack that we all could munch on when they stopped by my apartment. However, many recipes are off-limits for this bunch because my aunt cannot eat gluten. I was never really aware of how many things actually contain gluten. Looking at what I eat daily, I know I eat gluten everyday! It would be so hard not even having the choice to eat it. 


I wanted to find the perfect recipe that my aunt could eat with us, taste delicious, and no one could tell was gluten-free. This one does the trick! I almost think these cookies are better than peanut butter cookies I have had in the past. With no flour, there is nothing to get in the way of the peanut buttery goodness! They are thin but still chewy. The other great thing about this recipe than the taste is how easy it is! With only 5 ingredients and a 10-minute cooking time, these yummy cookies are a cinch! 

Flourless Peanut butter Cookies
adapted from the Food Network website

Ingredients
1 c. peanut butter
1 c. sugar
Egg whites from 1 large egg
1 tsp. vanilla extract
Kosher salt

Instructions
1. Preheat oven to 350 degrees
2. In a medium bowl, mix the peanut butter, sugar, egg whites and vanilla extract
3. Place tablespoon-sized balls of the dough onto a baking sheet. Flatten the dough balls with a fork, making the famous cross-hatch markings
4. Sprinkle with Kosher salt (I was nervous to do this but I think it turned out tasty mixing the sweet and salty)
5. Bake for about 10 minutes or until the edges are golden. Allow the cookies to cool on the baking sheet (when they are warm, they tend to crumble)
6. Enjoy!

I added mini Reese's to some after they came out of the oven.
Otherwise, try a Hershey's Kiss to add some chocolate to that peanut butter!

Sunday, June 10, 2012

Chocolate Brownie Cookies


I was just having one of those weeks. The one's where you think there is no way Friday will come and the Universe seems to be laughing at you struggle. Yup, that sums up my week so to turn it around, I made these. I was just browsing recipes and once I feasted my eyes upon this recipe, I knew my week could only get better. C'mon, its a cookie...and a brownie. And it's made with chocolate, lots of it! I used up all my cocoa powder and semi-sweet chocolate chips. Oh, and I had to go to the store for some white chocolate chips. Universe, who is laughing now!


These cookie/brownies are a perfect mood-booster or a easy dessert to add to a cookout menu. I actually used this recipe for both purposes! They are chewy (as long as you are extra careful with baking time), chocolately, and are sure to go within a couple of days!


Chocolate Brownie Cookies
adapted from Yammie's Noshery

Ingredients
2 sticks butter
2 1/4 c. sugar
4 large eggs
1 Tbsp vanilla extract 
1 1/4 c. cocoa powder 
1/2 tsp. salt
1 tsp. baking powder 
1 1/2 c. all-purpose flour
1 c. semi-sweet chocolate chips
1 c. white chocolate chips

Instructions
1. Add butter and sugar into a saucepan. Place on stovetop at medium heat. Stir until the butter/sugar mixture is bubbly and smooth. Remove from heat. 
2. Add in eggs and vanilla and stir. 
3. In a separate bowl, mix together the cocoa, salt, baking powder, and flour. Add in the butter/sugar/egg mixture.
4. Fold in both types of chocolate chips once the dough is at room temperature. 
When I did this, the sugar/butter mixture was still a bit hot and melted the semi-sweet chocolate chips (oops!). So I added more and the white chocolate chips later
5. The dough will have a consistency (and smell) of brownies so chill the dough in the freezer or refrigerator until it becomes pretty solid. 
6. Preheat the oven to 375 degrees. Form the dough into balls and gently pat them down onto a cookie sheet. These cookies don't spread out too much during baking, so shape them/pat them down to your liking. 
7. Bake for about 9-13 minutes. Keep an eye on them to not over-bake them. I took them out just as the middle of the cookie was losing its dark brown color (as mine cooked, they turned into a slightly lighter brown color). 
8. Set cookies on a cooling rack.
9. Enjoy!

Wednesday, June 6, 2012

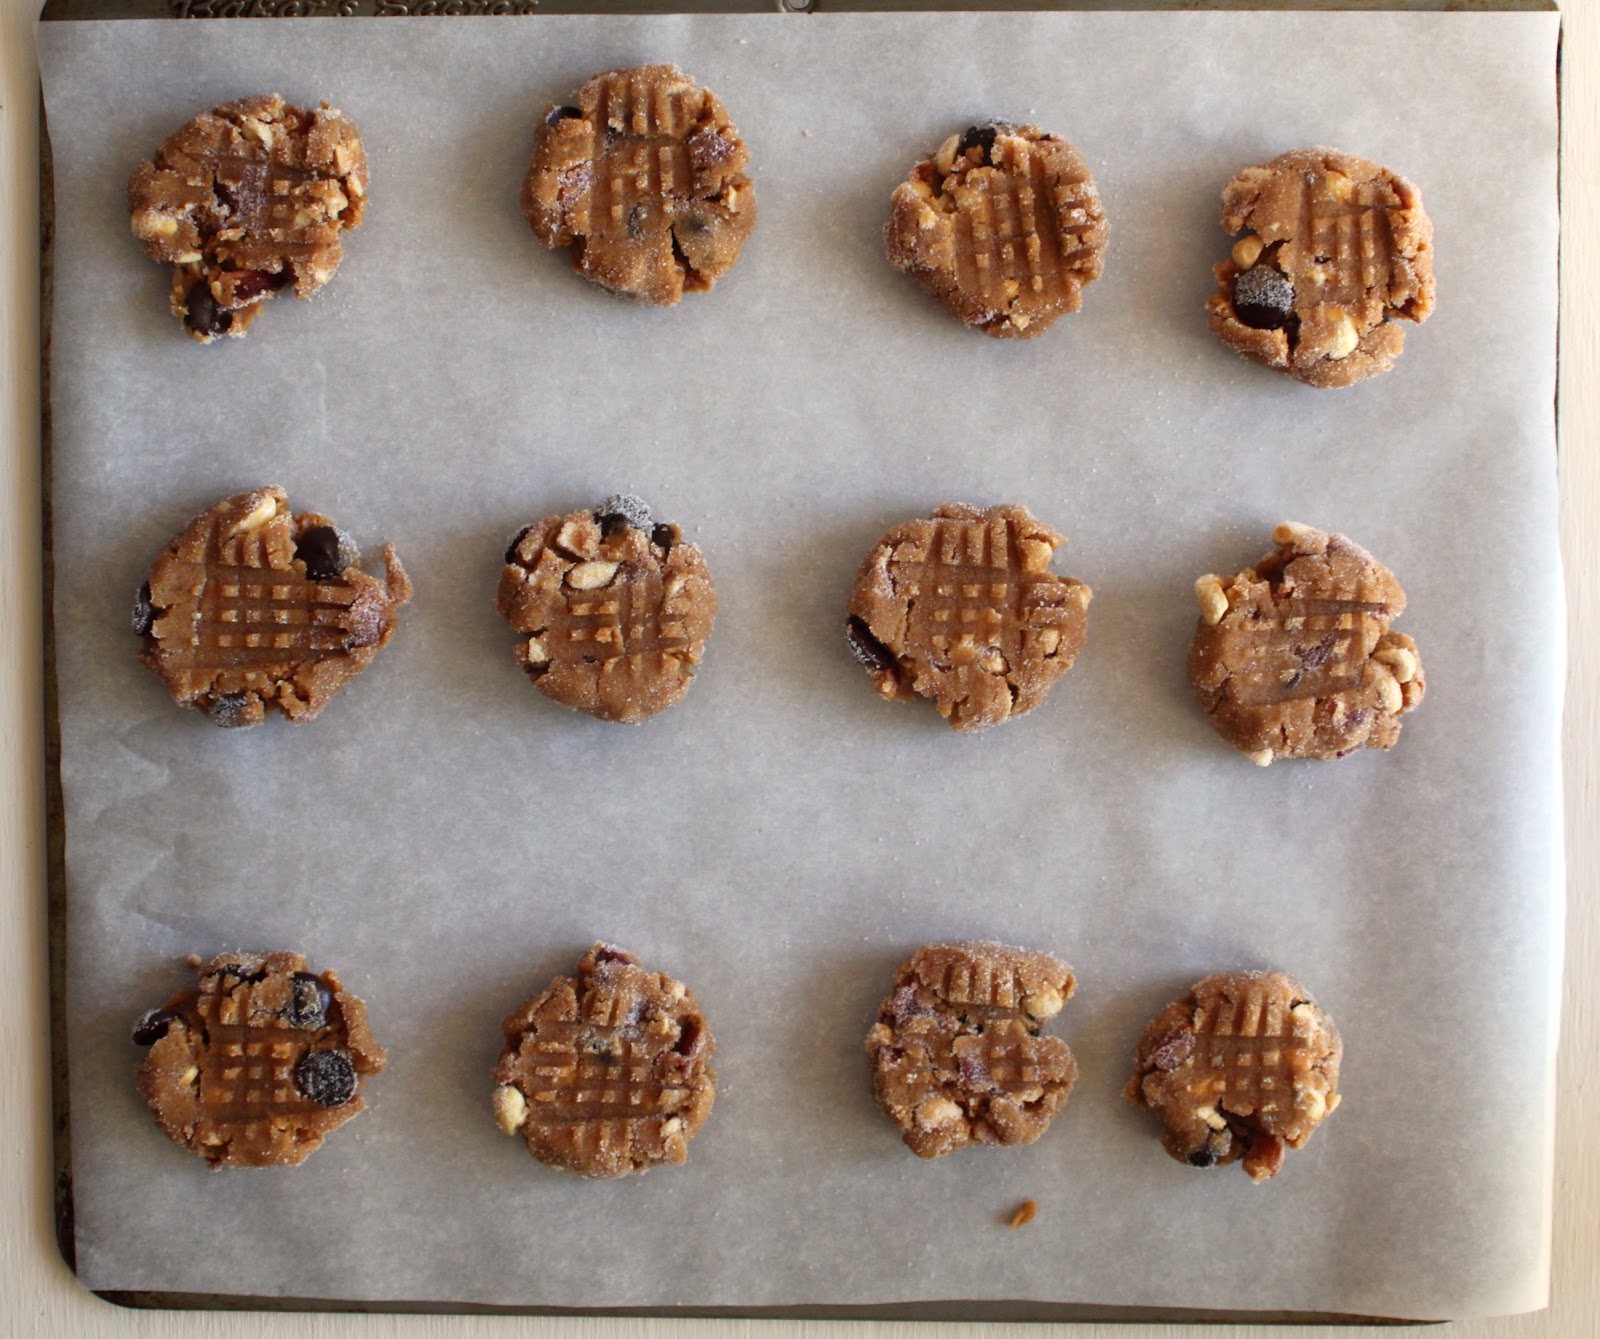
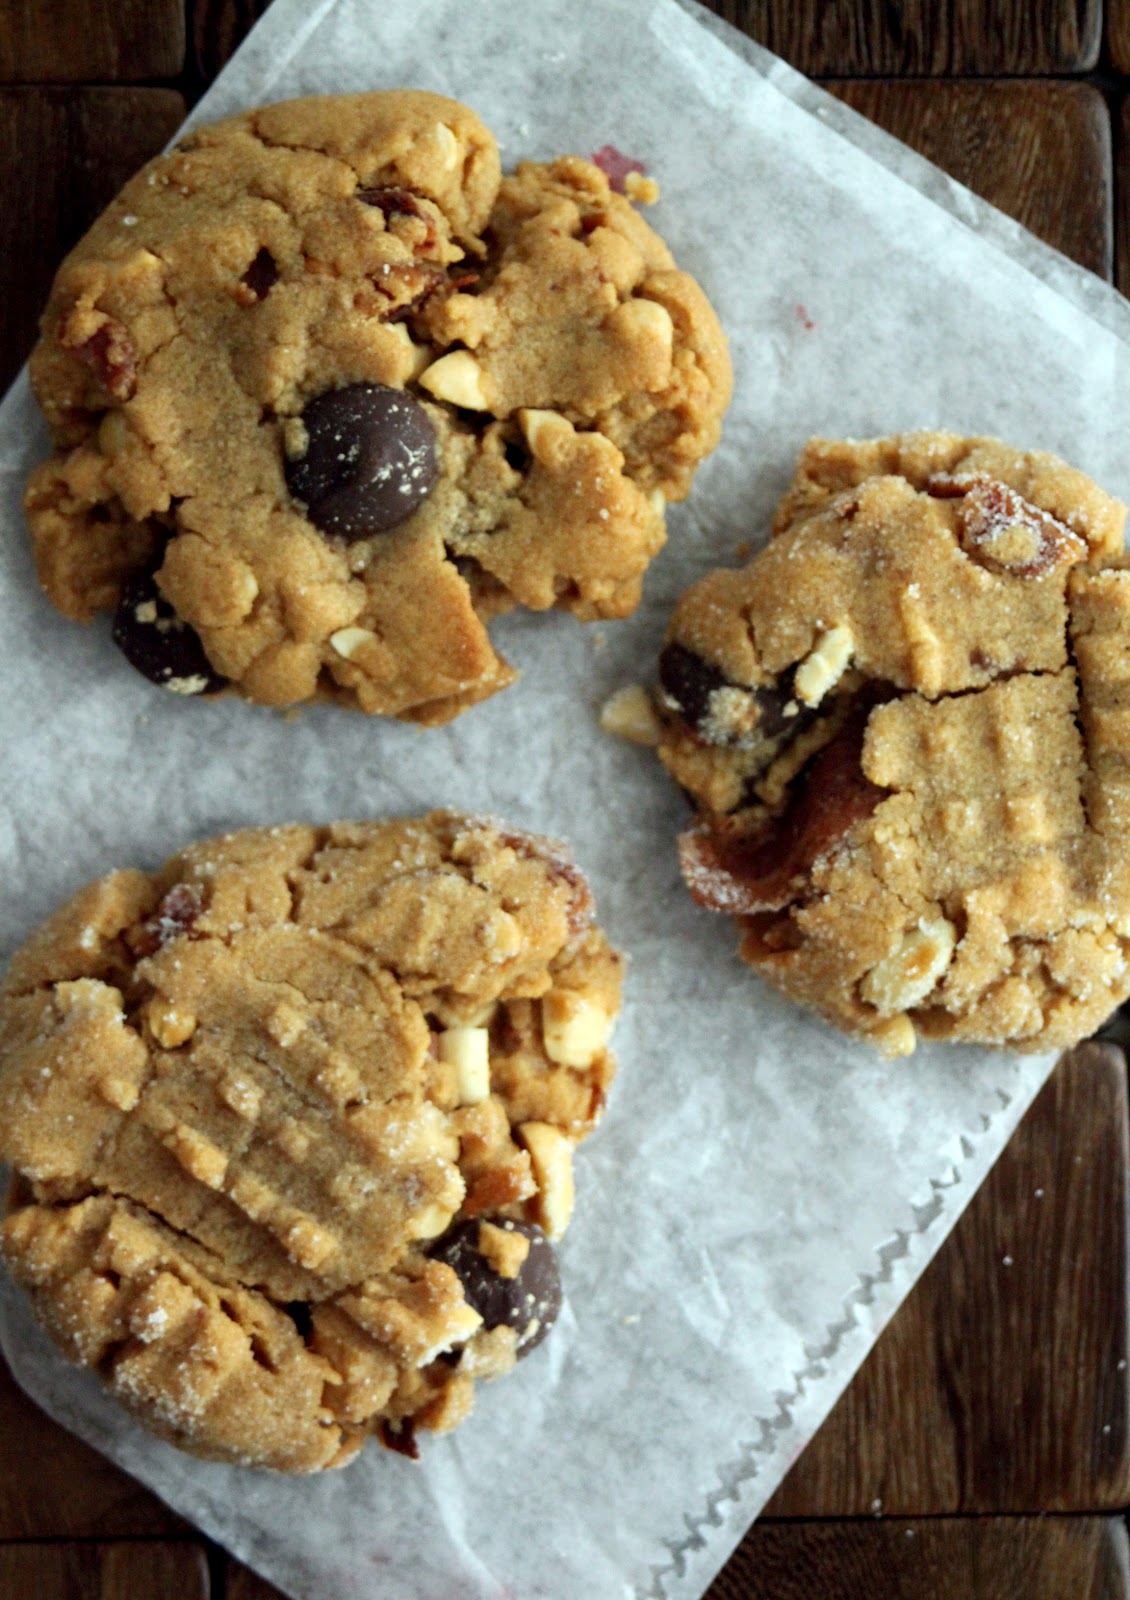
Peanut Butter Bacon Chocolate Chip Cookies

It is doubtful that anyone cares that we have had a onslaught of cookie and baked good posts as of late. Maybe it is the weather? The temperatures have been cool and pleasant, making it perfect for turning on the oven. Actually the weather has little influence on my turning the oven or not. It actually may get  more use during the summer.


If you feel like you can't do or have something, it just makes you want to do it more. We all know this feeling right? Good thing there is air conditioning for when I realize what an awful idea it was to bake. Air conditioning is up there on my favorite inventions ever list. Honestly, I don't know what I would do with out.


Enough about the downfalls of baking in the heat of summer. These cookies are awesome. I went to visit my grandma this weekend and made these for her. She LOVES bacon, peanut butter and chocolate. After I said "peanut butter, bacon, chocolate chip cookies", she immediately scurried across the kitchen and hid them in a cupboard from grandpa.

I would also like to think that these cookies are the perfect man bait. Most men apparently don't like sweets, but can they really stand by that when bacon is involved? Doubtful. Really they shouldn't care at all what is in the cookie. They should just be happy that a pretty lady cares enough to make them cookies.


Honestly anyone who loves bacon should think these cookies are the best. The bacon can be omitted, if you must. Although the bacon flavor was not overwhelming. It was more like pleasant background music. I was surprised by how moist this cookie turned out too. No flour had me worried, I am skeptical of gluten free. The very best part, besides being the best peanut butter cookies ever, they are the easiest/simplest cookies ever. Almost everything should be in your pantry, which means you better get working!

xo
April

Ingredients:
8 slices of bacon
1 cup all natural peanut butter
1 cup granulated sugar, plus some to roll the dough in
2 teaspoons molasses
1 large egg
1 teaspoon baking soda
1/4 cup coarsely chopped peanuts
1/4 cup chocolate chips

Instructions:
  1. Fry the bacon in a pan over medium-high heat, until cooked through and crisp. Remove the bacon from the pan onto paper towel to drain and cool. When cool enough to handle, coarsely chop the bacon and set aside.
  2. Line a cookie sheet with parchment paper and set aside.
  3. In a bowl of a stand mixer fitted with a paddle attachment, cream together the peanut butter, sugar and molasses until thoroughly combined, about 3-5 minutes. Add the egg and baking soda and mix on medium speed for another 2 minutes.
  4. Preheat the oven to 350F.
  5. With the mixer on low speed, add the chopped peanuts, bacon and chocolate chips to the mixer, until just combined. Roll the dough into large walnut-sized balls and roll in granulated sugar. Place on a lined cookie sheet, and use a fork to make the distinctive peanut butter cookie crisscross pattern. If the dough sticks to the fork, dip it in sugar before pressing into the cookies. The dough will be a little crumbly, just press together with your fingers as necessary. 
  6. Bake for 10 minutes, until lightly browned. Cool on the baking sheet for 5 minutes before transferring to a wire rack to cool completely. Cookies will be crumbly and delicious. Cookies will last up to 5 days in an airtight container in the refrigerator.

Friday, June 1, 2012

Cornflake, Marshmallow, Chocolate Chip Cookies


June just came out of nowhere! This year has flown by, which also implies my summer is dwindling too. I've got a long list of things I want to accomplish this summer too. Who knows it may be one of my last in Madison? That decision is a long ways away though, lets focus on the summer list:
  1. Find a hostess or waitress job. Check, cocktail waitress to be precise!
  2. Raise $4,000 for the MS bike ride. Only 2 months and $3,965 to go, no biggie.
  3. Put a 1,000 miles on my sexy new bike.
  4. Go on a brewery tour. Ale Asylum anyone?
  5. Make a trip to Devils Lake. I've never been, which appalls many of my fellow Wisconsin natives.
  6. Canoe camping round two.
  7. Concerts on the square, cheese and wine.
  8. Willy Street biking eating-drinking crawl.
  9. Lose a bit of the pasty white girl look.
  10. Make a mean sangria.

That list probably makes me seems a lot more outdoorsy than I really am. Because I think that last word anyone would use to describe me is outdoorsy. That is just my summer list too, there are so many things that I want to do before the year is over! What sort of things do you want to do this summer?


Make these cookies, if June being here is as alarming as it is to me. Even if it isn't, the first of everything month deserves to be started out right. Theses cookies are just the thing. The sister-in-law was in town last weekend. I hadn't seen her since Christmas!!!! I met up with her and my brother at our favorite watering hole, The Library Bar and Cafe. These cookies along with some cake balls came with us. I like to bake and then contemplate how to pawn the goods off on people.


Turns out a bar is a pretty great place to pawn baked goods off on people. These cookies especially. They are crispy, chewy and salty. The salty aspect keeps the people drinking too. I like to help not only myself the bar too. All the reviews were amazing and it wasn't just because people were drinking. The night was young, in fact it wasn't even night time yet.


There will be a leftover cornflake crunch, but just make yourself a bowl of cereal with it. You won't regret it. You can save it too, since after you share these, people will want you to make more. Give these a try you won't regret the sweet, salty, gooey, chewy goodness that results.


Recipe by Christina Tosi from Momofuki Milk Bar Cookbook
Makes 15 large cookies
Ingredients:
Cornflake Crunch:
1/2 box (5 cups) cornflakes
1/2 cup milk powder
2 tablespoons sugar
1 teaspoon kosher salt
9 tablespoons unsalted butter, melted

Cookie:
16 tablespoons (2 sticks) unsalted butter, softened
1 1/4 cups granulated sugar
2/3 cup light brown sugar
1 large egg
1/2 teaspoon vanilla extract
1 1/2 cups all-purpose flour
1/2 teaspoon baking powder
1/4 teaspoon baking soda
1 teaspoon kosher salt
3 cups Cornflake Crunch
2/3 mini chocolate chips
1 1/4 cups mini marshmallows

Making the Cornflake Crunch:
  1. Heat the oven to 275F
  2. Pour the cornflakes in a medium bowl and crush them with your hands to one-quarter of their original size. Add the milk powder, sugar, and salt and toss to mix. Add the butter and toss to coat. As you toss, the butter will act as glue, binding the dry ingredients to the cereal and creating small clusters.
  3. Spread the clusters on a parchment- or Silpat-lined sheet pan and bake for 20 minutes, at which point they should look toasted, smell buttery, and crunch gently when cooled slightly and chewed.
  4. Cool the cornflake crunch completely before storing or using in a recipe. Stored in an airtight container at room temperature, the crunch will keep fresh for 1 week; in the fridge or freezer, it will keep 1 month.
Making the Cookies:
  1. Combine the butter and sugars in the bowl of a stand mixer fitted with the paddle attachment and cream together on medium-high for 2 to 3 minutes. Scrape down the sides of the bowl, add the egg and vanilla, and beat for 7 to 8 minutes.
  2. Reduce the mixer speed to low and add the flour, baking powder, baking soda, and salt. Mix just until the dough comes together, no longer than 1 minutes. (Do not walk away from the mixer at this point, or you will risk overmixing the dough.) Scrape down the sides of the bowl with a spatula. 
  3. Still on low speed, paddle in the cornflake crunch and mini chocolate chips just until they're incorproated, no more than 30-45 seconds. Paddle in the mini marshmallows just until incorprated. 
  4. Using a 2 3/4-ounce ice cream scoop (or a 1/3 cup measure), portion out the dough onto a parchment lined-sheet pan. Wrap the sheet pan tightly in plastic wrap and refrigerate for at least 1 hour, or up to 1 week. Do not bake your cookies at room temperature-they will not hold their shape.
  5. Heat the oven to 375F.
  6. Arrange the chilled dough a minimum of 4 inches apart on parchment-lined sheet pans. Bake for 10-18 minutes (I baked mine for for 15 minutes-keep an eye on them). The cookies will puff, crackle and spread. The cookies should be browned on the edges and just beginning to brown toward the center. Leave them in the oven for an additional minute or so if they aren't and they still seem pale and doughy on the surface.
  7. Cool the cookies on the sheet pans before transferring to a place or an airtight container for storage. At room temperature, the cookies will keep fresh for 5 days; in the freezer, they will keep for 1 month.


Thursday, April 5, 2012

Caramel DeLites


Caramel delites (or samoas) have become one of my favorite Girl Scout cookies (but thin mints are definitely number one). But, I don't normally get any because I don't know any Girl Scouts. Hopefully, my little niece will become one someday soon! Anyway, I was browsing Pinterest and found the perfect recipe for caramel delites. The recipe is pretty involved so I waited until spring break to try it out. Unfortunately, I was a little disappointed when I finally got to taste my hard work. They were a little bland, which is far from the yummy Girl Scout caramel delites. So, for next time, I am going to change a few things: (1) splurge on tastier caramel. I got Kraft's caramel bits which I thought would be perfect because they don't have wrappers and they would melt quicker but they lack flavor. (2) stick to shredded (perhaps sweetened) coconut. I picked up finely shredded unsweetened coconut but I think the cookies would look and taste better with sweetened shredded coconut.

Although a little on the disappointed side, these cookies have potential, especially because the shortbread cookie base is delicious! Plus, with the right caramel and coconut, they will be just as good as the ones you get from Girl Scouts.


Caramel DeLites
adapted by Once Upon a Plate

Part 1: Cookie Base

Ingredients
1 c. butter, softened
1/2 c. sugar
2 c. flour
1/4 tsp. baking powder
1/2 tsp. salt
1/2 tsp. vanilla extract
1 Tbsp. milk

Instructions
1. Preheat oven to 350 degrees.
2. Blend with a hand mixer butter and sugar in a large bowl. 
3. Mix in flour, baking powder and salt on a low speed.
4. Add in vanilla extract and milk. The dough should become a soft, malleable ball.
5. Using a floured rolling pin and floured hands, roll out dough on a clean surface or parchment paper.
6. Use a round cookie cutter to cut out circular cookies. Use a piping tip (or knife) to cut a hole in the center. Place cutout on a cookie sheet. 
7. Place cookie sheet in the preheated oven for 10 minutes or until light golden brown around the edges. 
8. Allow to cool on the cookie sheet for a few minutes then transfer to a wire rack to cool completely. 
Part 2: The Topping

Ingredients
2 to 3 c. shredded coconut
12 oz. chewy caramels
1/4 tsp. salt
3 Tbsp. milk
8 oz. bittersweet chocolate chips

Instructions
1. Preheat oven to 300 degrees.
2. Spread coconut out evenly on a cookie sheet and toast in oven for about 15 minutes, stirring every couple of minutes. Coconut can toast quickly so keep an eye on it. 
3. Let coconut cool on baking sheet, stirring occasionally. Set aside.
4. Place caramels in large bowl with milk and salt and microwave for 3 to 4 minutes, stirring a couple of times. 
5. Once caramel is smooth, stir in coconut. 
6. Spread caramel/coconut mixture onto the cookies. Microwave caramel for a few seconds if it becomes firm. 
7. As the topping sets, microwave the chocolate chips in a small bowl on 50% power. Stir often and microwave until the chocolate is smooth. 
8. Dip each cookie into the chocolate to cover the bottom and set onto parchment paper. 
9. Scoop the left over melted chocolate into a ziplock bag. Snip a small hole in the corner of the bag and drizzle chocolate on the tops of the cookies.
10. Let the chocolate completely set and enjoy!


Sunday, February 5, 2012

Sugar Cookies


These cookies were supposed to be "I-wish-the-Packers-were-in-the-Super-Bowl" sugar cookies, but I guess now they can be "Aaron-Rodgers-MVP" cookies!  I was pretty excited to use the piping kit that I got for Christmas to make the laces on the footballs, it was my first time using it though so they aren't exactly perfect.

This is the sugar cookie and frosting recipe that my Mom always uses when our family makes Christmas cookies.  It's also the same recipe that my Gramma Zach has always used as well.


Sugar Cookies

Ingredients
  • 1 cup butter (may use half shortening and half butter)
  • 1 1/2 cups sugar
  • 3 eggs
  • 1 teaspoon vanilla extract
  • 3 1/2 cups flour
  • 2 teaspoon cream of tartar
  • 1 teaspoon baking soda
  • 1/2 teaspoon salt
Directions
  1. Cream butter and shortening if using half and half of each.
  2. Add sugar gradually until light and fluffy.
  3. Add eggs one at a time, beating after each addition.
  4. Stir in vanilla.
  5. Add dry ingredients gradually to creamed mixture.
  6. Chill thoroughly at least 3 to 4 hours.  (I usually make it the night before I want to bake.)
  7. Preheat oven to 375 degrees.
  8. Roll out on well floured surface.
  9. Cut into shapes.
  10. Bake for 6 to 8 minutes.


Frosting

Ingredients
  • 3 cups powdered sugar
  • 1/3 cup butter or shortening
  • 1 1/2 teaspoons vanilla extract
  • 2 tablespoons milk (may need more)
Directions
  1. Make sure cookies are cooled before frosting.
  2. Mix all ingredients together.


LinkWithin

Related Posts Plugin for WordPress, Blogger...