Happy new year friends! I hope everyone had as wonderful of a holiday with family and friends as I did. I'm in charge of Christmas Eve every year.
I spent about a month yabbering about how excited I was for this day. How epic it is. The copious amounts of cheese to be consumed. It is my favorite.
This was the most epic of cheese boards ever. A cheese board
the size of my kitchen table to feed 9 hungry beasts! There were no sad
bellies on this day. Not a single one. Happy Santa bellies for all!
I'm surprised it took me this long to dedicate a whole post to cheese, being Cheese Club president and all. Not to mention I could eat this for dinner every day all day. Who doesn't love a cheese, meat and crackers for dinner? Crazy people. Today is the day people!
I break pretty much every "rule" there is to making a cheese board because I get too excited. I want ALL of the cheese. Plus, there aren't really any hard and fast rules for a cheeseboard - except to have fun!
If you are not as big of a nut about cheese or it is your first time, here are some general guidelines. You'll want a firm cheese, like a firm aged cheddar (always a crowd pleaser) or gouda; a hard cheese like a parmesan or asiago, that is a little salty and flaky when you cut into it; a soft goats cheese (my favorite!); a mild, creamy, not too salty blue cheese; finally, a triple cream brie or camabert, warmed slightly.
I usually go overboard an have a few cheeses from each of these categories, which is good and bad. Choices, variety, and options are never bad. On the other hand, with too many choices you get a bit lost in the land of cheese, everything blending together with no clear favorite.
This year I even included two cheese balls! A cheddar one and a goat cheese one. No recipe to share unfortunately, but excellent contribution to any cheese board. I will be experimenting with them in the near future.
The perfect cheese board doesn't end with cheese. Accoutrements are a must, such as your favorite local jams and jellies. I always include fig jam.
Honey is a must too and if you can find a honey comb, buy it. It is amazing. It is sweet, semi-soft, crystalized, crunchy magic in your mouth. Honey goes great with things like goat cheese or blue cheese.
Pickled, briny things are a must too. Lots of olives if you are me. Love me some olives! I usually go to Whole Foods or the Co-op and pick from the olive bar: garlic-stuffed, Herbes de Provence, kalamata etc.
This year I found some pickled ramps and fermented brussel sprouts from Underground Butcher to change things up a little.
I always include a few types of meat as well. The men in my life love themselves some meat. Prosciutto is a must. A lot of prosciutto, which I get from Fraboni's. Then I usually go to Underground Butcher and pick out a two cured meats to thinly slice along side the prosciutto.
If you have never been to Underground Butcher, check it out. They have a lot of fun and creative sausages, in addition to a lovely meat case.
There also needs to be a variety of crackers and bread like vessels for your cheese, honey and jam. Finally, some grapes are always a delicious and beautiful addition to round out the cheese board. A variety of nuts are also a welcome addition, for those snackers out there who need a break from the cheese.
Below I've included all the information I just discussed, with fewer words and random thoughts, along with specific cheeses I love. Remember to have fun with it, these are just guidelines, make it your own.
Before we get to that might I suggest if you have not made plans for NYE, to invite all your friends over, with the small task of bringing their favorite meat or cheese over and ring in the new year with a belly full of cheese! You provide the accoutrements and maybe a bottle or two of bubbly and no regrets.
Cheers,
April
Cheese Board Guidelines:
Aged cheese: aged cheddar or gouda; two of my favorites are Hook's 10 year cheddar or Marieke's aged gouda
Firm cheese: Asiago, Parmesan or Satori Bellavitano Merlot, Raspberry or Cognac or any other wine washed Parmesan
Blue cheese: Any creamy, mild blue cheese or Gorgonzola, or my favorite Hook's Little Boy Blue
Chevre or goat cheese: Cypress Grove Humbolt Fog or a truffled soft goat.
Semi-soft cheese: brie, camabert or St. Andre
Breads: baguette, crostini, water crackers, hard breadsticks, whole wheat crackers, fruit and nut crackers, and little toasts
Charcuterie: thinly sliced prosciutto, hard salami, cured meats, pepperoni
Jams and jellies: bacon jam, fig jam, fruit jams/jellies/perseveres (Quince and Apple, my favorite from WI), honeycomb or honey
Fruit and nuts: marcona almonds, black pepper almonds, corn nuts, dried apricots, fresh or dried figs, grapes, strawberries, raspberries, fresh or dried pears
Salty and briny snacks: olive medley, pickled vegetables, cornichons, mustard
Showing posts with label appetizers. Show all posts
Tuesday, December 30, 2014
Wednesday, September 17, 2014
Loaded Baked Potato Rounds
Oh boy do I have a great recipe for you today! Our September theme of football munchies is rolling in once again. These potatoes are sure to be the hit on the appetizer table on football Sunday, or my favorite, Saturday! Go Bucky!
These salty, cheesy, no fork needed snack are the perfect pop-able food to serve next game day, I know I will. Funny thing, when I was testing this recipe out, it was just me and Mr. Bear (haven't been acquainted with Bear, check out here or here). No party and actually no game to watch. I ate them while watching Bride Wars. Yeah, not even close to a sport. But they tasted so good, I think I'll have to make them again this weekend.
This recipe is super easy and probably impossible to mess up. It's really up to you to add what and how much of ingredients you want. For me, I doused on the pepper. The recipe didn't actually call for pepper, but it's my other half when it comes to cooking. I just can't leave it off. Also, I realized I have never cooked bacon before. Ever. Seriously, I have always left the bacon cooking to the experts. Well, my expert wasn't around so I had to try it out myself. Little crunchier than I like but it was perfect on top of the potato rounds. So trust me when I say you can't mess up this no-fail potato rounds appetizer!
Adapted from Pip & Ebby
Ingredients
Red potatoes
Bacon
Green onions
Cheese
Olive oil
Kosher salt
Pepper
I didn't actually use specific measurements, it's really up to your personal liking
Instructions
1. Preheat oven to 400 degrees.
2. Slice potatoes and place in a large bowl. Add oil and toss to coat entire surface of potato rounds.
3. Line cookie sheet with parchment paper and spread potatoes out in one layer. Sprinkle salt and pepper over potatoes.
4. Bake for 15 minutes, flip and bake for another 15 minutes.
5. While potatoes are baking, cook bacon.
6. Chop green onions and bacon to small pieces.
7. Once potatoes are golden brown, sprinkle cheese, onions and bacon. Bake another 5-10 minutes.
8. Enjoy!
Bon Appétit!
Brittany
These salty, cheesy, no fork needed snack are the perfect pop-able food to serve next game day, I know I will. Funny thing, when I was testing this recipe out, it was just me and Mr. Bear (haven't been acquainted with Bear, check out here or here). No party and actually no game to watch. I ate them while watching Bride Wars. Yeah, not even close to a sport. But they tasted so good, I think I'll have to make them again this weekend.
This recipe is super easy and probably impossible to mess up. It's really up to you to add what and how much of ingredients you want. For me, I doused on the pepper. The recipe didn't actually call for pepper, but it's my other half when it comes to cooking. I just can't leave it off. Also, I realized I have never cooked bacon before. Ever. Seriously, I have always left the bacon cooking to the experts. Well, my expert wasn't around so I had to try it out myself. Little crunchier than I like but it was perfect on top of the potato rounds. So trust me when I say you can't mess up this no-fail potato rounds appetizer!
Adapted from Pip & Ebby
Ingredients
Red potatoes
Bacon
Green onions
Cheese
Olive oil
Kosher salt
Pepper
I didn't actually use specific measurements, it's really up to your personal liking
Instructions
1. Preheat oven to 400 degrees.
2. Slice potatoes and place in a large bowl. Add oil and toss to coat entire surface of potato rounds.
3. Line cookie sheet with parchment paper and spread potatoes out in one layer. Sprinkle salt and pepper over potatoes.
4. Bake for 15 minutes, flip and bake for another 15 minutes.
5. While potatoes are baking, cook bacon.
6. Chop green onions and bacon to small pieces.
7. Once potatoes are golden brown, sprinkle cheese, onions and bacon. Bake another 5-10 minutes.
8. Enjoy!
Bon Appétit!
Brittany
Wednesday, September 10, 2014
Greek Hummus Dip
Calling all football fans! Ok, fine, even if you don't like football but are just a fan of munchies you're welcome too! Throughout September we'll be bringing you recipes that are perfect for tailgating outside of Camp Randall Stadium or watching the Green Bay Packers play on a Sunday afternoon from the comfort of your couch. (Go ahead and insert your own favorite football team if you must.) These munchies and snacks are the perfect compliment to any football experience!
Truth be told, the first time I made this Greek Hummus Dip was actually for my sister's baby shower. But don't worry, I know it's football worthy because during said baby shower my dad and brother were downstairs in the man cave watching football and they kept coming upstairs to steal food, with this dip being one of their main targets.
I'm halfway convinced that my dad mainly enjoys dips because they give him an excuse to eat a whole bunch of chips. His go-to dip is some sort of melted Velveeta concoction, which might be tasty, but when I sit down to enjoy some munchies I know that I usually end up enjoying a few too many so it's better to go with something a little easier on the waistline.
This Greek Hummus Dip is a great healthier alternative. The base layer of hummus is packed with protein which is then topped with a variety of fresh veggies, dill, olives and my favorite cheese, feta! Pita chips or veggies are my preferred dipping receptacles. I like to think of this as the Mediterranean version of taco dip because it has all the same elements, the end result is just a different flavor.
I chose to use Sabra Roasted Pine Nut as my flavor of hummus because I don't like the hummus overpowering the fresh flavor of the toppings, but feel free to use whatever flavor you'd like. I like using diced red bell pepper as a topping because of the color it adds but green would work as well. Kalamata olives are seriously one of my favorite things, but if you have green or black olives on hand, go ahead and use those instead. This is a very easy recipe to accommodate to your tastes or what ingredients you already have on hand.
Enjoy!
Kelsey
Ingredients
Truth be told, the first time I made this Greek Hummus Dip was actually for my sister's baby shower. But don't worry, I know it's football worthy because during said baby shower my dad and brother were downstairs in the man cave watching football and they kept coming upstairs to steal food, with this dip being one of their main targets.
I'm halfway convinced that my dad mainly enjoys dips because they give him an excuse to eat a whole bunch of chips. His go-to dip is some sort of melted Velveeta concoction, which might be tasty, but when I sit down to enjoy some munchies I know that I usually end up enjoying a few too many so it's better to go with something a little easier on the waistline.
This Greek Hummus Dip is a great healthier alternative. The base layer of hummus is packed with protein which is then topped with a variety of fresh veggies, dill, olives and my favorite cheese, feta! Pita chips or veggies are my preferred dipping receptacles. I like to think of this as the Mediterranean version of taco dip because it has all the same elements, the end result is just a different flavor.
I chose to use Sabra Roasted Pine Nut as my flavor of hummus because I don't like the hummus overpowering the fresh flavor of the toppings, but feel free to use whatever flavor you'd like. I like using diced red bell pepper as a topping because of the color it adds but green would work as well. Kalamata olives are seriously one of my favorite things, but if you have green or black olives on hand, go ahead and use those instead. This is a very easy recipe to accommodate to your tastes or what ingredients you already have on hand.
Enjoy!
Kelsey
Ingredients
- 16 oz hummus, your choice of flavor
- 1 small cucumber, diced
- 1 red bell pepper, diced
- 1/4 cup kalamata olives, diced
- 1/4 cup feta cheese, crumbled
- 1 tablespoon dill
Directions
- In a serving dish, evenly spread a layer of hummus.
- Sprinkle cucumber, red bell pepper, kalamata olives, feta cheese and dill over hummus so it is evenly dispersed and all hummus is covered.
- Enjoy with your favorite choice of scooping device, like pita chips or vegetables.
Two Years Ago: Green Olive Red Noodles
Wednesday, June 11, 2014
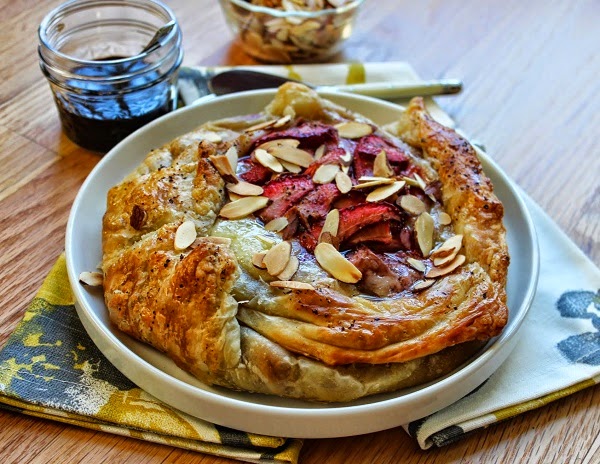
Baked Brie with Strawberries, Almonds and Balsamic Vinegar
Strawberry month continues! I have not been able to keep my mind off of strawberries. Its been all strawberry this strawberry that all up in my noggin lately.
I'm working on a frozen treat involving strawberries, but it needs a bit more work. Joy the Baker is having a "Baking Boot Camp" and I made this triple berry cinnamon swirl bread. Hopefully I can tweak some of the things I've been working on and share them with you all!
I want to roast all the strawberries there ever were and devour them. If you've never tried roasting fruit, you should. No pressure, but really you should. I also just ordered a ice cream maker. I'm giddy about it. Maybe there will be a roasted strawberry ice cream situation in the future. At the very least there will be buckets of ice cream in my future.
Now for the real strawberry situation at hand, strawberries and cheese. This is a pretty simple, easy and straightforward gooey, salty, tangy and cheesy situation. My first go around at making this resulted in spilled cheese, which is better than spilled milk. Promise. You can still eat spilled cheese.
I tweaked a few things to prevent a spilled cheese situation from happening again. I went for less liquid for the strawberries and created a balsamic glaze instead.
As I tend to do, there is not much added sugar to the strawberries. I like the tartness. The exposed top makes this almost a cross between a gallette and traditional baked brie. Leaving the opening at the top allows the strawberries to become sort of like roasted strawberries - jammy, melty and tart.
The balsamic adds a nice sharp tang on top, while the toasted almonds add a crunch. The pepper is not at the forefront here, but I do think it adds a little something. You could always add more pepper, if you wanted a real peppery kick.
You won't want to drizzle all of the balsamic glaze over the baked brie all at once, but reserve some for you and your friends to drizzle on as much or little as they want. I won't judge though if you just eat this all by yourself. I begrudgingly shared with my father because well he is my father.
Cheers,
April
Ingredients:
For the brie:
8oz strawberries, sliced into quarters
1 tablespoon balsamic vinegar
2 teaspoons honey
2 teaspoons all purpose flour
1/8 teaspoons freshly ground black pepper
1/3 cup slivered almonds, toasted
For the balsamic glaze:
1/4 cup balsamic vinegar
2 teaspoons honey
Freshly ground black pepper
Egg wash:
1 large egg, beaten in a small bowl, with a splash of water
Instructions:
I'm working on a frozen treat involving strawberries, but it needs a bit more work. Joy the Baker is having a "Baking Boot Camp" and I made this triple berry cinnamon swirl bread. Hopefully I can tweak some of the things I've been working on and share them with you all!
I want to roast all the strawberries there ever were and devour them. If you've never tried roasting fruit, you should. No pressure, but really you should. I also just ordered a ice cream maker. I'm giddy about it. Maybe there will be a roasted strawberry ice cream situation in the future. At the very least there will be buckets of ice cream in my future.
Now for the real strawberry situation at hand, strawberries and cheese. This is a pretty simple, easy and straightforward gooey, salty, tangy and cheesy situation. My first go around at making this resulted in spilled cheese, which is better than spilled milk. Promise. You can still eat spilled cheese.
I tweaked a few things to prevent a spilled cheese situation from happening again. I went for less liquid for the strawberries and created a balsamic glaze instead.
As I tend to do, there is not much added sugar to the strawberries. I like the tartness. The exposed top makes this almost a cross between a gallette and traditional baked brie. Leaving the opening at the top allows the strawberries to become sort of like roasted strawberries - jammy, melty and tart.
The balsamic adds a nice sharp tang on top, while the toasted almonds add a crunch. The pepper is not at the forefront here, but I do think it adds a little something. You could always add more pepper, if you wanted a real peppery kick.
You won't want to drizzle all of the balsamic glaze over the baked brie all at once, but reserve some for you and your friends to drizzle on as much or little as they want. I won't judge though if you just eat this all by yourself. I begrudgingly shared with my father because well he is my father.
Cheers,
April
Ingredients:
For the brie:
8oz strawberries, sliced into quarters
1 tablespoon balsamic vinegar
2 teaspoons honey
2 teaspoons all purpose flour
1/8 teaspoons freshly ground black pepper
1/3 cup slivered almonds, toasted
For the balsamic glaze:
1/4 cup balsamic vinegar
2 teaspoons honey
Freshly ground black pepper
Egg wash:
1 large egg, beaten in a small bowl, with a splash of water
Instructions:
- Preheat your oven to 375 degrees F. Line a baking sheet with parchment paper and set it aside.
- Combine strawberries, balsamic vinegar, honey, flour and black pepper in a bowl. Set aside.
- Slice the rind off of the top of the brie and set aside.
- Lightly flour your surface with flour and roll out the thawed puff pastry to a 12" by 12" (being a little shy of 12" is better than being to wide/thin). Trim off the corners to make a circle/oval (using a 10" plate is a useful guide, but you want your circle to be slightly larger than 10").
- Place the brie in the center of the dough. Drain the strawberries, reserving the juice for later. Add the strawberries on top of the brie (it may seem like they won't all fit and if a few fall along the sides of the brie, that is okay).
- Fold the edges of the dough over in small sections, overlapping as you go. Brush it all over with egg wash.
- Transfer to the oven and bake for 20-30 minutes, until the pastry is golden brown. Allow the baked brie to cool for 10 minutes. Place slivered almonds on tin foil and place in oven, until golden and nutty, about 3 to 5 minutes.
- While the brie is cooling, lets make the balsamic glaze. To a small saucepan, set over medium heat, mix together the reserved strawberry juice, honey, balsamic vinegar and pepper. Simmer for 3-6 minutes, until slightly thickened and sweet. Turn off the heat and drizzle a little over the baked brie. Garnish with a few slivered almonds; serve with remainder of almonds, glaze and crackers.
Sunday, July 29, 2012
Crunch Chicken Tenders
Over the weekend, my boyfriend and I spontaneously decided to have lunch at Fratello's, a super good restaurant (one of my favorites) that is in my hometown, Appleton. Fratello's has two locations in Appleton and one in Oshkosh. I recommend going to any of them if you ever get the chance. Besides great and unique food, the atmosphere is classy and romantic. Another bonus is that everything is priced well, even for college students like my boyfriend and I. Stuart and I were running errands in our comfy clothes, picking up a golf glove for me and Brewers T's when we got pretty hungry. We really didn't want fast food from the Fox River Mall food court and that is when we spotted Fratello's. The one we went to is actually attached to the mall, so it's not as fancy and doesn't have a water view, like the other two. I would never wear athletic shorts and a t-shirt to the water front locations, but hey, this one is in the mall so we figured it would be fine.
Ok, ok, I'll stop raving about Fratello's...lets get to the recipe. So Fratello's is known (at least in my family) for their crunch chicken tenders. They're served as an appetizer but I think they would make a perfect meal, too. They are sweet and crunchy strips of lightly breaded chicken tenders served with honey dijon mustard. After Stu and I went there for lunch and split the chicken tenders, I wanted to recreate them at home.
And that is exactly what I did! They turned out pretty close to Fratello's. I was impressed with myself and I think Stu was too.
Crunch Chicken Tenders
Ingredients
1 lb chicken breasts, precut into strips (I was feeling a bit lazy with cutting the chicken myself)
approx. 3 c. Cap'n Crunch cereal
1 c. milk
1 egg, scrambled (optional, I didn't have an egg so I used more milk)
1 1/2 c. pancake mix
2 Tbsp. butter
Kosher salt
small amount of sugar
Instructions
1. Pour the Cap'n Crunch into a large ziplock bag. Crush with hands or a rolling pin but be careful not to puncture the bag. You could use a blender or food processor also.
2. Add some salt and sugar to the crushed cereal. I didn't actually measure anything. These two ingredients I did to my taste preference.
3. Place the cereal, milk, pancake mix and scrambled egg into separate bowls.
4. Dip a chicken strip into the milk and then coat with the pancake mix.
5. Then dip the strip into the egg (or milk if you don't have an egg, like me) and coat with the cereal.
6. Place strip on a plate and repeat 4-6 for all the chicken strips.
7. Heat up a skillet with the butter at about medium heat. Add the chicken strips once the butter is melted.
8. Cook for about 4 minutes on each side or until there is no pink left.
9. Enjoy with your favorite sides (I did onion rings and peas)!
Ok, ok, I'll stop raving about Fratello's...lets get to the recipe. So Fratello's is known (at least in my family) for their crunch chicken tenders. They're served as an appetizer but I think they would make a perfect meal, too. They are sweet and crunchy strips of lightly breaded chicken tenders served with honey dijon mustard. After Stu and I went there for lunch and split the chicken tenders, I wanted to recreate them at home.
And that is exactly what I did! They turned out pretty close to Fratello's. I was impressed with myself and I think Stu was too.
Crunch Chicken Tenders
Ingredients
1 lb chicken breasts, precut into strips (I was feeling a bit lazy with cutting the chicken myself)
approx. 3 c. Cap'n Crunch cereal
1 c. milk
1 egg, scrambled (optional, I didn't have an egg so I used more milk)
1 1/2 c. pancake mix
2 Tbsp. butter
Kosher salt
small amount of sugar
Instructions
1. Pour the Cap'n Crunch into a large ziplock bag. Crush with hands or a rolling pin but be careful not to puncture the bag. You could use a blender or food processor also.
2. Add some salt and sugar to the crushed cereal. I didn't actually measure anything. These two ingredients I did to my taste preference.
3. Place the cereal, milk, pancake mix and scrambled egg into separate bowls.
4. Dip a chicken strip into the milk and then coat with the pancake mix.
5. Then dip the strip into the egg (or milk if you don't have an egg, like me) and coat with the cereal.
6. Place strip on a plate and repeat 4-6 for all the chicken strips.
7. Heat up a skillet with the butter at about medium heat. Add the chicken strips once the butter is melted.
8. Cook for about 4 minutes on each side or until there is no pink left.
9. Enjoy with your favorite sides (I did onion rings and peas)!
Wednesday, July 25, 2012
Green Tomatillo Guacamole
My parents had their Monday night crew of friends over this week, and of course I jumped on the opportunity to show off my mad kitchen skills. They were going to order pizzas. Why do that when it is so easy just to throw some homemade ones together?
I got to be creative with two and my mom made two. Whenever my mom and I try to cook in the kitchen together these days, it turns into a bit of a competition. My dad can attest to my great concern that mom was going to show me up and steal my thunder. Worried all day. Thought my pizzas might be too weird, aka adventurous. Beet pizza. Zucchini and roasted tomato pizza. I just struggle to keep things on the straight and narrow normal path.
So much for all of my fretting, mine were the bomb. Who had one of their whole pizzas devoured? This kid right here. Victory! Hers were good too, she just failed to steal my thunder. Enough bragging and onto the guacamole, which is not your regular guacamole. Which is silly because my whole reasoning behind making it was to quell my concerns about my pizzas.
It was a hit. This is based on a recipe by Rick Bayless, forgot my trusty cookbook at my apartment. The tomatillo mixture makes this guac nice and tangy. It also ends up being less thick than your traditional guac. The addition of lime juice, just a squeeze, is optional. I tasted it and thought maybe it needed more tang. After I added the lime I thought maybe it was better without, but I couldn't go back and compare, obviously. It was a hit though, and will for sure impress!
xo
April
Ingredients:
3-4 medium tomatillos, husked and rinsed
2 serrano peppers, stemmed
3 cloves of garlic, peeled
Cilantro
1/2 a small onion, finely chopped
3 avocados
1/2 teaspoon salt
1/2 lime (optional)
Instructions:
1/2 teaspoon salt
1/2 lime (optional)
Instructions:
- Turn your ovens broiler to high. Arrange the tomatillos, serranos and garlic on a rimmed baking sheet, placing it under the broiler for 5-8 minutes. Half way through or when the tomatillos are nicely charred with brown spots, flip them over and return them to the oven. Once nicely charred on both sides, remove from the oven and allow to cool.
- Once cooled, add the tomatillos, serranos, garlic, cilantro, and a scant 1/4 cup of water to a blender or food processor, blending until smooth.
- Cut the avocados in half, remove the pit, and scoop out the flesh into a medium bowl, adding the onion and tomatillo mixture. Mix with a fork to your desired consistency (I like mine fairly smooth). Add more cilantro, squeeze of lime and salt to taste.
Monday, June 25, 2012
Beet, Blue Cheese & Arugula Pizza
Has anyone else been watching the Olympic trials? I caught synchronized diving the other night when it was a bit slow at work. It is some crazy cool stuff. I'm especially excited to watch the swimming Olympic trials. I even know someone who will be swimming, crazy! It was also just brought to my attention that the Tour de France starts Saturday.
That is right, I like to watch the kind of sports where people just truck along, alone. Wind through the hills of France. Swim back and forth, back and forth, in a pool. It is thrilling stuff, seriously.
If the Olympic trials and Tour de France don't thrill you, pizza will. Pizzas are such a great treat in the summer time. There are so many fresh veggies and even fruits available to top you pizzas with. That is right, savory fruit pizza. Its going to happen this summer, just wait for it.
Homemade pizza is a great way to get outside the box in the kitchen. Like this beet pizza. The ingredients are a classic flavor combination. Think beet salad, on a pizza. My new unofficial mission is to get people to like beets. At least to give them a chance. Good thing these beets are on a pizza, because everyone likes pizza.
The beets add a little sweetness, contrasted by the tangy, creamy and sweat blue cheese. I used a Hook's Danish Blue. Using a variety of colored beets, makes this pizza very pretty too. The only difference in red and orange beets is their sweetness.
Walnuts add a unexpected crunch to the pizza. Lets be real, who expects nuts on a pizza? Probably no one. The addition of arugula adds a peppery spiciness to offset the sweetness of the beets. I added some before I cooked the pizza and then more after it came out of the oven. Either or both ways work.
Just have fun with this pizza. It is super easy to throw together, using your favorite pizza dough. I used this one from Smitten Kitchen. You can always do store bought dough. Try adding goat cheese, if blue cheese isn't your thing. Enjoy!
xo
April
Ingredients:
10 ounces pizza dough (homemade or store-bought)
4 small to medium beets, thinly sliced
4 ounces of blue cheese, such as Hook's Danish Blue, crumbled
1/2 cup chopped walnuts
2 cups arugula
Olive oil
Salt
Instructions:
- Preheat the oven to 500F. Gently roll your pizza dough out to a 10 to 12 inch diameter (don't worry if it isn't perfect, that is what we call rustic!). Place the pizza on a sheet pan, or heat a pizza stone in the oven. Cover the surface of the pizza with the beet slices, overlapping them slightly. Sprinkle with salt and olive oil, to keep the beets moist. Sprinkle the blue cheese, walnuts and half of the arugula evenly over the beets.
- Bake until the dough is golden and crisp, about 10-15 minutes, popping any bubbles with a fork that might form. Remove from the oven, topping it with the remaining arugula, allowing it to wilt slightly. Serve and enjoy!
Wednesday, June 13, 2012
Beetroot Hummus
If you could be any animal, what animal would you be? I have never ever had a good answer to that question. Sure, I got the height, uncoordinated, awkwardness of a giraffe, but that always felt like a predictable default sort of answer. Not very unique, but it may be a close second.
The other day I was having dinner with the family and my mom blurts out that she would like to be reincarnated as a chicken. Why? Its a mystery to us, some things are better left not trying to be understood. The next day I decided I would be an orangutan. They are awesome furry gingers and I have a soft spot for gingers. I don't think think it is true that they don't have a soul.
In my primate class last year, I learned that they are generally solitary creatures. Being solitary isn't really my thing exactly. They are mostly loners because they don't like to share their food. Its fitting for me, I say I want to share my food. What I really mean is you can have a bite and I will hoard the rest for myself. I also expect that you share an even bigger bite of your food with me. That is why I would be an orangutan. Now onto the food: beets.
Beets are probably my favorite vegetable. I love the color of them. You eat with your eyes first after all. I even love the earthy flavor they have going on. Yes, some may translate earthy to dirt. Maybe I like dirt, so what? What ever you want to translate earthy to mean, I love it. They are also delicious hot, cold or at room temperature. Diverse vegetable alert!
This hummus is perfect for those of you who may not be able to get past the earthy quality of beets. What you really pick up in the hummus is the sweetness of the beets and the nuttiness of traditional hummus. Make sure you salt this generously too, brings out the flavor double time! The bright pink color of this too makes it really fun and unexpected. Give beets a chance, with this hummus. If you already love beets, you are good to go.
xo
April
Ingredients:
5-6 small beets, tops trimmed and cleaned
1 (15 ounces) can of garbanzo beans
2 tablespoons tahini paste
2 garlic cloves
1 lemon, zest and juice
Salt
Olive oil
Instructions:
- Preheat the oven to 400F. Wrap the beets in tin foil and cook in the oven for an hour or until fork tender. Once cool enough to handle, peel and cube the beets, placing them into the food processor.
- Add the garbanzo beans, tahini paste, garlic, lemon juice and zest and salt to the beats, pulsing to combine. Taste and season with more salt if necessary. Add a splash of olive oil to thin the consistency, if desired. Transfer to a bowl, top with a drizzle of olive oil or feta. Serve with pita chips, crackers, veggies or whatever you like.
Friday, April 27, 2012
Simple Soft Pretzels
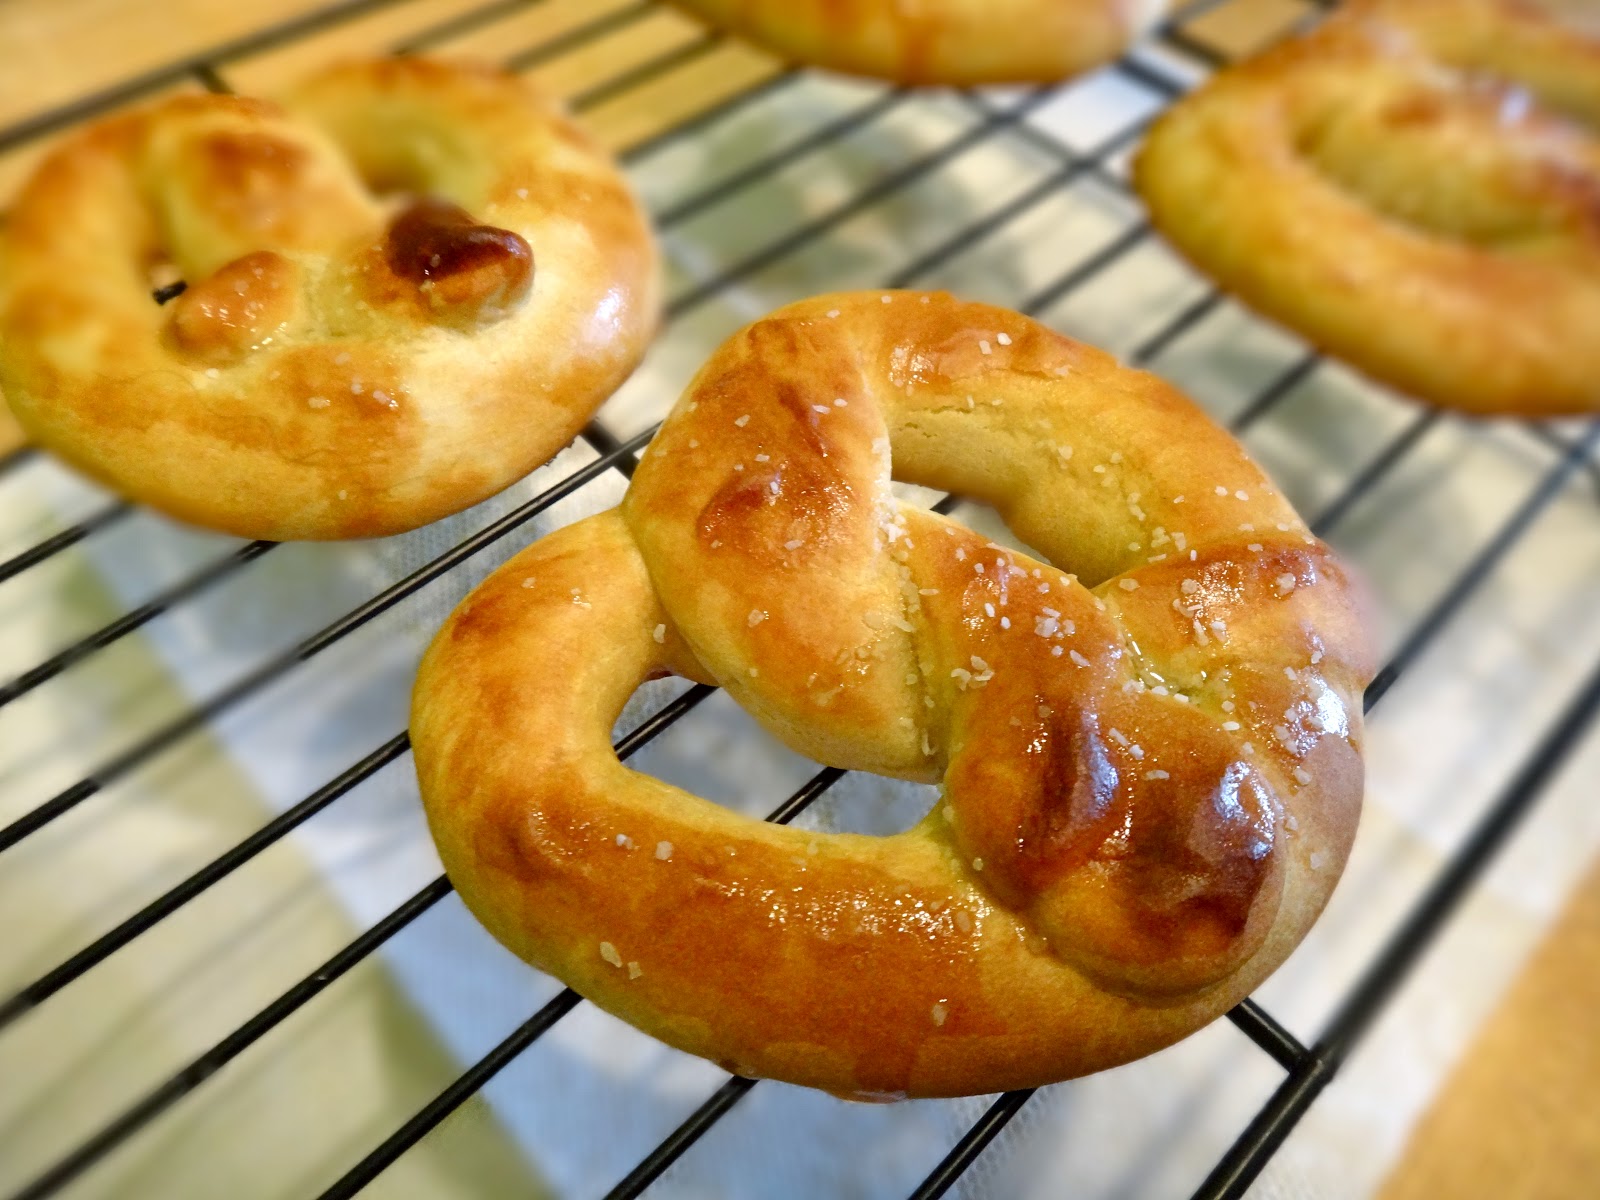
Whenever I go to a mall, an Auntie Annie's soft pretzel is always hard to resist! However, since I have been in college, I rarely go to a mall, especially since I don't have much time or money for it. This can be problematic, because then I go through soft pretzel withdrawals (even my boyfriend experienced it, too). When I was younger, I remember my parents making soft pretzel dough in our bread machine. Us kids got to mold them into what looked nothing like pretzels but they would taste like darn good ones! This got me thinking, why not make soft pretzels at home like my parents did for us! Luckily, I was able to find a recipe that didn't call for a bread machine or bread hook attachment for a stand mixer (since I don't have any of these fancy kitchen gadgets). It is a simple and tasty recipe! Oh, and did I mention fun? My boyfriend and I made them together and it was a fun time, especially when we tried to see who could make the best looking pretzel (mine won, of course!).
Simple Soft Pretzels
Ingredients3 3/4 c. flour
1 1/2 tsp. table salt
1 tsp. vegetable oil
1 tsp. melted butter
3/4 c. plus 1 Tbsp. powdered sugar
1 Tbsp. plus 1/2 tsp. (or one packet) active dry yeast
1 1/4 c. plus 2 Tbsp. warm water
To create the signature brown outside:
2 c. warm water
2 Tbsp. baking soda
Instructions
1. Place yeast in a mixing bowl with the warm water. Add in oil and stir.
2. In a separate bowl, combine powdered sugar, butter and flour. Add in the yeast mixture and stir with a wooden spoon.
3. Add salt and mix.
4. Sprinkle a clean surface and knead the dough for about 10 minutes.
5. Cover dough ball with a light layer of flour and place in a lightly floured bowl. Cover with plastic wrap and let the dough double in size. This will take about 2 to 3 hours.
6. Preheat oven to 425 degrees and clear a large, clean work surface to shape the pretzels.
7. Take the dough in sections (about 8, depending on desired size), roll out and make into pretzel shapes.
8. Warm up 2 cups of water and add 2 Tbsp. baking soda, mix. Dip each pretzel into the mixture and place on parchment paper that is on a cookie sheet.
9. Place in oven for about 10 minutes or until the pretzels are brown.
10. Brush warm pretzels with butter and sprinkle with kosher salt, if desired. Place on a cooling rack.
11. Enjoy with your favorite dipping sauces or plain!
Tuesday, February 7, 2012
Sesame Whole Wheat Soft Pretzels
I am trying to be a more adventurous baker and cook and try making new things. I came across this recipe for sesame whole wheat soft pretzels in my healthy cookbook Comfort Food Fix by Ellie Krieger. It didn't seem overly difficult, and since I've been a little intimidated by yeast I figured this would fall under the adventurous category. All I had to do was wait for a weekend when I went to my parent's house to do laundry (and visit them of course, the perks of going to college 20 minutes from home) so that I could use my Mom's stand mixer as the recipe calls for the use of the dough hook. I'm sure you could easily make these without the stand mixer too, just by kneading the dough a bunch.
They turned out quite delicious if I do say so myself. They're especially good warm, so if they aren't fresh I suggest heating them up in the microwave for a few seconds before eating. My choice of dip was spicy mustard, so yummy!
Yield: 18 pretzels
Ingredients
- Nonstick cooking spray
- 1 packet (2 1/4 teaspoons) instant yeast
- 3 tablespoons honey
- 1 1/2 cups warm water
- 2 1/4 cups whole wheat flour
- 2 1/2 cups all purpose flour
- 2 teaspoons salt
- 2 tablespoons canola oil
- 1 tablespoon unsalted butter, melted
- 1 large egg
- 1 teaspoon water
- 3 tablespoons sesame seeds
- 1 1/2 teaspoons coarse salt
Directions
- Preheat oven to 425 degrees and prepare two baking sheets with cooking spray.
- Using the bowl of the stand mixer, use a spoon and stir together yeast, warm water, and honey. Once all the yeast is dissolved let sit for about 5 to 6 minutes, once the mixture begins to foam.
- While the yeast mixture is setting, take a different large bowl and mix together the all purpose flour, whole wheat flour, and salt.
- When the yeast mixture is ready, add flour mixture, oil, and butter and mix on low speed in the stand mixer with the paddle attachment. After about 10 to 15 seconds the dough will begin to form. Switch to the dough hook.
- On a low to medium speed, continue to mix dough for 2 to 3 minutes. Dough should be smooth but still pliable.
- Will the dough is mixing, beat together egg and water in a small bowl. Also mix sesame seeds and coarse salt on a small plate. Set aside.
- Remove dough from bowl and divide into 6 equal parts (each will be about 6 ounces).
- Divide each of those parts into 3 equal sections (each will be about 2 ounces) and form into balls.
- Roll out each ball so it is about 14 inches long and twist into a pretzel shape. (I found it easiest when rolling the dough out to start with both hands in the middle and move outward in opposite directions are the same time so dough was about the same thickness throughout.)
- Generously brush egg mixture onto pretzel and dip in sesame seeds and salt. Place on baking sheet.
- Bake for 18 to 20 minutes, or until a golden crust is formed. Enjoy with your favorite dipping sauce!
Recipe courtesy of Comfort Food Fix by Ellie Krieger
Saturday, January 21, 2012
Roasted Tomatillo-Serrano Salsa
My love affair with Rick Bayless continues! I made this to go along with homemade quesadillas, yummy. You can find everything in a regular grocery store and the process is very simple. In total, thirty minutes are spent actively cooking.
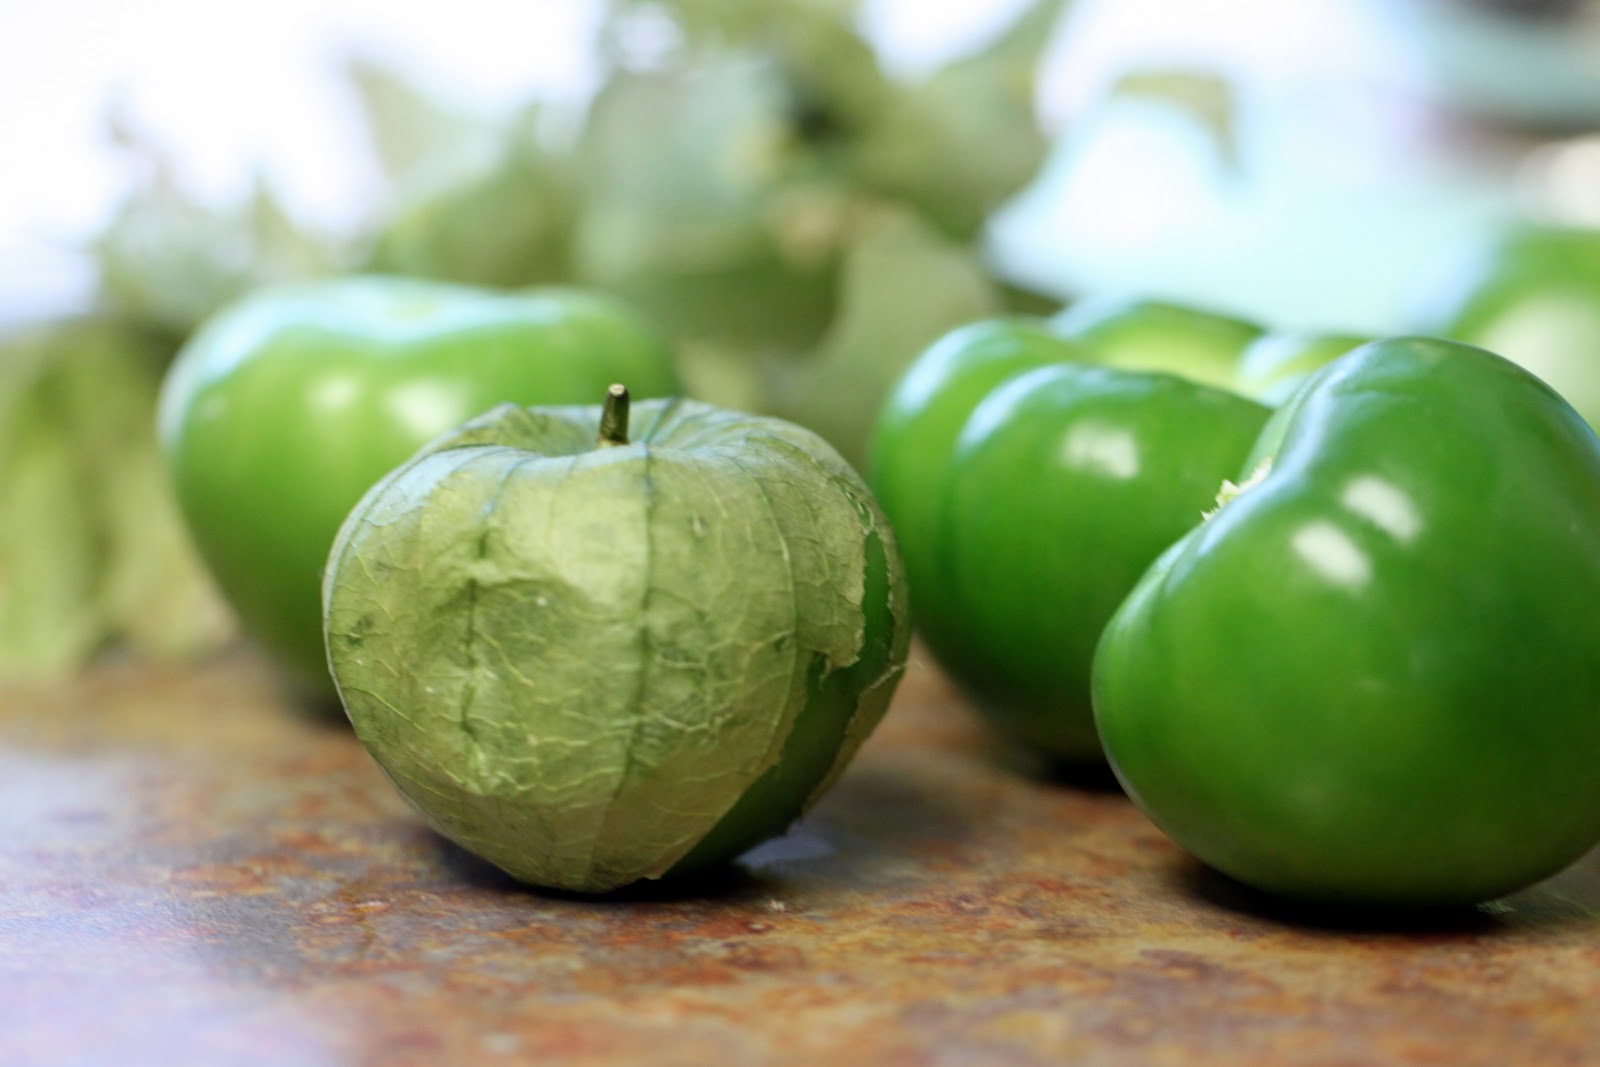
Tomatillos are a pale yellow to green fruit, covered in a papery lantern like husk. They are not green tomatoes though. Tomatillos are more tangy and citrusy than a green tomato. Make sure to pick ones that have grown fully into their husk. When you peel off the husk, rinse the sticky coating off that can sometime make them hard to peel.
The recpie asks you to rinse the chopped onion under cold water. This may seem silly, but is really worth it. When you give the chopped onions a rinse, the taste of onion does not overpower everything else like it sometimes can. I would suggest using this trick whenever you make salsa or guacamole. This salsa is also used in an amazing Tomatillo-Green Guacamole, recipe to come in the future!
Recipe courtesy of Rick Bayless
Ingredients:
1 pound (10-12 medium) tomatillos, husked and rinsed
1 to 3 fresh serrano chiles to taste
2 large garlic cloves, unpeeled
1 small white onion, finely chopped
1/4 cup roughly chopped cilantro
Salt, about 1 teaspoon
Sugar, about 1 scant teaspoon (if tomatillos are too acidic)
Instructions:
The recpie asks you to rinse the chopped onion under cold water. This may seem silly, but is really worth it. When you give the chopped onions a rinse, the taste of onion does not overpower everything else like it sometimes can. I would suggest using this trick whenever you make salsa or guacamole. This salsa is also used in an amazing Tomatillo-Green Guacamole, recipe to come in the future!
Recipe courtesy of Rick Bayless
Ingredients:
1 pound (10-12 medium) tomatillos, husked and rinsed
1 to 3 fresh serrano chiles to taste
2 large garlic cloves, unpeeled
1 small white onion, finely chopped
1/4 cup roughly chopped cilantro
Salt, about 1 teaspoon
Sugar, about 1 scant teaspoon (if tomatillos are too acidic)
Instructions:
- Turn broiler to high. Place tomatillos on a baking sheet and place 4 inches below a very hot broiler. When the tomatillos blister, blacken and soften on one side, about 5 minutes, turn them over and roast the other side. Cool completely. Roast the chiles and garlic in a ungreased skillet over medium heat, turning occasionally, until blackened in spots and soft, 5 to 10 minutes for the chiles, about 15 minutes for the garlic. Cool, then pull the stems from the chiles and peel the garlic
- In a food processor or blender, add the roasted tomatillos, garlic and chiles (I used one and a half), pulsing until everything is reduced to a coarse puree. Scrape the salsa into a serving bowl, adding a 1/4 cup of water if it is too thick. You can complete all of these steps up to 2 days ahead of time.
- Right before you are ready to serve, scoop the onion into a strainer, rinse under cold water and shake off any excess water. Add the onion and cilantro to the salsa, seasoning to taste with salt and sugar.
Monday, January 16, 2012
Cinnamon Roasted Almonds
One day (like many days) I was browsing random food websites and I started coming across homemade cinnamon roasted almond recipes. I instantly thought of my dad. He loves them! Conveniently, Christmas was coming up and it would be a perfect gift for him. Especially because this year I got my parents cutting boards and oven mitts (both of which were on their list), and I feel both were a little on the girly side. Don't get me wrong though, my dad cooks, and he cooks really well! I'll have to blog his bread pork tenderloin sometime in the future.
Cinnamon Roasted Almonds
adapted from Instructables
Ingredients
1 lb raw almonds (about 3 1/2 cups)
1 egg white
1 tsp. vanilla extract
1/2 c. brown sugar, packed
1/2 c. white sugar
1/2 tsp. salt
1 tsp. cinnamon
3 Tbsp. butter
Instructions
1. Preheat oven to 250 degrees
2. Separate egg white from yoke and put in bowl. Melt butter and add to the same bowl. Add vanilla extract to the bowl as well
3. Whisk mixture with fork
4. Add the almonds. Toss until all the almonds are coated.
5. In a small bowl, add the brown sugar, white sugar, salt, and cinnamon and mix until well blended.
Cinnamon Roasted Almonds
adapted from Instructables
Ingredients
1 lb raw almonds (about 3 1/2 cups)
1 egg white
1 tsp. vanilla extract
1/2 c. brown sugar, packed
1/2 c. white sugar
1/2 tsp. salt
1 tsp. cinnamon
3 Tbsp. butter
Instructions
1. Preheat oven to 250 degrees
2. Separate egg white from yoke and put in bowl. Melt butter and add to the same bowl. Add vanilla extract to the bowl as well
3. Whisk mixture with fork
4. Add the almonds. Toss until all the almonds are coated.
5. In a small bowl, add the brown sugar, white sugar, salt, and cinnamon and mix until well blended.
6. Pour the cinnamon/sugar mixture over the almonds. Stir well until the almonds are fully and evenly coated.
7. Lightly grease a cookie with oil, butter, or Pam. Spread the almonds evenly and shake gently to create one layer.
8. Place the cookie sheet in the oven for a total of 1 hour.
9. Stir the almonds every 20 minutes (you'll do this twice) with a large spatula. Do not worry if the coating looks melty or is coming off the almonds. The coating will harden and the stirring will help re-coat them.
10. Let cool on stovetop. Store in an airtight container.
11. Enjoy!
Subscribe to:
Posts (Atom)

.jpg)

.jpg)


.jpg)