Showing posts with label pork. Show all posts

Wednesday, January 28, 2015

Apple Cider Braised Pork with Apples, Fennel and Potatoes

Does anyone else have the winter blues? This pork is the perfect fix.


The winter hasn't even been that bad here in Wisconsin. No blizzards. Only a few days with below zero wind chills. I'm just so excited for warmer weather but mostly for school to be over.

Braising is the best. This could probably be done in a slow cooker, with less liquid. This recipe was also intended for the Fall, when there was a plethora of apples, but it works for winter too. Am I right? I am. Thanks for agreeing.

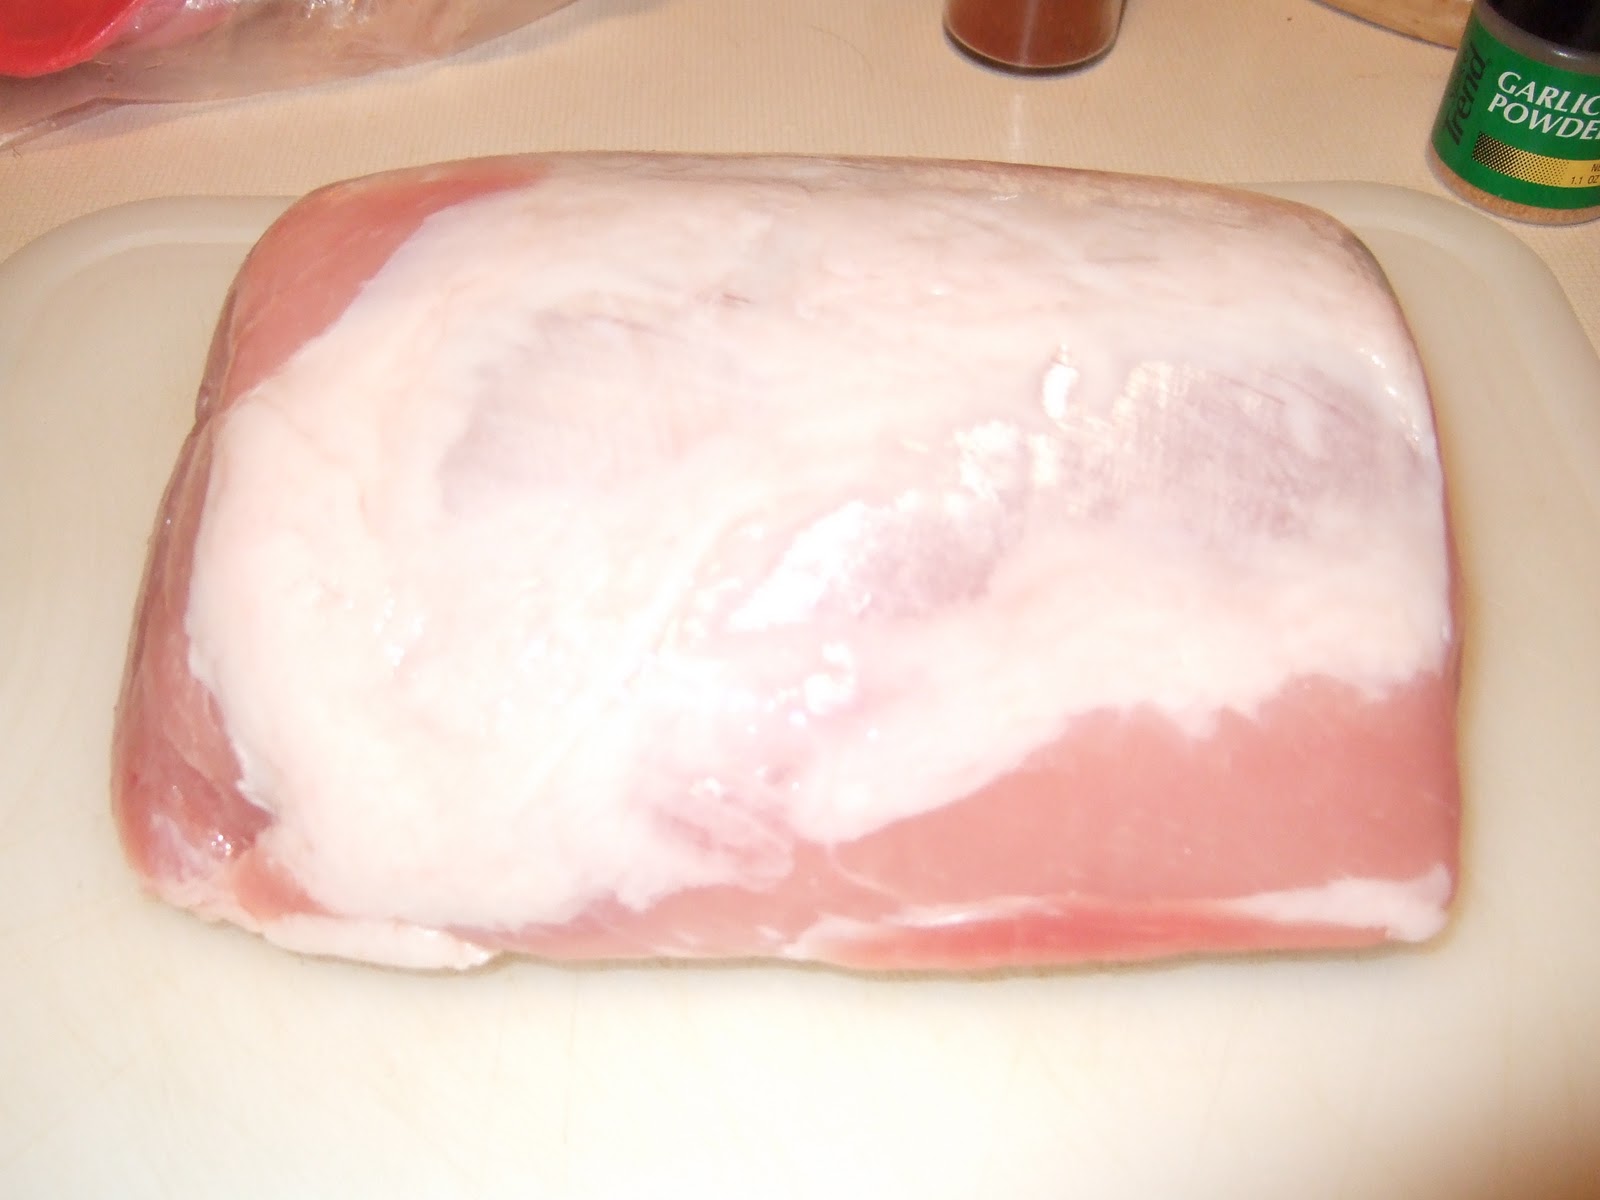
When braising, the initial steps are key for a delicious finished product. Searing the meat, getting a nice caramelized exterior is key for flavor.

Sauteing the mirepoix (fancy for carrots, onions and celery etc.) in the drippings. You want a caramel-y brown color without scorching anything. Balance is key.


Step three is deglaze the pan, with brandy in this case, getting all of those caramelized brown bits off the bottom of the pan. Flavor city. Little flavor bombs. Tiny, yet powerful! Be sure to scrap the bottom of the pan.

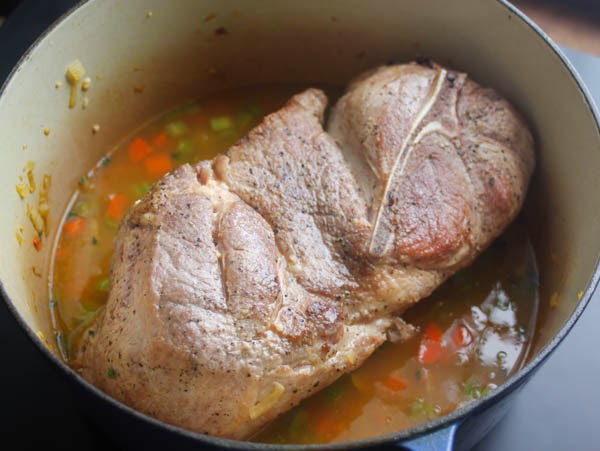
Then you add your braising liquid. Enough to go about 1/3 to 1/2 way up your pork butt. We aren't boiling our pork. We are braising. Give the liquid a hand, bringing it to a simmer on the stove and then put it in the oven.

Forget about it for awhile. Simple.

In the last 45 minutes, add your vegetable. Take it to the next level. Fennel and apple add some flavor to the broth, making a nice aromatic of sorts.

Potatoes cooked in with all that flavorful sauce are perfect for serving.

One-pot meal!


This makes a ton of meat. Probably more meat than potato-veg mash. I ended up using leftover meat for tacos, tossing it in some store bought sauce and making a soup.

I would have been eating the same thing twice a day for at least a week otherwise. I need more variety in my meals.
This is a really impressive meal, with minimal effort. Just a little bit of preparation and planning. Braising is really easy, with a crazy flavor impact for such little labor.

Pork not your thing? Chicken could work really well in here too. Or turkey!


I mashed all the veg together to make a little bed for the meat. Not necessary, but that is my preferred vessel for meat of this sort.

The apple cider adds a caramel-y, tangy, sweetness to the whole dish and the fennel and lemon zest add brightness and a little something unexpected. It isn't too sweet though.

Finishing the whole thing off with a little cider vinegar adds brightness, cutting the sweetness. It really makes a difference. Rounds the whole dish out. Promise.

Cheers,
April

Serves 5 to 6 

Ingredients

4 to 5 lb. pork butt
3 Tbs. vegetable oil
Kosher salt
ground black pepper
2 celery stalks, diced
2 carrots, peeled and diced
1 medium onion diced
2 whole dried bay leaves
1 Tbs. chopped fresh thyme
1 Tbs. finely chopped garlic
Zest of half a lemon, wide strips (3-4 strips)
1/4 cup brandy, apple brandy if you have it
1-1/2 cup lower-salt chicken broth
1-1/2 cup apple cider 
1 medium fennel bulb, diced
1 apple, peeled and diced
6 to 8 small red potatoes
1 to 2 tsp. cider vinegar
Instructions
Position a rack in the center of the oven and heat the oven to 325°F. In an 8-quart Dutch oven, heat 2 Tbs. of the oil over medium heat. Season the pork with salt and pepper. Add pork to the pot, and cook, turning with tongs, until nicely browned on all sides, 3 to 4 minutes per side. Pour off all but a thin layer of fat from the pan.

Add the remaining 1 Tbs. oil, carrots, celery and onions to the pan. Season with 1/2 tsp. salt. Cook, stirring and scraping up any browned bits on the bottom of the pan, until the aromatics are soft and lightly browned, 6 to 8 minutes. Add bay leaves, lemon zest, thyme, and garlic, and cook, stirring, until well distributed and fragrant, about 1 minute.

Pour the brandy into the pot and cook, stirring to scrape up any browned bits on the bottom of the pot, until the liquid is reduced to about 2 Tbs., about 1 minute.

Transfer the pork (and any juices that have accumulated) back into the pot. Pour the chicken broth and apple cider over the ribs.

Bring the liquid to a simmer, cover, and put the pot in the oven. Cook, turning the pork with tongs after about an hour, total cooking times is about 2 to 3 hours. In the last 45 minutes of cooking, add the apples, fennel and potatoes, until the potatoes are fork tender and the meat is falling off the bone. (The meat may fall off most of the bone about midway through cooking; this does not mean that the ribs are fully tender.)

Transfer the ribs to a serving platter or dish. Let the sauce and solids sit in the pot for a few minutes to cool and with a shallow spoon, skim off as much of the fat as possible from the surface. Season the sauce to taste with salt and pepper, and add the vinegar.

Optional: spoon out the vegetables, mashing them, making a chunky mashed potato mixture. Then reduce the sauce for 10 to 15 minutes, making a sort of gravy. Serve the meat over the potatoes, drizzled with the reduced sauce.

Thursday, September 25, 2014

JalapeƱo Beer Brat Macaroni and Cheese


To wrap up out football theme, I have some macaroni and cheese with all the quintessential Wisconsin fixings mixed into it. 


I made this at my boyfriend’s house. Big mistake. The most useful thing he had was a grill. Real bachelor kitchen. I should have known. It works for him apparently but it almost caused me a nervous breakdown. Now by no means do I have a ton of fancy pots and pans or equipment, but I do have some. Most of it is hand me downs. I might have overreacted to not having the things I’m used to cooking with. That should not be a surprise to anyone though. Cooking in a new place is stressful, but totally doable and you don’t need anything fancy to make macaroni and cheese from scratch.
The stuff in the blue box or Annie’s macaroni and cheese is wonderful, but you just can’t beat homemade macaroni and cheese. I think it is intimidating for most people, but even a sparsely equipped bachelor pad kitchen has the equipment to make it: medium sized saucepan, large pot to boil noodles and a baking dish.


I grilled the brats, but you could totally throw them in the oven or on the stove top, in a pan. If you grill the brats, don’t be like me and spend 6 minutes futzing around trying to take pictures.  The charcoal grill will get to hot with all that air and then everything will go up in flames and your brats will be split open and be flame cooked in 4 minutes.  Lesson learned.


It is all pretty straightforward. If you have never made a roux (butter and flour), don’t be scared. Keep and eye on it and stir constantly. This is what will thicken your cheese sauce. Once it is a light nutty brown, pour in your beer slowly and then the milk. This avoids clumps. Bring this mixture almost to a boil, which means for me where there are tons of tiny bubbles all around the edge of the pan. Add the cheese. Add the brats and peppers.

You’re going to probably look at this sauce and freak out like I did, thinking it is way to runny and that there is way too much of it. I know there can never be too much cheese, but proportions and balance are key to a solid mac. I know I freaked out, but it came out of the oven perfectly, with just the right amount of spice, which will depend on the heat of your jalapeƱos. 


It was even better the next day for lunch! I didn’t try it but I bet this would work great to make the day before, refrigerate and reheat in the oven at your friend’s house or before your own football party. Make it for any party really, it is delicious and oh-so very Wisconsin. I promise. 

cheers,
April
 
Ingredients:
for topping:
2 1/2 cups panko bread crumbs
2 tablespoons butter, melted
1 cup cheddar cheese, grated
1/4 cup gruyere or fontina cheese, grated
1 jalapeno, grilled, seeded and chopped

for macaroni & cheese:
1 lb. sharp cheddar cheese, grated
5 ounce Gruyere cheese, grated

1 jalapenos, grilled, seeded, chopped
1 poblano pepper, grilled, seeded, sliced into quarter inch pieces
4 brats, grilled (I used D&G Sausage Shop bacon and jalapeno brats)
1 lb pasta (such as cavatapi, fusulli or macaroni) cooked to al dente
6 tablespoons unsalted butter
6 tablespoons all-purpose flour
3/4 cup amber or pilsner beer
1 cup heavy cream
2 1/2 cups whole milk

Instructions:
grilling:
Start by heating your grill to medium heat. Place brats, two jalapenos and poblano pepper on the grill. Cook the peppers for 2 to 5 minutes, or until lightly charred. Cook the brats, turning, for 6 to 8 minutes. 

Topping:
Preheat oven to 400F, with rack in middle. Combine the butter, panko bread crumbs, cheddar, Gruyere and one jalapeno pepper, in a bowl, until well combined. Set aside for later.

Macaroni and Sauce
Bring a large pot of salted water to a boil. Meanwhile, melt the butter in a heavy medium saucepan over medium-low heat. Once butter has melted whisk in the flour, continue whisking for 3 minutes, until the mixture is a light golden color and thick, then slowly whisk in the beer and milk.

Increase the heat to medium and bring sauce to a low boil, whisking constantly (this takes about 8 minutes). Reduce heat and simmer for 4 minutes or until sauce has thickened. Stir in cheeses, until smooth. Add in the remaining jalapeno, poblano and brats. Season to taste with salt and pepper.

Cook the pasta in boiling water until al dente, 8 to 10 minutes (a few minutes shy of done). Drain pasta in a colander. Combine the noodles and cheese sauce, until evenly coated. Transfer to a 9 x 12 baking dish, sprinkling topping over the pasta evenly.

Bake for 20-25 minutes, until topping is golden.

Wednesday, August 6, 2014

Warm Tomato, Arugula and Bacon Panzanella Salad

Its tomato season just about, before you know it tomatoes will be coming out of your ears. Don't worry though because this month on the blog its all about tomatoes!


This is a really simple recipe to throw together. You could even cut it down and make it for one person because the leftovers don't keep. Soggy bread problems, ya know? Speaking of bread problems, this is the perfect salad for day old bread. You want the bread to be a bit dried out so it takes its time absorbing the dressing.

This recipe can really be adjusted to your own tastes as well. Add as much or as little arugula or basil as you want. Play around with it a little bit. Trust your instincts! Add more tomatoes if you want. It is your salad after all. This is just a good foundation to build off of.


I love me some roasted tomatoes. They get all jammy and soft. Delicious. This recipe creates that feeling without having to turn the oven on. The tomatoes get fried up quickly in some bacon fat and they leave behind all their juices in the pan that will make up the bacon dressing eventually.

Surprisingly the bacon isn't over powering as you might expect. It gives just the right amount of salty bacon flavor and crunchy topping.The vinegar and mustard add nice balance to the dressing. You could easily use green onions or shallots in replace of the leeks. I just happened to have bought leeks the day before at the farmers market. 


Overall this is a really easy and beautiful salad to throw together for friends. The crispy bread with the juicy tomatoes and rich bacon and spicy arugula go so well together. Try adding some mint for a little extra freshness with the basil. More tomato recipes to come this month! Enjoy!

April


Ingredients:
1 french baguette or french round, cut into 1 inch cubes 
6 slices smoke bacon (3 ounces), cut into 1/4 inch pieces
1 1/2 pints tomatoes, halved
1 leek, sliced

1 tablespoon lemon juice
1 1/2 tablespoons balsamic vinegar
3 1/2 tablespoons olive oil
1 tablespoon Dijon mustard
Salt, to taste
Pepper, to taste

2 handfuls of arugula
Handful of basil

Buratta, mozzarella or goat cheese to serve

Instructions:
  1. Preheat the oven to 300 degrees F. Spread bread in one even layer on a rimmed baking sheet and toast bread in oven for 15 minutes or until the bread is crispy, but not browned. Meanwhile, fry bacon over medium heat, until crispy. Using a slotted spoon, remove bacon from pan, reserving 1 tablespoon of bacon grease. Add the halved tomatoes, cut side down to the pan, cooking over medium heat for 3-5 minutes or until softened and slightly caramelized. Remove the tomatoes, using a slotted spoon again, and set aside. 
  2. Over medium heat, add a tablespoon of oil to the pan and saute the leeks until softened and lightly golden, about 5-7 minutes. Turn off the heat and add the lemon juice, balsamic vinegar, remaining olive oil and dijon mustard. Whisk it all to combine (it will be thick and clumpy, that is okay). Season to taste with salt and pepper. 
  3. In a large bowl, add half the bread and top with half the tomatoes, arugula, basil and dressing. On top of that add the remaining bread and vegetables and dressing and toss to combine. Serve immediately and garnish with some bacon, buratta (or cheese of your choice) and a drizzle of balsamic vinegar.


Thursday, June 21, 2012

Maple Bacon Biscuits with Maple Glaze


Swim lessons just started up and I've been a bit busy and trying to get into a new routine. You know how that goes, right? It is only a small change and doesn't really take up much time, but it seems to throw off your whole game. Maybe I am just in a bit of a slump. Work has at least forced me into a working out routine. Riding your bike to work plus some for the win! Now its time to kick the slump elsewhere, starting with maple bacon biscuits and a wonderful message from fellow blogger Frances!


Frances (aka Emily) and Kelsey are in Spain right now. Totally jealous. In case you didn't know, they also contribute to the blog along with Brittany and I. The only difference is Britt and I are here, in good old Wisconsin. We make our own fun that  competes with their European adventures. It is fun to pretend we do anyways.


I got the best message from Frances this morning. A real fixer for the slump I am in. Her host mom wanted to check out the blog, mostly the pictures. Then Frances writes down the recipe in Spanish for her, if the picture looks yummy. No big deal, she thought my hummus looked tasty enough to write down. It pretty much made my day. Remember that people, little things (especially food orientated things) make my day. Now onto more important things, maple bacon biscuits.


These biscuits are like little nuggets of gold. Be sure to use a good quality real maple syrup, not Mrs. Butterworth. They are best enjoyed warm out of the oven. They are still good if made the night before or at room temperature, just not as good. Their sweet, salty, bacony goodness makes up for their lack of warmth, if you choose to make them ahead of time. Try sandwiching a fried egg between these biscuits. I bet it would be out of this world delicious. I made these in a food processor because I think it easier. They can be just as easily made without one and are equally good. If you like bacon, you will love these. Give them a try.

xo
April

Adapted from Baking Illustrated
Ingredients:
Biscuits
6-8 slices of bacon
2 cups unbleached all-purpose flour
2 teaspoons baking powder
1/2 teaspoon baking soda
1 teaspoon sugar
8 tablespoons unsalted butter, chilled, cut into 1/4 inch cubes
1/2 cup cold buttermilk
1/4 cup maple syrup
Maple Glaze
1/2 cup powdered sugar
1/4 cup pure maple syrup
1/2 teaspoon vanilla

Instructions:

  1. Preheat the oven to 450F
  2. The bacon can be fried or baked. I prefer the baking method for a more crispy bacon. Preheat the oven to 400F. Arrange the bacon on a parchment lined rimmed baking sheet side by side. Place the bacon in the oven for 10-20 minutes or until crispy. Drain the bacon on paper towels and roughly chop into 1/2 inch pieces.
  3. If you baked the bacon, increase the oven temperature to 450F. Combine the flour, baking powder, baking soda, sugar, and salt in a large bowl or food processor. Whisk together or pulse six times.
  4. If making by hand, add the cubed butter, working quickly to break it into bits, to resemble small peas. If using a food processor, evenly distribute the butter into the work bowl, pulsing 12 times, for 1 second.
  5. If making by hand, add the buttermilk, bacon and maple syrup, stirring until it just starts to form a ball. If using a food processor, add the buttermilk, bacon and maple syrup, pulsing 8 times or until the dough just comes together.
  6. Transfer the dough to a lightly floured surface and quickly form a rough ball. Be careful not to over mix. Using a knife, dived the dough into quarters and then cut each quarter into thirds. Quickly shape each piece into a rough ball and place on a parchment lined cookie sheet. 
  7. Bake until the biscuit tops are light brown, 10 to 12 minutes.
  8. For the glaze, mix all the ingredients together, whisking to combine. Serve the biscuits warm with glaze poured over the tops.


Wednesday, June 6, 2012

Peanut Butter Bacon Chocolate Chip Cookies

It is doubtful that anyone cares that we have had a onslaught of cookie and baked good posts as of late. Maybe it is the weather? The temperatures have been cool and pleasant, making it perfect for turning on the oven. Actually the weather has little influence on my turning the oven or not. It actually may get  more use during the summer.


If you feel like you can't do or have something, it just makes you want to do it more. We all know this feeling right? Good thing there is air conditioning for when I realize what an awful idea it was to bake. Air conditioning is up there on my favorite inventions ever list. Honestly, I don't know what I would do with out.


Enough about the downfalls of baking in the heat of summer. These cookies are awesome. I went to visit my grandma this weekend and made these for her. She LOVES bacon, peanut butter and chocolate. After I said "peanut butter, bacon, chocolate chip cookies", she immediately scurried across the kitchen and hid them in a cupboard from grandpa.

I would also like to think that these cookies are the perfect man bait. Most men apparently don't like sweets, but can they really stand by that when bacon is involved? Doubtful. Really they shouldn't care at all what is in the cookie. They should just be happy that a pretty lady cares enough to make them cookies.


Honestly anyone who loves bacon should think these cookies are the best. The bacon can be omitted, if you must. Although the bacon flavor was not overwhelming. It was more like pleasant background music. I was surprised by how moist this cookie turned out too. No flour had me worried, I am skeptical of gluten free. The very best part, besides being the best peanut butter cookies ever, they are the easiest/simplest cookies ever. Almost everything should be in your pantry, which means you better get working!

xo
April

Ingredients:
8 slices of bacon
1 cup all natural peanut butter
1 cup granulated sugar, plus some to roll the dough in
2 teaspoons molasses
1 large egg
1 teaspoon baking soda
1/4 cup coarsely chopped peanuts
1/4 cup chocolate chips

Instructions:
  1. Fry the bacon in a pan over medium-high heat, until cooked through and crisp. Remove the bacon from the pan onto paper towel to drain and cool. When cool enough to handle, coarsely chop the bacon and set aside.
  2. Line a cookie sheet with parchment paper and set aside.
  3. In a bowl of a stand mixer fitted with a paddle attachment, cream together the peanut butter, sugar and molasses until thoroughly combined, about 3-5 minutes. Add the egg and baking soda and mix on medium speed for another 2 minutes.
  4. Preheat the oven to 350F.
  5. With the mixer on low speed, add the chopped peanuts, bacon and chocolate chips to the mixer, until just combined. Roll the dough into large walnut-sized balls and roll in granulated sugar. Place on a lined cookie sheet, and use a fork to make the distinctive peanut butter cookie crisscross pattern. If the dough sticks to the fork, dip it in sugar before pressing into the cookies. The dough will be a little crumbly, just press together with your fingers as necessary. 
  6. Bake for 10 minutes, until lightly browned. Cool on the baking sheet for 5 minutes before transferring to a wire rack to cool completely. Cookies will be crumbly and delicious. Cookies will last up to 5 days in an airtight container in the refrigerator.

Wednesday, December 28, 2011

Roasted Salt and Spice Packed Pork

I made this for Christmas dinner this year and it was a hit! It is definitely a dish for a special occasion. The salt and spice crust locks in moisture and adds more flavor than you may think. If you make this for company, make sure they are present before you remove the crust. It has such a fun presentation it would be a shame for people not to see it. 
The recipe calls for freshly ground spices. I have a small coffee grinder that I use only for spices. If you don't have a spice/coffee grinder, I think it would be okay to use already ground spices. The advantage to using freshly ground spices is that they have a stronger flavor. It is important to use coarse kosher salt because the salt grains are much larger than table salt.

I used a large oven safe pan instead of a roasting pan. I like using the a oven safe pan because in my mind it fits better over the burner while you are searing it. It makes no difference though. Before you settle on a pan, make sure the pork will fit. The recipe is a lot easier than it may seem. The total active cooking time is about 30 minutes and the rest of the time it is in the oven. Make sure to just have fun with it! You will have a lot of intrigued guests, when you pull it out of the oven and take the crust off. The presentation and unveiling of the meal is half the fun sometimes!
Recipe courtesy of Bon Appetit 
Ingredients:
1 5-pound bone-in pork rib roast, chine bone removed
1 teaspoon plus 8 cups coarse kosher salt (3 3/4 to 4 pounds)
1 teaspoon plus 2/3 cups freshly ground black pepper (3 1/2 to 4 ounces)
1/3 cup freshly ground fennel seeds (1 to 1 1/4 ounces)
2 tablespoons olive oil
1/3 cup freshly ground whole allspice (1 to 1 1/4 ounces)
1/3 cup freshly ground juniper berries (about 1 ounce)
1 cup water
Instructions:
  1. Preheat oven to 350F, with a rack positioned in the middle of the oven.
  2. Rub 1 teaspoon salt, pepper and a1/3 cup fennel all over the pork. Heat olive oil in a large heavy oven proof pan OR roasting pan over medium-high heat. It is very important the oil is heated first. Place the pork, fat side down, in the pan. Cook until browned on all sides and ends, using tongs to hold it upright if necessary. Transfer to a baking sheet and let cool for 20 minutes.
  3. Combine 8 cups salt, 2/3 cup pepper, allspice and juniper, in the same pan you seared the pork. Stir to combine. Add one cup water and stir to moisten. Spread 3/4 of the mixture to 1 side of the pan, spreading the remainder into a strip as a base for the pork to rest on. Place the pork into the pan, bone side down, on the salt base. Pack the remaining salt over the pork, enclosing entirely.
  4. Roast pork in salt crust until an instant read thermometer inserted straight down into pork from the top center reads 165F, about 2 1/2 hours.
  5. Transfer pan to a work surface. Let pork rest 10 to 20 minutes. Remove all salt from around pork, brushing an remaining salt off. Transfer to a cutting board and carve.

Friday, November 25, 2011

Root beer Pulled Pork

I love this recipe! It is super delicious but super easy! The first time I ate root beer pulled pork, my boyfriend made it for me on my birthday. He had never had it before but was confident it would taste great. Since then, it has been one of our favorite dinners to have together. 

I made this one week day when we were both craving it. It is super easy to put together in the morning and let it cook all day as you're in class or working (or in my case, spending the whole day writing and perfecting a paper). Plus, it always leaves us left overs to enjoy later in the week. 

Root beer Pulled Pork

Ingredients
1 pork tenderloin (approximately 2 pounds)
2 cans of root beer (or enough to submerge the tenderloin)
1 bottle of Sweet Baby Ray's Barbecue sauce

Directions
1. Pour root beer over the pork tenderloin in a slow cooker (make sure the tenderloin is not frozen)
2. Cook on low for approximately 7 to 8 hours
3. Drain the root beer and shred the pork with two forks
4. Add the Sweet Baby Ray's barbecue sauce and cook on low until warm (about 15 minutes)
5. Enjoy!

Tuesday, October 18, 2011

Crockpot Barbecue Beer Pulled Pork

One of my favorite things about going to graduation parties when I was in high school was always the food.  Besides the cake (shout out to Craig's Cake Shop in Verona, WI!), you could almost always count on there to be some sort of hot sandwich served, and most likely that sandwich was going to be pulled pork.  I usually got my fair share of pulled pork to last until the next graduation party season, but now that I'm in college, my pulled pork needs are just not being met!

So, I decided I needed to take matters into my own hands.  I've always heard that it was pretty easy to make, and seeing as it was a Badger football Saturday and roommate Tonia wanted everyone to get up early to tailgate before the 11am game, I thought it would be a pretty good occasion to try out my luck.


Ingredients
  • 3 lbs pork roast (mine was actually 3.3 lbs)
  • 1 tablespoon onion powder
  • 1 tablespoon paprika
  • 1 teaspoon garlic powder
  • 1/2 teaspoon salt
  • 1/2 teaspoon pepper
  • 8 ounces beer
  • 32 ounces barbecue sauce

Season both sides of the pork roast with the onion powder, paprika, garlic powder, salt, and pepper.  I did not measure them out exactly but instead approximated.


Add the pork roast, beer, and most of the barbecue sauce to the crockpot.  I used Bud Light but would maybe suggest using a darker beer to add a little more flavor.  


Set the crockpot to cook on low.  It will need to cook for about 8 hours.  When I got back from the Badger game (victory over Indiana!) the pork had been cooking for about 6 hours and I found that it had floated to the top of the sauce, so I flipped it over to make sure both sides got thoroughly cooked.


A couple hours later I came back to get ready to shred the pork.  Mine actually ended up cooking for closer to 9 hours.


Pull the pork out of the crockpot and set it on a cutting board or pan.  Then take two forks and start pulling the pork apart and shredding it.


After the pork is shredded, put it back in the crockpot and stir in with the sauce.  Add more barbecue sauce as desired to taste.


Serve on a bun and enjoy!  


I shared my pulled pork with three of my roommates and my boyfriend, ate some leftovers the next day for lunch, and still had probably four sandwiches worth that I put in the freezer.

Recipe adapted from this crockpot barbecue beer chicken recipe.


LinkWithin

Related Posts Plugin for WordPress, Blogger...